Collage Barrage

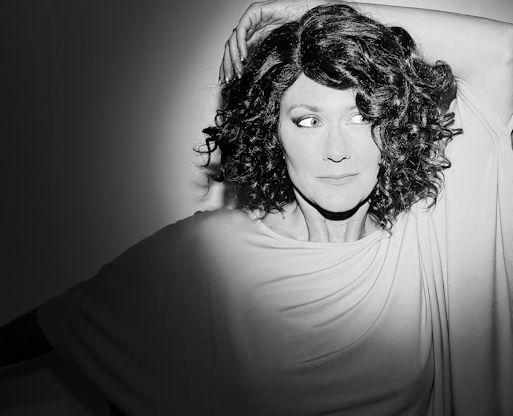
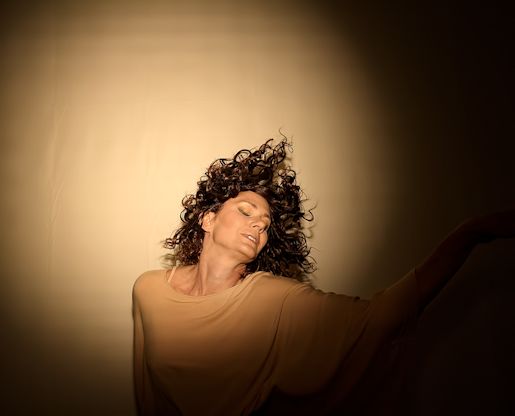
I’ve been writing so many wig review posts I got behind on sharing photos, so let’s catch up! Since I had so many shots to share, I decided to save some space and use the Pixlr collage function to group things together. Here’s the first one:

candy_collage

I shared the photo on the left in my last photography post, but I wasn’t pleased with it. However, Pixlr recently came out with a new set of overlays called ‘candy minimal’ and it’s got some great pastel color washes I love, so I moved this shot over there and played around until I came up with something I liked. Now I really love this shot; I even made it my new lock screen on my phone. Loving all the pretty pinks and blues and yellows those overlays have. I’ve Pixlr’ed some other photos too, but they haven’t come out as good as this one.

Here’s another shot I shared previously that I re-worked a little:

blonde_collage

The skin was way too plastic-looking in the first shot, so I worked to maintain more depth and texture when I edited it a second time. It’s still a little flat, but that’s because of the bright flash; at least I look a bit more human in the new version.

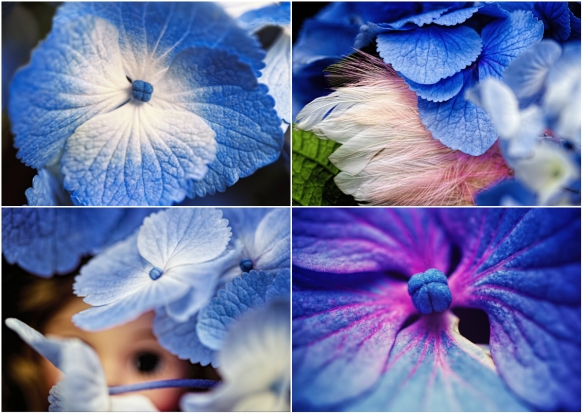
Next up, some macro florals:

floral_collage

Last week I had to stop by the grocery store to pick up some things I forgot to get the day before, and to make the trip less irritating I decided to grab some flowers and photograph them when I got home. They were hydrangeas, and yes, they were originally these colors; I did enhance them but I did not alter the color. For some reason I eventually decided to stick a doll in there; it was my Madame Alexander angel doll, so I used her wings in that top right shot too.I took 500 shots of these flowers, so I would imagine there will be more to come from this set in the future.

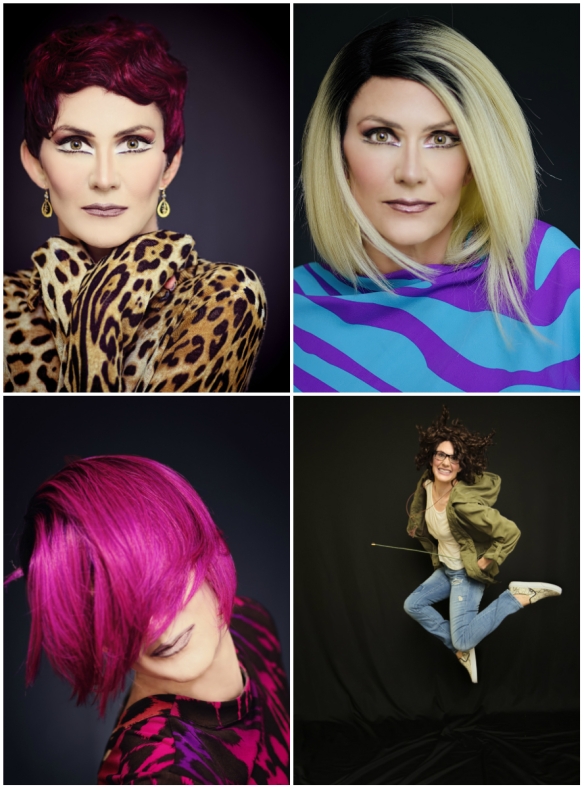
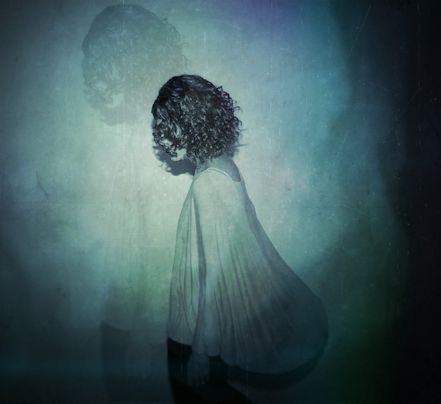
Then, after filming wig videos the other day, I decided to take advantage of the fact that I already had my studio set up and some halfway-decent stage makeup on to take a few portraits in some of the new wigs. One of the wigs I haven’t reviewed yet and I’m not sure I will –  it looks pretty outrageous and the cap is a hot mess, but it’s great for photos. It’s called Stream, it’s by Ellen Wille, and the color is Hot Chocolate Lighted. The other wig in these shots is the Shari by Envy I uploaded to the Wig Videos section a few days ago.

wig_collage

For some reason, I edited all those shots with a lot of greenish and bluish tint; not sure why but it felt like the thing to do at the time.

And last but not least, some random other shots that didn’t fit into any of the previous collages:

misc_collage

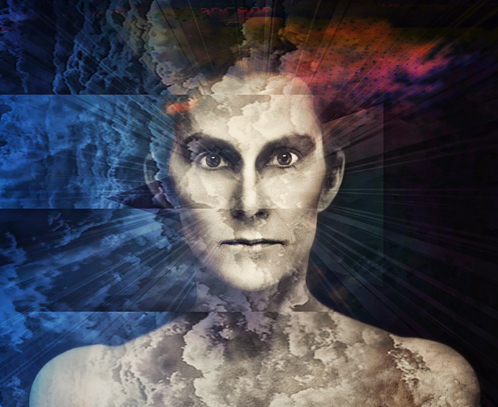
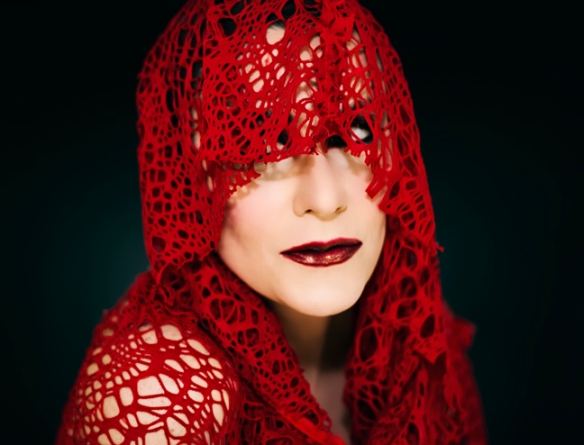
That first shot up top took forever for me to edit; all that fancy eye makeup was done in Photoshop, as well as the nose contouring, so just those two things took me quite awhile. Then I went for an almost cartoon-ish effect, and that also took me time to get exactly like I wanted it. And yes, the day I took all my Stitch Fix photos, I did do some light leaping. My bum knee hurt a bit when I was done, and I definitely cannot leap with the enthusiasm I used to be able to do (but that’s totally my fault for continuing to not exercise like I’m supposed to be doing to strengthen it) but I got a few good ones in before I had to call it a day and limp away.

So many shots in the hopper to edit and play around with; one week into summer and I’ve spent most of it either shooting photos and videos or editing what I just shot. Kinda sad, but lots of fun. More wigs coming this week, including a (gasp) topper, so probably more filming at some point and uploading of new reviews. Getting the old ones uploaded will also continue. That’s right, it’s me with free time, so I’m getting all busy on the blog over here!

And by the way, my beloved Pearl did not win RuPaul’s Drag Race, but the finale was all kinds of awesome and I’m sure all the queens will make loads of money on all the singles, albums, and other various business ventures they embark on after their time on the show. Pearl has actually come out with a perfume called “Flazeda,” and I bought it even though it probably smells like every other perfume on the celeb market and costs too much at $125. Still – FLAZEDA everyone!

Picture Perfect

valentine9a

I haven’t had much to say this week. but perhaps that’s because things are clicking along smoothly. My father-in-law has managed to stay out of the hospital for almost two months now, which is great, and work is humming along without much trouble also. I need to do exercises for my knee, but it appears there’s no serious injury there, which is good (and of course I’ve yet to start the exercises; I have read the instructions though, so that’s a start). I don’t have much to say here but I do want to share some photos I’ve worked on this week, so let’s get started and I’ll try to say a few things that are interesting.

First of all, the photo up top comes courtesy of Pixlr; they sent out a new batch of overlays to members with a lot of geometric/graphic things going on, so I took one of my makeup test shots from my last shoot and worked it over using their program. Not my usual style, but I do like the results, and I am continuing to get a feel for their layer masking so I can utilize it better.

valentine8

I’ve been quite pleased with how many good shots I got during last weekend’s shoot; I’m not sure what I did that generated so many interesting images, but there are a lot I’d like to edit eventually. Perhaps it’s just that I hadn’t done a full shoot in quite a while so it didn’t feel too repetitive, or something with the makeup or lighting that made things work.Whatever it was, I’m loving the results so far, and rather than allow myself to get bored after processing three or four I really want to commit to creating a full set of photos from this shoot. I always feel people will get bored after seeing two or three shots from the same set, but when I think about it, I know loads of people on Flickr who work on photos with the same theme for weeks at a time, and I never get bored of looking at them. In fact, I like the unity it creates, so I want to try that out for myself instead of moving on too quickly. We’ll see if I actually accomplish this or abandon it as soon as something new comes along. I still don’t have a ton of time for shoots right now, so something new might not come along in time to throw me off anyway. Moving on.

valentine7

This is one of my many “happy accident” shots. Something you may not know about me is that I am completely challenged kinesthetically; an instruction as simple as “raise your right hand” actually takes me several seconds to process (you should have seen me getting my knee x-rayed earlier this week, the poor lab tech finally just started grabbing me and placing every body part exactly where she wanted it to go, as if I were a mannequin). This is why you almost never see me in self-portraits where the camera is in any position other than dead-on; even turning the camera into vertical mode screws me up and half my shots end up cut off somehow. Well, in this shot, I’d actually raised the camera up higher than right at face-level, then aimed it down a little, just for something slightly different. And as usual when I try something like this, well, I could not get myself placed properly into the shot. It’s actually a little frustrating how difficult it is for me to figure out where to place myself (hard enough for me to do when the camera is in the usual position, believe it or not) but at this point I am used to my complete inability to navigate my body through space effectively, so I just settle for a lot of off-centered pictures and make the most of it. Even though the intention here was to get my entire face in the shot, I actually like how this turned out, so we’ll all just pretend like I intended it to be framed this way and move on.

valentine10a

This was another makeup test shot; I always find a few I like to process, and I thought I looked very unlike myself in this one, which is why I decided to work with it. It was kinda boring though, so I added a wet plate filter using my Nik software and lots of light and texture to give it some interest. Looking at these shots reinforces for me, once again, how transformative false eyelashes are to a person’s face; I wish like hell they didn’t make me insane and I could wear them every day. But every time I decide to use them in photos, it’s a major ordeal. I decide to use them, open up a pair, steel myself for the application process, attempt to put one side on, screw it up, get the lashes stuck to my fingers, peel them off, re-apply glue, screw up the application again, then yank them off and throw them back into the box and stomp off angrily, refusing to ever even attempt false eyelashes again. Then 30 seconds later, come back and try the other eye, barely get it applied, spend a good minute mashing it into place and settling for however weird it looks and/or feels as long as it actually doesn’t fall off. Then do the same with the other eye. Then, realize how awesome they look and feel sad that there’s no way i could go through this hell on a daily basis (I’m lucky to make it in to work with my foundation and lipstick on; I apply a quick coat or two of mascara and some eyeliner once I get there). I do not know HOW Carol Brady wore these things every day while dealing with six kids. And I sure don’t have Alice around to help me.

Valentine11

While we’re talking about the prep process for my shoots, I’ll share this part as well: without fail, every time I finally finishing applying all my makeup (false lashes or not), two things will happen almost immediately and simultaneously: my dogs will need to go outside to pee, and I will realize I am hungry. Eating is not something you want to do right after spending an hour putting on stage makeup, so I usually end up ignoring it (I don’t even like to drink anything while shooting no matter how thirsty I get, because lipstick). The dogs I can take care of, but depending on the weather standing outside in my newly-painted face isn’t all that great either. And last time, right after applying all this makeup, I took the dogs out as I always have to do and immediately stepped in a pile of Penny’s poop (she is weird, and sometimes chooses to poop in odd places we don’t expect, like the deck). So there I was all gussied up washing poo off of a shoe in the backyard…good times.

Valentine12

Another thing that always, always seems to happen is whatever wig I’ve decided to wear for the shoot cannot be found, and I have to literally dump out every bucket full o’wigs I have in the house to find it – where it will always be at the very bottom of the last bin I dump on the floor. Every time this happens, I kick myself for not planning ahead and finding the wig sooner, when I am not already face-prepped for shooting, but every time I forget. It can actually turn into quite a crisis if I really start to feel like I won’t be able to find the wig and have already planned an entire shoot around it (this does happen; so many costume wigs come through my door that I often think I have wigs which I long ago sold or gave away). Bottom line is, after all my prep work and the stress that comes with it just by nature of me being, well, me, by the time I am actually fully costumed and ready to go I’ve already decided at least twice to blow the whole thing off because it’s too much trouble, and am almost ready to do so again. Plus, I’m hungry and can’t eat. In fact, I start almost every shoot from a place of frustration for all the things that have already gone wrong, and trepidation that I won’t actually get anything decent out of the set, in part because of all the things that have gone wrong. So, every shoot begins with a bad attitude and a general sense of being pissed off at the world. See, doesn’t it all sound like fun? This is why I choose to work alone.

BAwhatever2
This picture was taken in November, but the sky is from January. There were no clouds on Airshow day, which is death to a plane photo, so I stole the sky from one of my IAH plane shots and Photoshopped it into this one. Voila! 

One other thing I’d like to mention regarding photography is this: I’ve definitely noticed a difference in how certain photos are received on different social media platforms. For example, on Flickr it’s my self portraits that get the biggest response, but when I upload that stuff to Twitter, no one much cares. However, if I post a plane photo I get a ton of love. I’ve gotten more re-tweets and new followers off one plane photo than I’ve ever gotten off any selfie over there; it does seem that loads of aviation geeks are hanging out on Twitter so perhaps it’s just a larger pool of people to access there than on Flickr. For whatever reason, it’s clear the Twitterverse prefers me to share plane photos, so I’ve been doing that and getting connected with a whole new group of people, and that’s kinda cool. I’m hoping maybe some of them can eventually give me tips on how to get shots from places other than the observation areas – something I’m not brave enough to try yet but will have to do soon; the  few observation areas I go to always create the same shots since I’m always standing in the same place (albeit with different planes). Anyway, it’s nice to know that all of my shots can get love from somewhere, even if it’s not always at the same place.

Loose Change

N409UA

I’m posting this photo again because, of all the plane shots I’ve processed and shared so far from my shoot last month, this one has gotten the most positive response anywhere I’ve shared it – Twitter mostly, where a simple hashtag (#unitedairlines, #airbusintheUS) can connect a photo to the proper audience almost immediately. United Airlines, IAH, Hobby Airport, Airbus, and Airbus US have all re-tweeted it and sent me compliments, as well as several aviation and photography lovers who have since become followers. I find that interesting because I really felt I’d over-processed this one; most of the planespotters I follow stick to accurate representations of the planes and don’t appear interested in adding effects or filters. But I really haven’t done much more than skim the surface of the entire culture, so perhaps I’m wrong about that. At any rate, I’ve been pleased with the response to this one and it encourages me to experiment more, especially since it’s the part of the photography process I enjoy most.

Most of the new experimentation comes courtesy of the Topaz photo processing software I purchased over Christmas break thanks to a review by my blogger friend Beth Byrnes; as I get to know the software better I branch out more and try new things, and it’s amazing how a simple purchase of the right product can so enhance and even alter a creative process. It’s true that even without cool tools one can create art, be it painting or photography or poetry, but man are all the cool tools helpful.

And so, as I edit the 300 or so costume portraits I took Saturday, I’ve begun to experiment with them as well. I have a pretty set style at this point when it comes to portraiture – I like clarity and realism but I also want to look as good as possible, and there are lots of tricks I’ve learned to make that happen. Controversial or no, I do use Photoshop to edit out my under-eye wrinkles and even up/smooth my skin tone; I’ve learned to use stage makeup to great effect and eliminate the need for some of that sort of processing, but at 45 years of age it’s still necessary for me to get the effect I want – I’m not pretending that this is how I really look anyway since I’m always in costume, so whatever. Moving on.

After wrinkle removing and skin smoothing, I pull up RadLab to brighten, add contrast, pop color, and add light to the subject, as well as occasionally mess with filters to change tone. I don’t like too much contrast in a portrait, but I do like clarity, and I always, always put as much light on the face as possible without blasting out the skin and losing color or facial features. All that light is great to conceal any makeup errors I might make; even though it doesn’t show in the final shots, my makeup skills are still mediocre. I can follow a YouTube tutorial and put all the colors in the right space, but my blending skills are sub-par, especially when it comes to contouring the nose and adding lip liner. I am also a disaster at applying false lashes, so whenever I do apply them they are usually done poorly and practically falling off the entire shoot. All of these things can be concealed with enough light on the face; I already aim a lot at me during the shoot because I’ve learned it’s best to get as much right in the original shot as possible, but I always end up adding more, more, more.

Some examples from my latest shoot:

valentine1 valentine2

Brightening the whites of the eyes is always helpful, as well, and can be done using the dodge tool set to about 15% midtones. Really makes the eyes pop, or, if you’re into that sort of thing, it can make you look completely insane by making them too bright. Your call. My point in all of this (and I do have one) is that after processing these first two shots, I started playing around with the Topaz software more and experimenting with different approaches to editing them. This was not done intentionally, but came about as I clicked around in different filter programs just to see how each one changed the look of the photos. The first one to get a slightly different approach was this one:

valentine3

First of all, that fabric is a vintage dress I was wearing; I got the idea to yank the skirt up over my head and use it as a prop (it’s ideas like this that confirm my need to shoot only indoors and alone). And I was only using the Speedlite on my camera and no extra lighting for these shots; I’ve gotten to the point where I know how to manipulate that flash effectively enough so that the umbrella lights I used to always use are not needed as often. But, in some shots I got a bit too close to the flash and had just a bit too much light on my face; this photo was one of those. So, as I was processing I came across a filter that actually darkened my skin quite a bit and decided to go with it. I still think I came out a little orange, but it looks much better than it did when there was this bright white face staring out amidst all that vibrant fabric. It may not seem like such a big deal to anyone else, but believe me I agonized over that darkened skin tone; I knew it was the better choice but MAN it bugged the hell outta me. Moving on.

valentine5ab

I think the experiment here is obvious: to someone who is obsessive about clarity, working with an unfocused shot is a nightmare. But I loved the movement of the sleeves and the composition was pretty great with my face dead-on into the camera, so I decided to make a go of it and see what I could do. There are some fantastic Flickr photographers who work beautifully with blur (kokorage, who I learned of from the Pixlr blog, is probably one of the best) so I knew it could be done; I just wasn’t sure I could do it. With no real roadmap to follow, this literally took over four hours, and more filters and overlays than you could possibly imagine (I ended up using Pixlr for a lot of it, a program that hasn’t gotten a lot of love from me lately; mostly because of my fascination with Topaz, but also because my desktop  version crashes on occasion AND I still find the masking feature awkward to use). In the end I do like the result, but it was so hard to know when this one was finished, as opposed to my usual portraits where the stopping point is clear.

Now for this one, I really went to town:
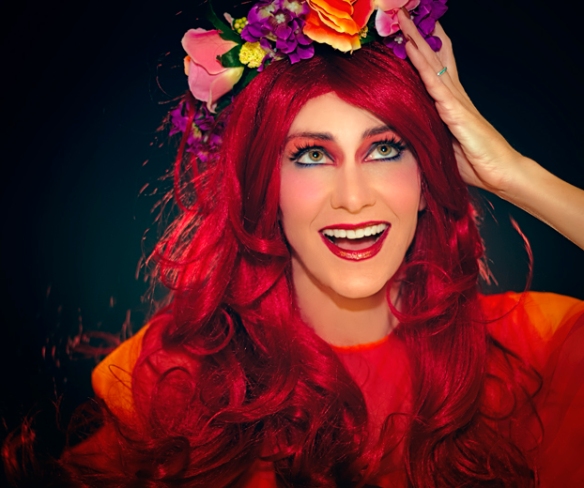
valentine6ab

I went for something highly stylized, much like my plane photo at the top of this post. I envisioned a low-key look although I didn’t actually use any low-key filters to get that effect; I just wanted something cartoon-like to match the silliness of the expression. As I worked with it I kept thinking of print ads from the 1950’s – that overly-painted/colorized/watercolor effect they seemed to have. But it was HARD, y’all. First of all, none of my little tricks were available to me to help conceal my makeup flaws, so I had to use Photoshop to correct blending errors, something I’ve never had to do before and hope not to have to do again because it took forever. The blush on my left cheek? Totally edited; that side of my face showed very little color in comparison to the ride side which was nice and rosy, so I used a brush to add it – something that is much harder to do effectively than it sounds! And the wig had random flyaway hairs everywhere that I had to edit out; doing that was not too hard, but it left discolorations all over my skin that were enhanced once I began to add color rather than lightening it like I normally do – that took me ages to figure out how to do properly too. And then there was my nose. Remember how I said I am not the best at contouring noses? Well my contouring for this shoot was particularly bad; I had to lighten it in all my shots but it wasn’t a big deal; when making my skin darker and more colorful for this one, oh man was it hard to correct. But I eventually figured it all out, and I am pleased with the result, even though once again it was hard to know when it was finished and all the editing was done.

Since I love those comparison shots, let me show you the before of this one, so you can see how much work I had to do to get rid of all that wig hair and fix that terrible nose job (click to see it larger):

val_collage

I think you can tell in the before shot how much more blush was showing up on the right side than on the left, and in case I haven’t made the point clear enough let me repeat that getting rid of all that stray wig hair was really tricky. The editing left dark smudges on my forehead and neck, and it took some time to get the skin tone even as a result. And getting the shot to those exact colors took so many different filters I couldn’t recall them all if I tried, but I am obsessive about such details and will spend 20 minutes to choose an effect I end up reducing to 5% opacity, so that didn’t help. This is another one I spent about 4 hours getting right, so needless to say I only edited two that day.

I’ll close with the last one I’ve edited so far. I threw on a short wig and took some quick shots against a different backdrop towards the end of the shoot. I’ve taken to using up two walls in my office for backdrops instead of just one – the big blank wall holds a large, full-body backdrop, while against an adjacent wall I’ve stuck a shower curtain I bought years ago for just this purpose but that can only be used for portraits as it’s not very big. So for variety I wanted some shots against the other backdrop, but as often happens towards the end of a shoot my energy and creativity were low and I was anxious to upload the photos to my computer and start editing, so these shots weren’t all that thrilling. Still, there’s a few from this bit that I like, and this was one of them – nice close-up of the makeup I worked so hard on if nothing else (and yes, I did go through the torture of applying false lashes this time, even though they almost always make me cry and I end up with my real lashes all glued together):

valentine4

Continuing with the theme of editing photos differently, I obviously used a much softer effect here than I would normally do. The photo on its own and straight-up edited just wasn’t very interesting to me, so I played around with light leaks to give it some added appeal, even though it washed out the previously vibrant color quite a bit and the haze reduced the clarity. I still think it’s a decent shot, and the softness seemed to work OK, so I left it alone after adding the light leaks and called it a day (and in looking at this shot in particular, holy cow can I see the weight loss in my face. Losing ten pounds is no joke; even my head looks different and of course I’ve had to buy a bunch of new clothes. But I digress). Oh, and I love that wig – I believe it cost me a whopping $20 and it is awesome. Short wigs really are a great way to get short hair for a day, and overall they are much easier to deal with than long ones. But I digress again.

I’m finishing up Day 3 of my 5-day minibreak, with absolutely nothing to do on Monday, so I may take some Stitch Fix pics for my blog and some purse pics to share with friends on the Purse Forum where I am now a member (there’s no interest or hobby in which I indulge that I cannot find a message board somewhere to join. Trust me on this one). So who knows, a shopping post might be to follow, as well as loads more airplanes I have yet to edit! Suddenly I’ve gone from no photos to way too many.

Speaking of which, one of the things I’ve realized during this little break is that it’s not so much that I’ve grown tired of my portraits as it is that I’ve just not had time to do them properly. Every time I’ve had more than one day free on weekends since the start of the school year, though, I’ve gotten right back into the swing of things, so I think it’s mostly a time issue, and we can all rest easy that the selfies aren’t going anywhere anytime soon – they just get put on hold until I have some breathing room. One of the nice perks about being a teacher though (especially at a private school) is that time off is always worked into the schedule somewhere (except for the start of the school year, where there’s a pretty long stretch from August to November without any decent break). When I only get one day off on a regular weekend though (if I even get that), I don’t feel free enough to do a full shoot it seems. So this may be the last one I do until Spring Break next month, but with over 300 shots in the can that shouldn’t translate into a lack of portraits.

Enjoy your President’s Day!

Peer One Portraits

Stupid title, but it’s a play on Pier 1, which is where I got all these props. Moving on.

Pier6_final

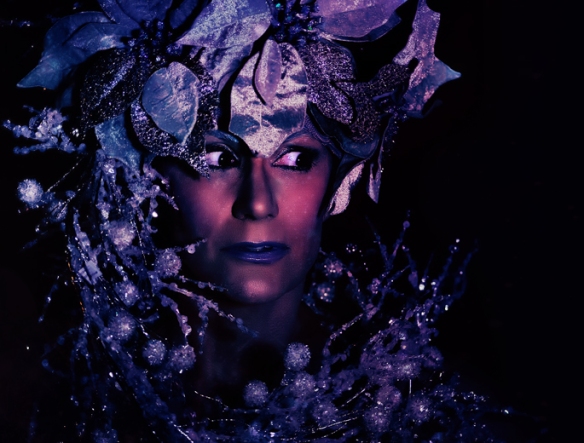
My initial plan was to wear one of my silvery gray wigs in this getup, but it ended up getting tangled in the garland so I put a thick silver headband on my head, on top of my wig cap, and pinned the poinsettias to that instead. Ended up working out great; I forget how much more difficult long wigs make taking self-portraits. They’re a bit hot under the lights, they get in the way constantly (snagged up in the costume or in my eyes while I’m trying to see what I’m doing or set up a shot), plus they tangle a lot when I’m flinging them around. Believe it or not, having 4 poinsettias clipped to my head was actually easier than putting on one wig! And yes, the poinsettias came with clips attached – I’m sure they are meant to clip to Christmas tree limbs or something, but that’s why i snatched them up, because I knew they’d be super-easy to pin to my head. And they were, except on one of them the clip broke off after about 20 minutes – kinda chintzy for a $5 decoration if you asked me, but then again, I’ve always found Pier 1 to be overpriced. Moving on.

Pier8_final

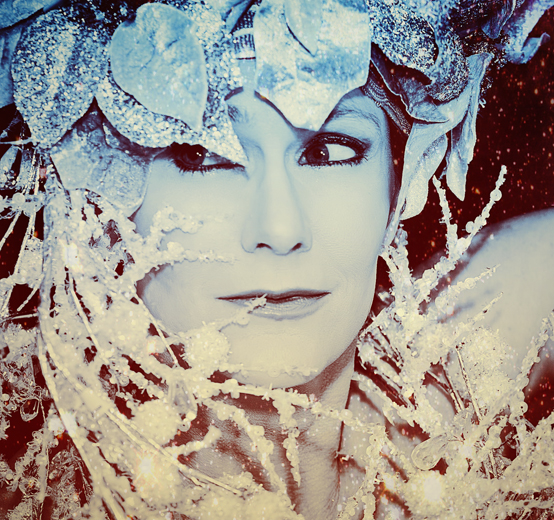
I was on my way to the register with some other stuff when I spied this white, sparkly garland shoved into a basket and snagged it instead. It was really fun to work with and created some very cool looks – the downside was that it was terribly itchy (then again, it wasn’t created to be worn by a human, so there you go). I loved the shots I got with these props, so much so that I’ve already edited – including the pics I shared yesterday – ten shots! That’s way more than I usually process from a shoot where I didn’t change costumes all that much. But the garland really added interest to the photos, and I found myself struggling to decide which shots to process.

Pier7_final
Remember when I said yesterday how I changed the colors up in every shot? Here I went for an icy blue that’s probably more green than I inteded.

When deciding what shots to edit, I try to find pictures where either my pose or facial expression isn’t so typical, but I do just have one face, after all, and I do tend to make the same faces over and over (which I discussed in a previous post). I think this is where the props can help a lot; to add some visual interest to the photo besides my face. I had very similar expressions going on in all the shots I took with the garland (about 200, in case you wanted to know), but the garland created a lot of interesting shapes and was fairly easy to manipulate. In fact, I totally want to work with it again – it’s very sturdy, and the wires are thick and strong so I can move it into a shape and it will hold it for several poses before it starts to collapse. I could have done a lot more, but as I said, it was terribly itchy and my skin was starting to get irritated, so I had to stop playing around. Plus, there’s only so many shots I need of me in this particular look with the same garland no matter how much I can manipulate it, so I figured I’d stop while I was ahead and leave more to the imagination for a future shoot where I can look completely different.

Pier11_final
Another favorite

As far as the technical stuff, to change things up a bit I used my 70-200 telephoto lens that I normally reserve for plane shots in this shoot. There was no real reason for this other than wanting to try something different and see how the photos turned out; it was nice to have more room to work with while I posed since I could keep the tripod pulled quite far back instead of needing to keep it closer with my 50mm or 85mm prime lenses, but I didn’t get the lovely focus and camera blur those lenses would have provided. Still, it did a good job and for the most part  the auto-focus was dead-on – easier than either one of the prime lenses, in fact, but I guess that finicky focus is why they create such nice portraits in the first place. Another benefit I’d never considered was that I could stand much farther away from the black backdrop, so there was very little light from the flash reflected in it to alter the solid black effect – another thing I probably should have known by now but never did.

Pier13_final

Because I used my Flash Bender on my Speedlite for this shoot, I got a lot of sharp, strong shadows that created some nice black and white shots as well, so there’s quite a few I converted to B&W when processing. I also kept my cheap ring light handy (and managed to knock it over and break it as well, so it’s time to buy another one of those) and for the most part had it set up behind me on a tripod to give my head and shoulders a bit of an outline against the black backdrop; occasionally I also placed it right in front of me to get some catchlights in my eyes. Unfortunately, in some of the tighter close-up shots the ring light tends to create a lot of chromatic aberration that I forgot to edit out (you can see it in the close-up shot from yesterday and the one above), and my eyes came out looking a little pink. I may go back and edit that before uploading to Flickr, but for the blog, pink eyes it is. And by the way, super-easy Photoshop technique for fixing chromatic aberration is located here – a two-minute YouTube tutorial that is simple as pie to do. Has saved my butt on many occasions when working with bright lights and getting all those purple rings around high-contrast areas.

These next few are pretty experimental and I don’t care for them quite as much as the more straightforward shots, but there was so much I wanted to work with here and I started feeling the need to change things up a bit.

Pier5_Snapseed

When this shot was taken, the Speedlite failed to go off, so the resulting photo was really dark. This happens several times throughout any shoot, and sometimes I try to process one of the pics to see if anything interesting can come of it. Usually nothing does, and I don’t think this one is very successful either. I pulled it into Pixlr to try and generate some added interest, and honestly I can’t remember what all I did to it there, but in the end, I still don’t think I like it very much. But hey, I tried.

Pier9_final

Mostly I just liked the way the garland was framing my face here; this is another shot I Pixlr’ed like crazy, but I think it worked better here. I used some of their graduated color filters as well as a space filter to make the costume sparkle; I just discovered that Pixlr’s desktop app can utilize masks so I was able to apply the stars without having to add them to my face, which is cool. I love textures and filtered effects, but for the most part I don’t like them to muck up faces, and it’s nice to be able to erase that out now.

Well, that’s probably all I have from this shoot, although I have one or two more I’m still eyeing. But I pretty much marathon-edited this weekend, partly because I had the time, and partly because it’s been a long time since I just worked with portraits and had forgotten how much fun it is. Busy week coming up at work – the week before any vacation is always stressful, and this one is shaping up to be the same, so I may be MIA until the holiday starts next weekend. Happy Monday everyone!

Levitation Break

Overall it hasn’t been a great week, but I’m not going to talk about that right now. I’d rather randomly share this ad I saw in my Facebook feed a few days ago, because it cracked me up:

pop
Why yes, the first thing one thinks when looking at this photo is WOW, NICE EYES

I actually see this sort of thing quite often around the internet when looking for tips on taking portrait photography or getting the right lighting for studio shots. Many of the tips are written by male photographers, and their example photographs are often scantily clad women. My favorite, and dammit I wish I could find it again, was a video on YouTube that featured a sloppily-dressed, fairly dumpy looking middle-aged guy firing away with his camera at a very young woman in a bikini to show how he set up his portrait lighting. It was kinda gross, but amusing as hell at the same time, in a dude, we all know you’re paying her to wear that bikini in front of you sort of way. Half the time while trying to get tips on studio shoots I end up feeling like a big old creeper because of the half-naked women I have to view over and over just to learn. But moving on.

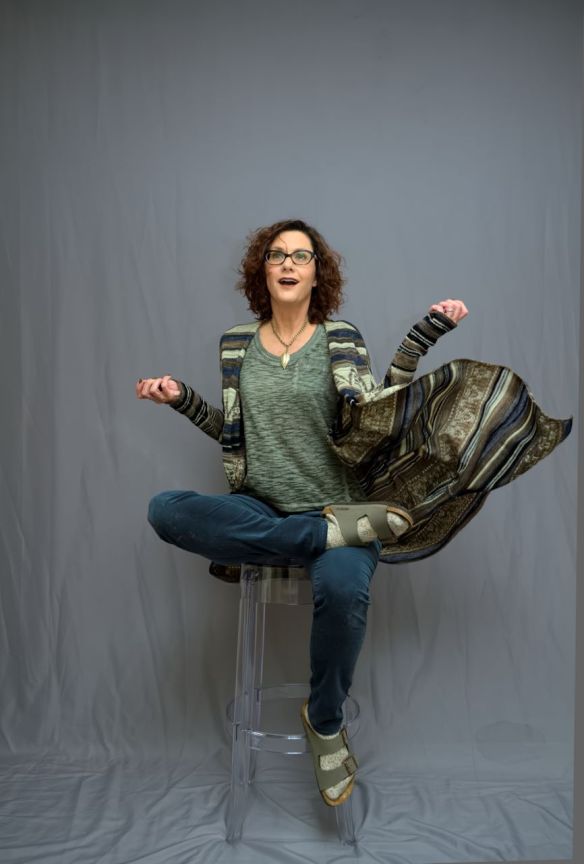
Here’s a shot I managed to pull off Saturday wherein I, of course, am not scantily clad, but I am in a studio. I ran errands all morning, then felt like trying out this clear plastic stool I bought recently because I thought it might help with levitation shots by being easy to edit out. It was, but the shot was still hard to edit and I spent several hours on it for various reasons. For one, I always forget what process works best for these shots because currently I am doing them so infrequently, so I never remember what I did last time that worked. For another, I forgot about the rule of wearing contrasting colors to the backdrop so I can easier edit myself out of the shot and into the background one, so  the process of selecting the subject was tricky and took a good deal of time. But this picture is proof that even if I have very little time to shoot photos right now, it still can be done. I am in my regular clothes, and have on no stage makeup or fake hair – just me and a backdrop and a plastic chair. I also went along with my new strategy of going in with a plan – I knew exactly the shot I wanted, set up and posed for it, and once I had it, I quit shooting. This set? Was 32 shots – that’s it. As opposed to my usual 350. So it’s good to know I can work this way and pull it off.

Now let’s see the whole thing in action:

GHD1

That duster is fabulous and from Free People, of course. I own two because I snagged a huge hole in the first one and went and bought another. The one I’m wearing in this shot is actually the one with the hole, because I figured I’d be tossing it around a bit so might as well wear the damaged one.

GHD1a_Snapseed

Here I am, layered over a second shot of a blank background and highly filtered and edited in Photoshop. My hair in particular was a bitch here, because I realized halfway through the editing process that I’d clipped out all the little flyaway hairs the first time and it left it looking flat and fake, so I had to go back to the original, select all these little flyaways, and layer them into the composite shot. Took some time and might not have seemed like a big deal to other people, but it made huge difference to me because it gave my hair back the movement it lacked with all the flyaways cropped out. And, I am getting better at adding shadows, I think – the ones you see here were added in Photoshop by me. Final shot:

GHD1_final

I used my Pixlr desktop app for the final finessing, since I can edit TIFF files with it now. I used a “smoke” overlay to add some depth to the background, a barely visible little star overlay, and a couple of very faint borders for added pop. Unfortunately, something I did somewhere along the way with all my editing made my teeth turn kinda gray, but what can you do. It’s always something. In this case, the something is gray teeth. Still a cool shot and not a bad levitation, so I’ll take it.

Sidenote: Because I shoot in vertical or portrait orientation so often, my studio self-portraits are almost always crooked. And by almost always I mean always. I start out with the camera pretty straight, but the more I shoot and chimp my shots the more off-kilter it gets. Then I often forget to straighten it when I edit, so when you look at the floor line in my shots it’s often crooked. Hopefully most people don’t notice it, but if you go back and look at my levitation and jump shots over on Flickr, I guarantee you almost all of them involve a slightly slanted floor. Moving on.

Not much else to report at this time; I wanted to take a few more levitation photos with these cool new Minnetonka moccasin boots I bought, but I got sidetracked by it taking me 45 minutes to lace the stupid things (not even kidding) and then couldn’t get my feet into them, so that ruined my mood. Time to go return the  shoes and get ready for another week. Happy weekend everyone!


Kinks and Links

The kinks in my title refers to getting them worked out of my arm again with good ol’ Sandy. And Sandy? Has had enough, y’all. Of her husband, mostly. Today’s OMG moment came when Sandy was working on my right shoulder and suddenly started giggling. Then she kind of put her head down on the massage table for a moment and said, ‘You know, I’m really not a bad person, but…” and for those of you who know Sandy, you’ll be surprised to hear that she did not conclude that sentence with a mention of squirrel-shooting (actually you probably won’t be surprised, because Sandy would never consider herself a bad person for shooting a squirrel). What she did conclude it with was the statement that Thursday morning her husband had been feeling “frisky” and for the first time in her life, she told him, “You know what, no. You’ve been doing everything the same for forty-plus years, and I’ve had enough. I AM NOT IN THE MOOD.”  I was little flabbergasted Sandy’s been married forty-plus years and this is the first time she’s ever told her husband to put that thing away, but I’m beginning to suspect Sandy has a tendency to exaggerate. And is it sad that the first thing I thought when Sandy told me this story was, “I can’t wait to share this on my blog”? The links in my title refers to one link, actually, not several, but I wanted to be parallel so I had to make it plural. Forgive me. The point is, a feature has been published about my photography on the Pixlr blog. They do an occasional segment called “Follow-Worthy” which features a photographer they consider to be, well, worth following. And apparently I made the cut. Supereric from Flickr, who writes for the Pixlr blog, contacted me earlier this week and sent me the questions, and now he’s got the blog post up and running. So without further ado, I’ll quit talking here so you can go read what I’m saying over there: Follow Worthy: Marey Mercy. A big thanks to Eric and the folks at the Pixlr site for doing me the honor. I’ve shared that link with everyone I can possibly brag to about it, so I hope they saw a nice increase in numbers. You know – because I know hordes of people and all.

Back Alley Photography

Perhaps if I ever get a studio of my own, this is what I’ll name it. Moving on.

I think I mentioned in a previous post that I was interested in taking photos in the dirt road that serves as a back alley to the studio I rented Monday. As it turned out, by the time we got around to taking pics back there, I was pretty burned out and lacking in energy and ideas, so I ended up snapping a bunch of sloppy pics of Candace and her little boy while we all discussed what we were going to do with the rest of the day. I did remember to set my white balance with the ExpoDisc, but other than that I didn’t do too hot with the back alley shots. I forgot to change my settings and speed up the shutter when trying to take jump shots, the light was harsh overhead, and my framing was generally awful. What can I say, after putting makeup on two models and then shooting them for two and a half hours straight (we got started with the whole day at 9 AM and didn’t finish up until 2 PM)  i was tired.

Still, there was one shot I really loved and wanted to process; it always happens after a shoot that no matter how many I take, there will be a very select few at the top of the list of favorites for me, and I always process those first. This was one of those that I felt I absolutely HAD to edit, so when I woke up this morning I decided to work on it right away (then I got busy and didn’t get back to working with photos until about 10:30 PM, which is why I’m throwing up this sloppy post at two in the morning).

shot7_Snapseed_pxr

Candace had on a dress she wore in the indoor shoot, then threw the infamous faux fur vest on over it simply to get it ‘carried’ to my car, but it really worked here to give the impression that she’s a super-glam mom, and the fact that she’s in the vest with her sunglasses standing in a dirt road is even better. I figured while I was editing this one photo, why not edit everything else from this section of the shoot that I might want to work with so I can present it as a little collection here. These photos are weird though; they have such a snapshot feel to them that the only way I felt comfortable with them was to mess with them a lot, which means of a lot of obvious processing and Pixlr-ing, which I’m sure will make some of you happy. Take this next shot for example:

shot10_Snapseed_pxr


I wasn’t much into jumping during this shoot, but Candace totally was, so she wanted to do some leaping about before we left for the day. Unfortunately, this is one of the shots where my tired screw-ups came into play, as I forgot to change my camera settings to stop motion which resulted in all of her leaps being blurred. In spite of that, I liked how she was posed in this shot, as if she was levitating by accident instead of jumping. It was blurry, so I edited it with very heavy shadows and contrast to blend her in better with the tree branches; then I superimposed two photos over it in Pixlr (bonus points if you can see the face, which is one of the two photos I embedded into the original shot). I think with the creepy color and the added texture, this one works, but it’s pretty unusual  for me. Candace will probably love it.

This next one definitely had better clarity…

shot9_Snapseed_pxr


and I liked the movement and the sentiment it captured, but it wasn’t an overly thrilling shot by any means. I don’t usually add borders to photos, but I dunno, here I was just trying to add interest. I added a border to the next one to conceal Candace’s legs a little, since I didn’t think she’d be comfortable with me showing them from the particular angle I took the shot. What can I say – I was trying to capture her son grinning while holding onto her leg, but the angle on her was a little inappropriate. Hence the splotchy border that kind of covers her up but still conveys the message of the original shot.

shot8_Snapseed_pxr


It’s now after two AM and I am tired, so forgive me if this post isn’t riveting. I was also determined to get some alley shots put together for this post, so my eyes and arms are tired from working at the computer for so many hours. I don’t know how many of these particular pictures are keepers, but I love the first one for sure, and that second one is growing on me. Anyway, they’re done, so I’ll  move on to some aspect of the indoor photos next.

Curtain Calls

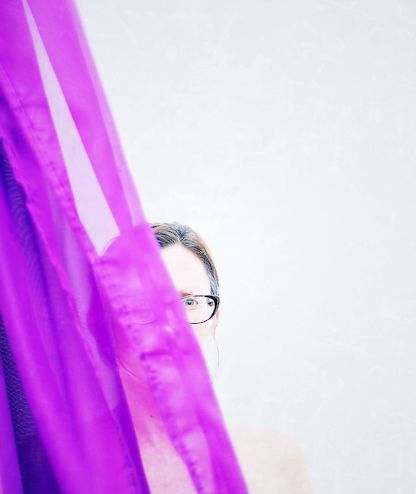
Last night, around 8:45 PM, I got to thinking about my next shoot and what it might be. I finally bought a black backdrop so that should be here on Wednesday, and I can get Doug to hang it sometime before the weekend so I can take some shots with a different mood than I can get with the white one that’s been on the wall for over a month. I’ve had the thought for some time that I might try taking the purple curtain sheers I used a few months ago and hanging them from my ceiling fan, just to add some interest to the photos, and for some reason I decided last night to hang one of them up there and see what happened.

If I’m going to do this in photos, I’m going to have to utilize more of the office space than the one blank wall I usually use, so I had to go searching around and see if I had any extra black sheets or blankets I could hang on another wall so I’d have more space to move. I did find a fleece sheet set I used previously in my costume closet, so that’s good – at some point I need to hang those on the second wall and see how they look too, but I didn’t have time to try that out last night. It’s a bit of a more elaborate set than I usually do, so I don’t want to wait until the day of the shoot to see if this is all going to work. We’ve got another three-day weekend coming up, so I should have time to play around this weekend, and can spend some time just playing around with the set and different shot angles before actual shoot day.

Anyway, I tied a sheer to the ceiling fan and let it spin around, then took some test pics in my pajamas with no makeup on just to see how it came out. These were total one-off shots, no set to speak of and just one curtain sheer spinning around, but you know me – I have to find at least a few I can process and try to turn into something.

curtain 2_Snapseed

I need a better way to attach the sheers to the fan, first of all; I just tied a loose knot which used up WAY too much of the length; ideally I’d like the sheers to almost reach the floor, but they only made it halfway to that point last night. So I need to get some clothespins or something to make that happen.

curtain 1_Snapseed

The sheer spun nicely though; and once I was brave enough to really get it spinning, it was quite fun to dance around in the midst of it. But it charged up my hair with static something awful.

curtain 3_Snapseed

Most of these shots didn’t mean much to me at all; as I said, I was in my pajamas and hadn’t prepped the room for the shots or anything, I  just wanted to see if this idea could possibly work. I think it can, although I’m not sure how much the purple sheers are going to show up against a black background – that wall with the sunflower photo hanging on it, by the way, is the second wall I plan to cover with the black fleece, if it works.

This last shot, however, I ended up likingonce I processed it, because I decided since there was so much background noise going on with the lamp and my umbrella diffusers showing that I’d  mess around with those details a bit to give it a surreal quality:

curtain 4_Snapseed

I tried at first to edit out the lamp entirely, but I just couldn’t pull it off without things getting sloppy; so I got the idea to edit out the stand and leave the lampshade floating in the corner. Then I figured I’d edit the stand out of the umbrella too, so it would have the same quality. I tried to do some funky things with that framed picture but with my head where it was, I couldn’t get anything to work, so I left it. Those surreal touches along with the light (I had a speedlite set up below me) and the positioning of both my arm and the purple curtain  gave this shot some nice movement; I think the weird angle of the lens (which was just me being quick and sloppy) adds to that. I added some zoom blur with a focal point on the curtain to create a little more movement as well. It’s not great, but at least it’s more interesting than the others.

Oh and of course, I had to Pixlr one – I edited the heck out of this photo and it was pretty sloppy, so I just textured it to hell and back to try and cover up for it. I had a photo, a bunch of stuff on a bookshelf, and the umbrella stand showing in the original, and managed to get it down to just the umbrella:

curtain 5
Original

curtain 5_Snapseed_pxr

I don’t know if I’ll be able to pull this off or not, but at least based on these test shots I should be able to get some interesting stuff. I also have this OTC inhaler I bought back when I had bronchitis in August that I was realizing creates some seriously crazy smoke that I could blow out of my mouth for cool effects, and I keep meaning to use it in some portraits, so I may try that too. Lots to think about – I’ve started a Word document to keep track of my ideas better so I don’t forget everything on shoot day and end up just doing the same old things.

Looking forward to the weekend!

Skills test

A friend of mine on Facebook sent me this link and said it made her think of me; I’ve been sent links to photos like this before and they always make me jealous. I don’t have the photoshop skills to pull something like this off yet – it is tricky to seamlessly edit a subject into another photo like that without it looking sloppy. For me the issue is the edges of the subject (in this case, a person) – I haven’t yet figured out how to soften the outlines of the body and hair so that they aren’t too harsh. I’ve done a little research on it but haven’t got a clear answer yet to the problem, because as usual the tutorials all talk over my head – I have more skills than I have knowledge, so when trying to learn something new, it’s not that I can’t do what they are telling me do, I just don’t know enough terminology to pinpoint what it is that’s going on, if that makes sense. So as usual, I end up gleaning what little I can from the tutorials I read and then screwing around with the software until I figure it out on my own. This works very slow and piecemeal for me – I figure out one little step of a process at a time, rather than be able to follow a full tutorial on the entire process at once.

But after looking at the photos on that page, I decided today was the day to start figuring this shit out. I’d already taken a ton of photos the day before of me playing around in the new clothes I bought over the holidays, just putting outfits together and learning how to integrate everything into my wardrobe, so I had tons of shots of me against a white background I could use. I do have some straight-up outfit shots I’d like to share later, by the way, but I thought for this post I’d share the Photoshop experiment – which actually isn’t using Photoshop at all, of course, but Paint Shop Pro, which is what I know how to use. I just call it Photoshop because everyone knows that name and I’m too lazy to call it anything else that might involve more explanation.

So – here’s the original shot. The skirt,by the way, is from ModCloth and is just lovely. Only forty-something bucks and it photographs like a dream, as well as being a great addition to the clothes closet. Shorter in the front than in the back, and in a very light material, it is incredibly flowy and comfortable, although to wear it out of the house I’ll most likely put a slip under it. But I’ll talk more about the clothes in another post – back to the original:

skirt2_Snapseed

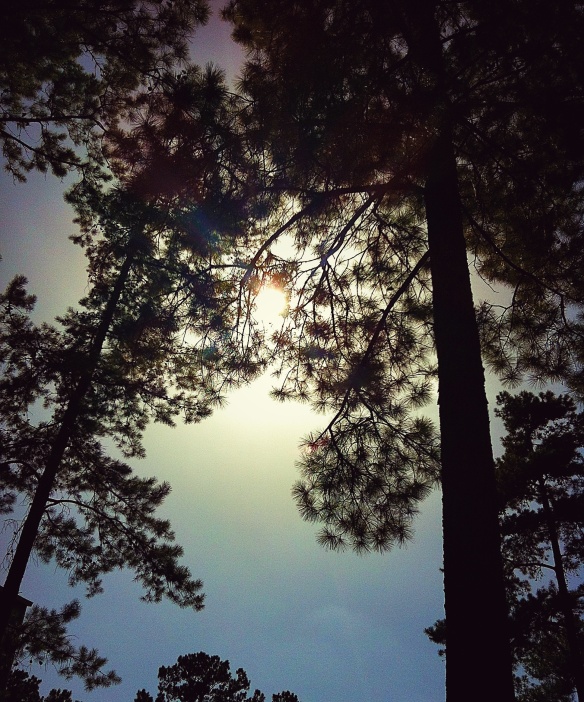
To play around with editing my body completely into another photograph I needed a background photograph to use; I first looked up backgrounds on Google, as my idea was to have me floating above a bed in a room or something. But I couldn’t figure out quickly how to get my hands on a decent-quality free photo like that without flat-out stealing one, which I wasn’t going to do, so I went for this picture I took with my iPhone when I was at a work retreat back in August:

trees

I had to get myself “cut” out of the first photo and “pasted” into this one, and through some tutorial deciphering and screwing around I managed to get a pretty good copy of my body to layer into this shot. The issue is in how I have to “highlight” (sorry for all the quotes but I know I’m not using the right words here) just my body, and absolutely nothing else, out of shot #1 (a lot of white can slip into the shot around the body’s outline, especially the hair, and that may not seem like a big deal until you paste that subject onto a new photo, where the background is not white). As far as that goes I think I did OK, but I still think I look rather pasted into the shot (click on it to see a better quality copy):

treesandme

So, I did what I always do when I’m not completely satisfied with an edit: I Pixlr-ed it, of course. I added a little more light flare to hit right on my body and maybe soften my edge a little, made a slight change in tint to the overall shot, and added some faint, glittery bokeh:

treesandme_pxr

As I said when I shared this over on Facebook, I think it looks like a 70’s prog-rock album cover, but aside from the cheese factor it isn’t bad. It’s actually leaps and bounds (pun intended) above any previous attempt I’ve ever made to do this sort of this thing. I’ll be flying around empty bedrooms before you know it.

One thing I’m thinking now in looking at this is that my obsession with clarity might be working against me here. I used an already-processed original of my body to layer over the trees, and that layer of me is decidedly more crisp than the image of the trees; that may be what makes me stick out a bit. Perhaps in the future I need both the background and the subject to be unedited when I merge them together, then add the sharpening and detail clarification after it’s a merged photo. Or maybe I should just have less clarity in these shots overall, as that’s probably part of what makes the hard edges of the body difficult to seamlessly blend into the shot. I noticed the girl who took those photos in the link used a lot of blurring and textures in the shots too, so maybe those things help conceal edits also. And I’m sure I can work with light and shadows to add to the realism…see what I mean? So much to learn.

Spot Blogging

Today I stumbled across a little Rogue spotlight I bought about a year ago to attach to my Speedlite; I’d only tried it out once before forgetting about it. At the time I wasn’t very interested in what it could do as I’d also bought a small softbox and got way more into using that than this little thing. So after coming across it again, I decided it was time to play around with it and commit more to learning how to use it.

spot 1a_Snapseed
Spotted!

The detachable spotlight also came with a sample gel filter to put over the spot for color effects; it was an orange one, but I’d definitely like to get more colors at some point. I stuck the gel on the spot and ended up doing the bulk of the shots with it in. The results were interesting – I actually used the orange gel on the shot above, but edited a black and white version also to show the spot effect without any color distractions. Here’s the actual shot using the orange filter:

spot 1_Snapseed
Pretty damn warm – believe it or not, I actually REDUCED the color in this shot when editing. That’s some serious orange.

Apparently this came with three different grids to create tighter or wider spotlighting, but I could only find two. Figures. Of the two, I much prefer the wider spot to the tighter one, so it’s the main one I used.

spot 2_Snapseed
The spot/gel combo didn’t do much to wash out the wrinkles in the backdrop, so I added a texture to the photo in an attempt to camouflage them

I thought that shot might be lacking a little, so I added some more filters to it in Snapseed, just for the hell of it:

spot 2a_Snapseed
Totally cancels the effect of the orange filter, but I thought it gave the shot a spooky vibe

But I still felt the shot was missing something, so of course I ventured over to Pixlr to play with it further. I discovered recently that if you access the “adjustment” tool in their Express editor, there’s an “upload image” option which allows you to superimpose another picture over the one you’re editing (more hours of fun on the way, as is the norm any time I discover something new) so I gave that a go by uploading the same image over it, enlarging it a bit and reducing its opacity, then throwing in some light leak, smoke, border and texture filters to finish it up:

spot 2a_Snapseed_pxr
Even spookier!

I really like the movement in this last one, and in spite of my itchy photoediting fingers I forced myself to keep the adjustments to a minimum (so hard for me to do):

spotshot_Snapseed

I’m sure you could get this entire effect using software after the fact, but it’s great fun to experiment with vignetting effects and filters right in the shot. Taking thousands of photos a month using one’s self as the subject does get boring (believe it or not, yep) so any time I run across something new that makes the actual taking of the photos more interesting (taking the photos is never my favorite part) I’m all for it. Plus, I do believe the more you ‘get right’ in the actual shot, the better – it just feels better in the final result.

Seriously considering zipping right over to Amazon and buying those other filters. Loads of colors for $30 and totally worth it. But it’s way past my bedtime and I have a busy day ahead, so the sooner I get off this computer and force myself to get sleepy the better. And I know I still need to share pics from as far back as a week ago (Christmas Eve) but I get so excited about my newest shots that ones I took previously and failed to upload right away sometimes get lost. I’ll get them all shared soon though; once work starts up again I won’t have so much time to take photos and get backlogged.