Texture Points

I got up Sunday morning and decided to play around with skin smoothing some more – of course – but was once again disappointment with my first attempt.

portraitzoomcollage1

The “after” shot there is OK, but still too mushy for my liking, with too much detail lost. And as much as I appreciate comments saying I don’t need retouching (and I really do appreciate them), it’s not something I do to improve my personal appearance; I do it to create the look I want for that particular photo – I really don’t even look at the person in the photo as me, I just happen to be the subject I’m working with.  It would probably be better to show edits on portraits that are not my own, so people wouldn’t get distracted by the fact that the person in the shot is the person who writes this blog, but I’m not sure my friends would be happy with me sharing all the steps I take to the edit their portraits here. Not to mention that most of the other people I’ve photographed up to this point are much younger than I am and as such, don’t create very dramatic “after” effects. Most tutorials on YouTube also use young models as their editing subjects, and I like being able to show how to work on a middle-aged face. But my point is, whether or not I need edits to my original photos, I definitely want them, from a purely artistic standpoint. Moving on.

After working on that first shot and feeling dissatisfied with it, i decided to go dig up more skin softening tutorials on YouTube to follow. I then spent two hours following a fairly advanced tutorial that, eventually, lost me entirely, which was really frustrating. Determined to figure something out, though, I located yet another video that focused on softening the skin without losing texture:

This is a more detailed tutorial than the one I followed the day before, but I was pleased with the results as they left a lot of texture to the skin while still smoothing out some of the wrinkles and imperfections. Here’s a bigger version of my before shot:

portraitzoom6

This actually isn’t a pure before shot, by the way, as I’d already edited out my larger undereye wrinkles and a bunch of stray wig hairs that were straggling in my face, as well as removed a blemish I had on the side of my nose. But other than those edits, it’s “before” enough. The tutorial uses several steps to eventually brush over a lot of the little lines and discolorations here, but again, it managed to retain some texture at the same time – so the end result of the process was this:

portraitzoom6retry1

The color is smoother, for sure, and the skin is definitely softer, but notice that you can still see the skin’s texture and pores. More realistic, and definitely more blended. We’ll overlook the fact that my lipstick was terribly uneven, since this is just a sample photograph anyway, but in the future I need to be more careful when applying the longwearing stuff – I suck at lipstick application as it is, but with a semi-permanent lipstick like this I really need precise application for photos, something I didn’t bother with here as I shot the photos in a hurry. Speaking of lipstick, the one I’m wearing here is from Lime Crime – one of my favorite makeup resources for photography makeup – and it is a semi-permanent one from their Velvetines line; the color I wore here is called Salem.

I liked the first go using the new technique, but I thought perhaps I could make it a little better by applying the technique I used yesterday after going through this process, just to make it look a touch smoother. I also ran it through Snapseed to brighten and lighten the skin a bit and whiten my teeth and eyes (I also tried to even out my lipstick lines a little, but was not too successful):

portraitzoom6retry1a_final

If I compare the first softened portrait to this one, I think the second one actually gives a smoother look overall by evening out the skin tones nicely, and while at first glance the level of detail appears to be about the same, there are subtle differences if you look closely. The pores in particular have not completely disappeared, just reduced and smoothed. And the color distribution is more even, while the first process came out splotchy. I think using both techniques blended details together better for a more natural appearance – but again, I get that no one else may be able to see a difference:

portraitzoomcollage2

A few other things I considered as I spent WAY too much time working on all this today: I wasn’t using the greatest lens for portraits (my telephoto), my makeup was pretty slopped on, my lighting was thrown together quickly, and these photos are MUCH more zoomed in than most portraits I do, not to mention most portraits in general, which will usually show the head and shoulders. So, I felt those things were probably part of what led me to be less than completely thrilled with my results. Since apparently I hadn’t spent enough of my Sunday at the computer editing photos, I decided to go back into the archives a bit and find a portrait to work my new magic on where I had a good, full face of photography makeup on and decent lighting, and that was taken at a better distance with a better lens, but I think I’ll save those edits for another post. This one’s gone on long enough already!


Smoothsayer

That’s a terrible title, but I’m sticking with it.

I got home from work Friday after a particularly frustrating week and realized one of the errands I had on my plate for the weekend had already been taken care of by my husband, so that was nice. He went out for the evening to jam with some friends and I decided at the last minute to throw on some stage makeup and a wig and take a few photos, since I haven’t done that in quite a while – well over a month, I think. I didn’t get too fancy as it was already five o’clock in the evening when I got started, and I mainly wanted to see what results I could get taking portraits using my new telephoto lens in my tiny little office/studio. None of the photos were anything groundbreaking, but it was interesting to see how close up I could get with the 70-200. I planned to process some of the closer-up close-ups (if you think about it, that does make sense), but when I started working on the first photo I got distracted by attempting some new Photoshop skin smoothing techniques I found on YouTube.

It’s not often that I feel inclined to try out new editing processes, although I try out new lighting and shooting techniques all the time – once I get down to editing I want to go with what I already know and get to the end result quickly. But Friday night, for whatever reason, I felt ready to tackle skin smoothing on a new level. Perhaps it was because these photos on their own were nothing I hadn’t done before, except for use a new lens, so I felt open to trying new things out on them to see a different result when I was done. Whatever. If anyone’s interested, I followed this eight-minute YouTube tutorial as I worked:


I don’t want to get too into the steps involved here, because as usual I cannot speak about it in a technical manner, but suffice it to say this process involves creating a mask layer consisting of a serious amount of blur (on my 45-year-old face, anyway) then using a brush to essentially ‘paint’ the blurred effect onto the skin wherever it is needed, while avoiding edges and lines like eyelashes, lips, eyebrows, etc. In this manner, the end result is skin that looks soft, while everything else remains sharp and detailed. That is one seriously crappy explanation, but it’s all I’ve got, so if you want a better explanation watch the video above. However, I can still show you a few examples, because you all know how into before-and-after photos I am, so let’s start with this original. I’m warning you, keep in mind that I was using a telephoto lens and therefore am REALLY CLOSE in this shot. I must be crazy sharing such close-up images of myself without any editing at all on the internet, but whatever. I don’t think my source material is all that bad to start with, so if the internet sees my wrinkles so be it. It’s still fun to compare. And yes, I was being silly in this photo, but I liked it anyway:

portraitzoom2a

Now, for anyone who’s tried to use simple skin smoothing software when editing a photo, you know it makes the entire photo, not just the skin, way too soft and unrealistic; I always think, when I see such edits, that the person looks like they’re carved out of butter, with all their lines and angles mushy and melted. As an example of this, below is the same photo, run through a pretty basic skin smoothing filter from Paint Shop Pro:

portraitzoom2ab
Kinda mushy, and not very smooth to boot. 

I’ve come up with a few solutions to skin imperfections in portraits over the years that have served me well, but I always knew there were even better ways to pull it off – as I said, I’d just not been willing to take the time to learn them. I think I did OK with the two shots I’ve processed so far, but in the future I probably need to zoom WAAAY in when editing to target problem areas more closely and get the edges precise (of course, the fact that the model in the tutorial is about 17 years old while my “model” is 45 probably had something to do with the amount of editing/smoothing my shots took versus the video version). But anyway, here’s my end result using the layering/masking/painting technique:

portraitzoom2_Snapseed
I also added some extra lighting on the face as well as reducing contrast on the skin when I pulled the photo over into Snapseed, by the way. And if you really want your mind blown, scroll back up to the original. Yep. 

This process takes a long time to execute, so as I mentioned previously, I’ve only edited two shots so far. Without any more gabbing, here’s the original of the second one:

portraitzoom1a

And here’s the final version:

portraitzoom1_Snapseed
Another bonus is how much better my hands look – I’ve always had wrinkly hands and fingers

I also used a pretty cool lighting technique on this shot, but I’ve got more to process  and share, so I’ll talk about that later. I’m excited to see how much better I can get at this with some other photos, but I start to get sloppy with this sort of detailed work if I do too much at once, so I stopped with these two for now. And I can also talk about that lipstick later, which is another of my fab-for-photos-but-awful-on-me-in-real-life purchases. I’ll save those discussions, and more photos, for later. Happy weekend everyone!

A few more shots

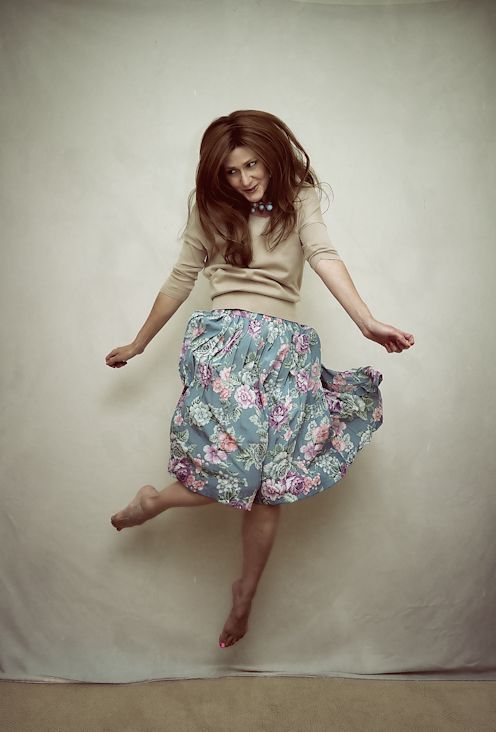
Just a few more from Sunday’s shoot that I’ve had time to process. As I mentioned earlier, I forgot to alter my lighting setup when I switched from portraits to full-length shots, so these suffered a little from that error. They weren’t nearly as crisp as I like them to be, and the light was blown out a little – so I used Pixlr to disguise these flaws a bit. Plus, I’m getting bored of the beige backdrop now – it wasn’t nearly as easy to transform into another color as I thought it would be, and was next to impossible to do in these full-length shots (you need a lot of contrast between the subject and the background – which is why people use greenscreens so often – and that mottled beige background did NOT contrast with what I was wearing at all) so without some Pixlr-ing they weren’t all that exciting to me. At first I wasn’t excited by them even after giving them the Pixlr treatment, but they’re starting to grow on me.

morepink7
Can anyone spot the kitten in this photo? I purposely left him in the shot.

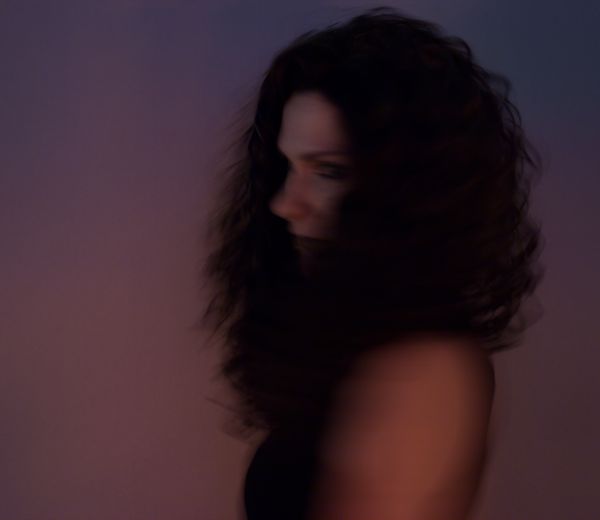
I always try to go easy with the Pixlr effects, because it’s a very popular free program and I don’t want my shots to scream that I used it. I don’t know why this matters to me; I guess I just want the edits to blend well into the shot and not have any one particular filter or effect stand out to people.

morepink6
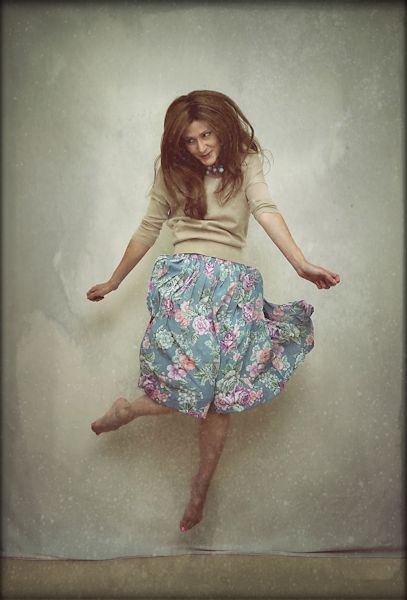
Clearly though, I like the scratchy textures Pixlr offers.

morepink8
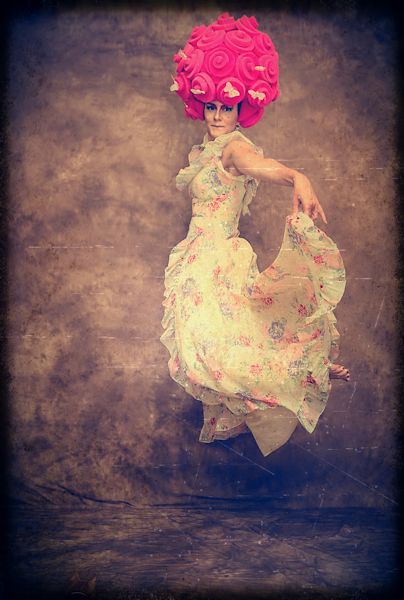
Love the movement of the skirt in this one.

morepink9
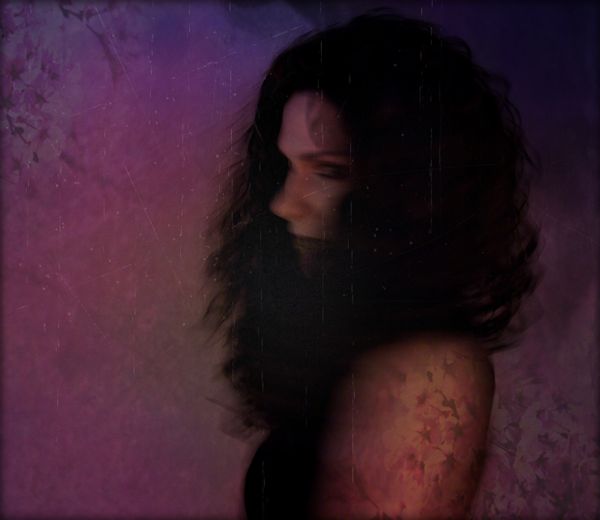
I used some interesting overlays here – one was a space filter, and fire was another. I kept them subtle so you wouldn’t be able to recognize what they are; I think the end result looks rather ghostly.

Photoedits

There’s a great free program called Pixlr that I discovered about a year ago; I used to use it quite a bit but haven’t accessed it much in several months. However, with my recent light and shutter-speed experiments I’ve been getting back into it again, since working with those photos is a different animal from my usual work.

110_Snapseed
Photo pre-Pixlr

Pixlr has an easy user interface and loads of options to add visual interest to photos. I don’t use it to make major adjustments to clarity, contrast, brightness or anything like that since I do that as a RAW file through Photo Ninja, but I love the overlays and borders available there. I use the effects option on occasion as well, but mostly it’s the overlays and borders that I use. And no, Pixlr’s not paying me to say any of this (as if). I just pulled some photos into it this weekend and realized I hadn’t shared it with readers before.

110_Snapseed_pxr
Post-Pixlr; adding a border and overlay

Generally if I edit a photo with Pixlr now, it’s because I feel it’s a little boring and needs something extra to add interest. The downside is you can’t upload TIFF or PSD files so I have to edit them in JPEG format, which I really hate to do – but to use Pixlr it has to be done.

055
Pre-Pixlr; it’s fine but a bit boring

Personally I like using the “efficient” editor, but there is a “playful” one you can download and even put on your phone. The efficient editor allows you to control the intensity of the effects you add as well as move them around the image, so I much prefer that version as I like to disguise the “pixlr-ness” of the overlays as much as possible when I use it.

055_Snapseed
Post-Pixlr; added several overlays and a subtle border

Anyway, it’s a cool little free editor that’s well worth a look. Just click browse, upload a JPEG, and play around for awhile. Hours of fun!