DiNGbat

For the purposes of my 365 project, I’ve decided to utilize my Canon SL1 as much as possible – something I think I’ve mentioned here already – due to the ease of carrying it around. To make things even easier, I keep my pancake lens attached to the SL1 at all times, so I can literally just pick it up and snap away. I’ve put it in a small case along with my little old 430-EX Speedlite and so far, that’s working out fairly well (keeping in mind that I’m only on Day Three). I rather like working within these limitations, as I think it will force me to be even more creative and push me outside my comfort zone, and man, if I was ever uncomfortable using the 40mm before, I sure won’t be after using it every day for a year (although I reserve the right to whip out the 7D when I deem it necessary – I never follow my own rules too closely).

This has also forced me to finally figure out a problem I’ve had with the SL1 since beginning to use it a few months ago. When pulling up my RAW files into PhotoNinja, they all look fine in the viewer, but when I pull a file into the editor to work with it, the color goes all wonky – everything is very pink, and the color corrector doesn’t work as it usually does to fix poor color balance. This never happens when working with files from my 7D, and I’ve been baffled as to what could be going on.

This happens to me frequently – I have a problem that I cannot articulate well enough to get proper answers. I’d tried all sorts of Google searches that pulled up nothing useful, so I knew it was once again a matter of me not having the proper terminology at my disposal to find a solution to my problem. This has happened to me often enough at this point to know that I just have to continue to struggle with the problem until I finally hit upon some word or phrase that starts me on the path to getting answers; this time, the phrase was “color profile.” I don’t even quite know how I hit on it, but hit on it I did, and tonight I went a-Googling and discovered that because my little Rebel is so new, Photo Ninja does not actually support it yet. In other words, it doesn’t have a color profile for RAW files taken with the SL1, so the color information just isn’t there. Hence, wonky color that is difficult to correct.

I tried opening the RAW files in Photoshop instead, but CS5 couldn’t even see them – again, not a problem with RAW files from my 7D (which makes sense, because that’s on old model camera). So after more searching, I discovered a new type of RAW file – the DNG. I found a free Adobe RAW converter that can take files and convert them into DNG ones, which can not only be seen in Photoshop, but can be better dealt with in Photo Ninja also (when I pulled a DNG file from the SL1 into the editor, the color was much more true to the file SOOC). So now I know, whenever I download files to my computer from my SL1, I must take the extra step of converting them to DNG – at least until Photo Ninja has an update that includes a profile for it, and who knows if that will ever happen.

So who knew – a whole new snafu to grapple with when buying a camera that’s new to the market. I tell ya, it’s always something with this digital camera stuff. Anyway, here’s Day Three’s photo. Allow me to explain:

Day3

As I mentioned in yesterday’s post, I went up to the school Saturday to clear out my old office so when the new counselor shows up, it does not appear to be occupied by someone else. While I was there, I checked out the progress on my new classroom for the first time, and I must admit I got a bit excited. Because our school is small and the student body has outgrown it, a room had to be created for the learning program I am going to help facilitate as the classroom teacher this year. A large meeting area was cut in half and this wall was put up to create our space, and well, here I am celebrating it.

I used my SL1’s ten-second timer to get the shot, and as a bonus I unknowingly color-coordinated my outfit to the unpainted walls, which gave the shot a much more professional look than I expected. The floor was very sawdust-y and slippery so I did not attempt a jump shot – plus I’ve not tested out the SL1 for jumps all that much and wasn’t sure how to pull one off; I had a lot to do that day so I didn’t have the time or inclination to get all sweaty taking 50 jump shots while trying to figure the settings out. I’ve already figured out enough for one day anyway!

Advertisement

Antique Technique

Thursday morning I went to the antique district up the road from our neighborhood to seek out some new end tables for our bedroom. I know I mentioned the new carpet we are getting this summer already, but while clearing out the house to prepare for that we decided we also needed to get a big dresser for our bedroom (we’ve been using the same old hand-me-down furniture ever since we got married because neither one of us care much for decorating and generally don’t take it into consideration). We have a lovely new dresser coming Monday, but we didn’t like the idea of pairing it with the same old cheap, crummy end tables we had on either side of our bed; we also didn’t much care for  the idea of paying over $300 per table for new ones, like the furniture showroom where we ordered the dresser wanted us to do. I mentioned to the salesman, in fact, that I was going to hit up  antique stores for tables and he sniffed at me, “You’ll have to go to Salvation Army to find a decent end table for under $200.” Well, folks, allow me to share with you a quick picture of my non-Salvation Army end tables I found for a whopping $50 each:

antiques5

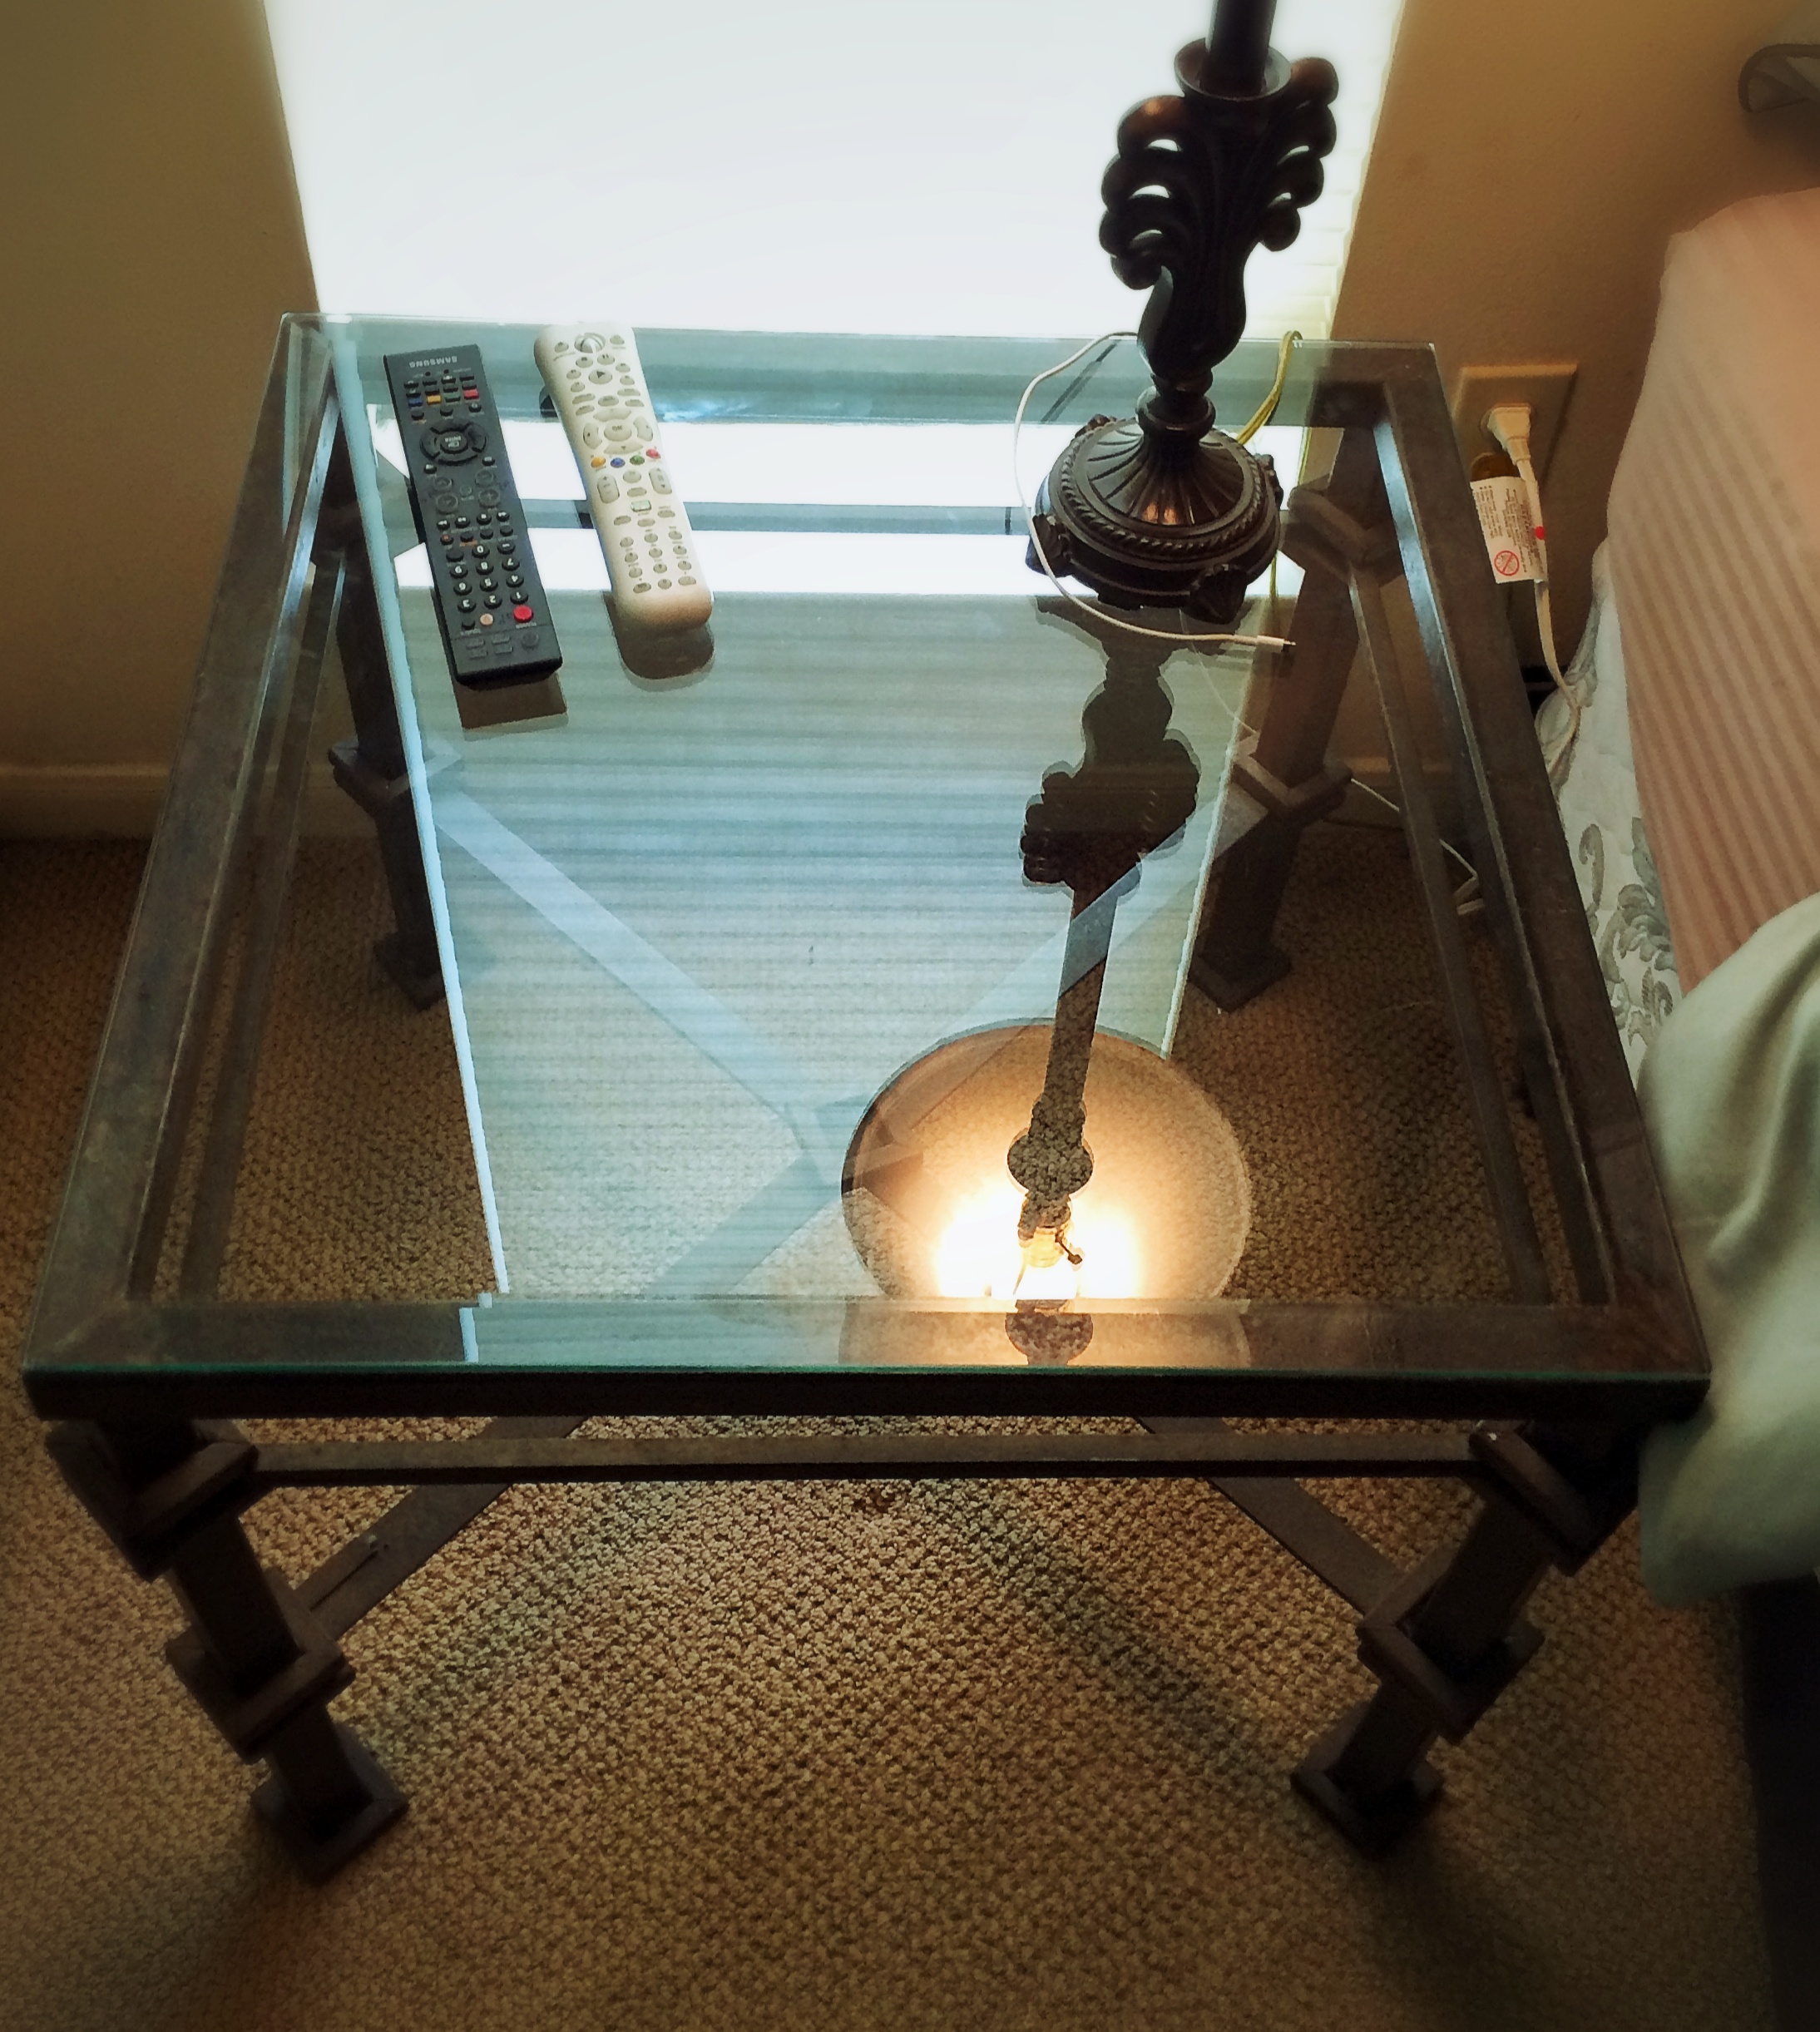
I think the showroom had almost the exact same table for $300. These are not antiques, but were found in an antique store nonetheless. I actually like that they are new because they aren’t rickety as hell like a lot of the antique ones were. Moving on.

antiques1_Snapseed
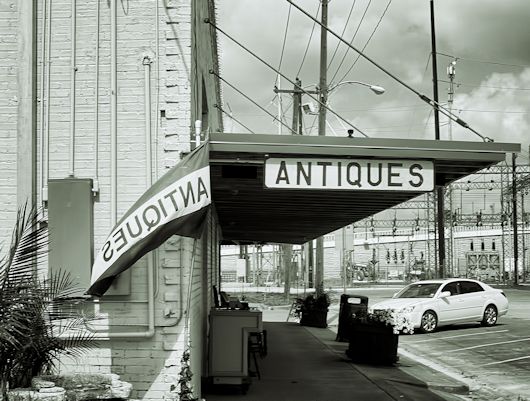
I stood there quite awhile trying to get the flag to mirror the sign. Got it eventually.

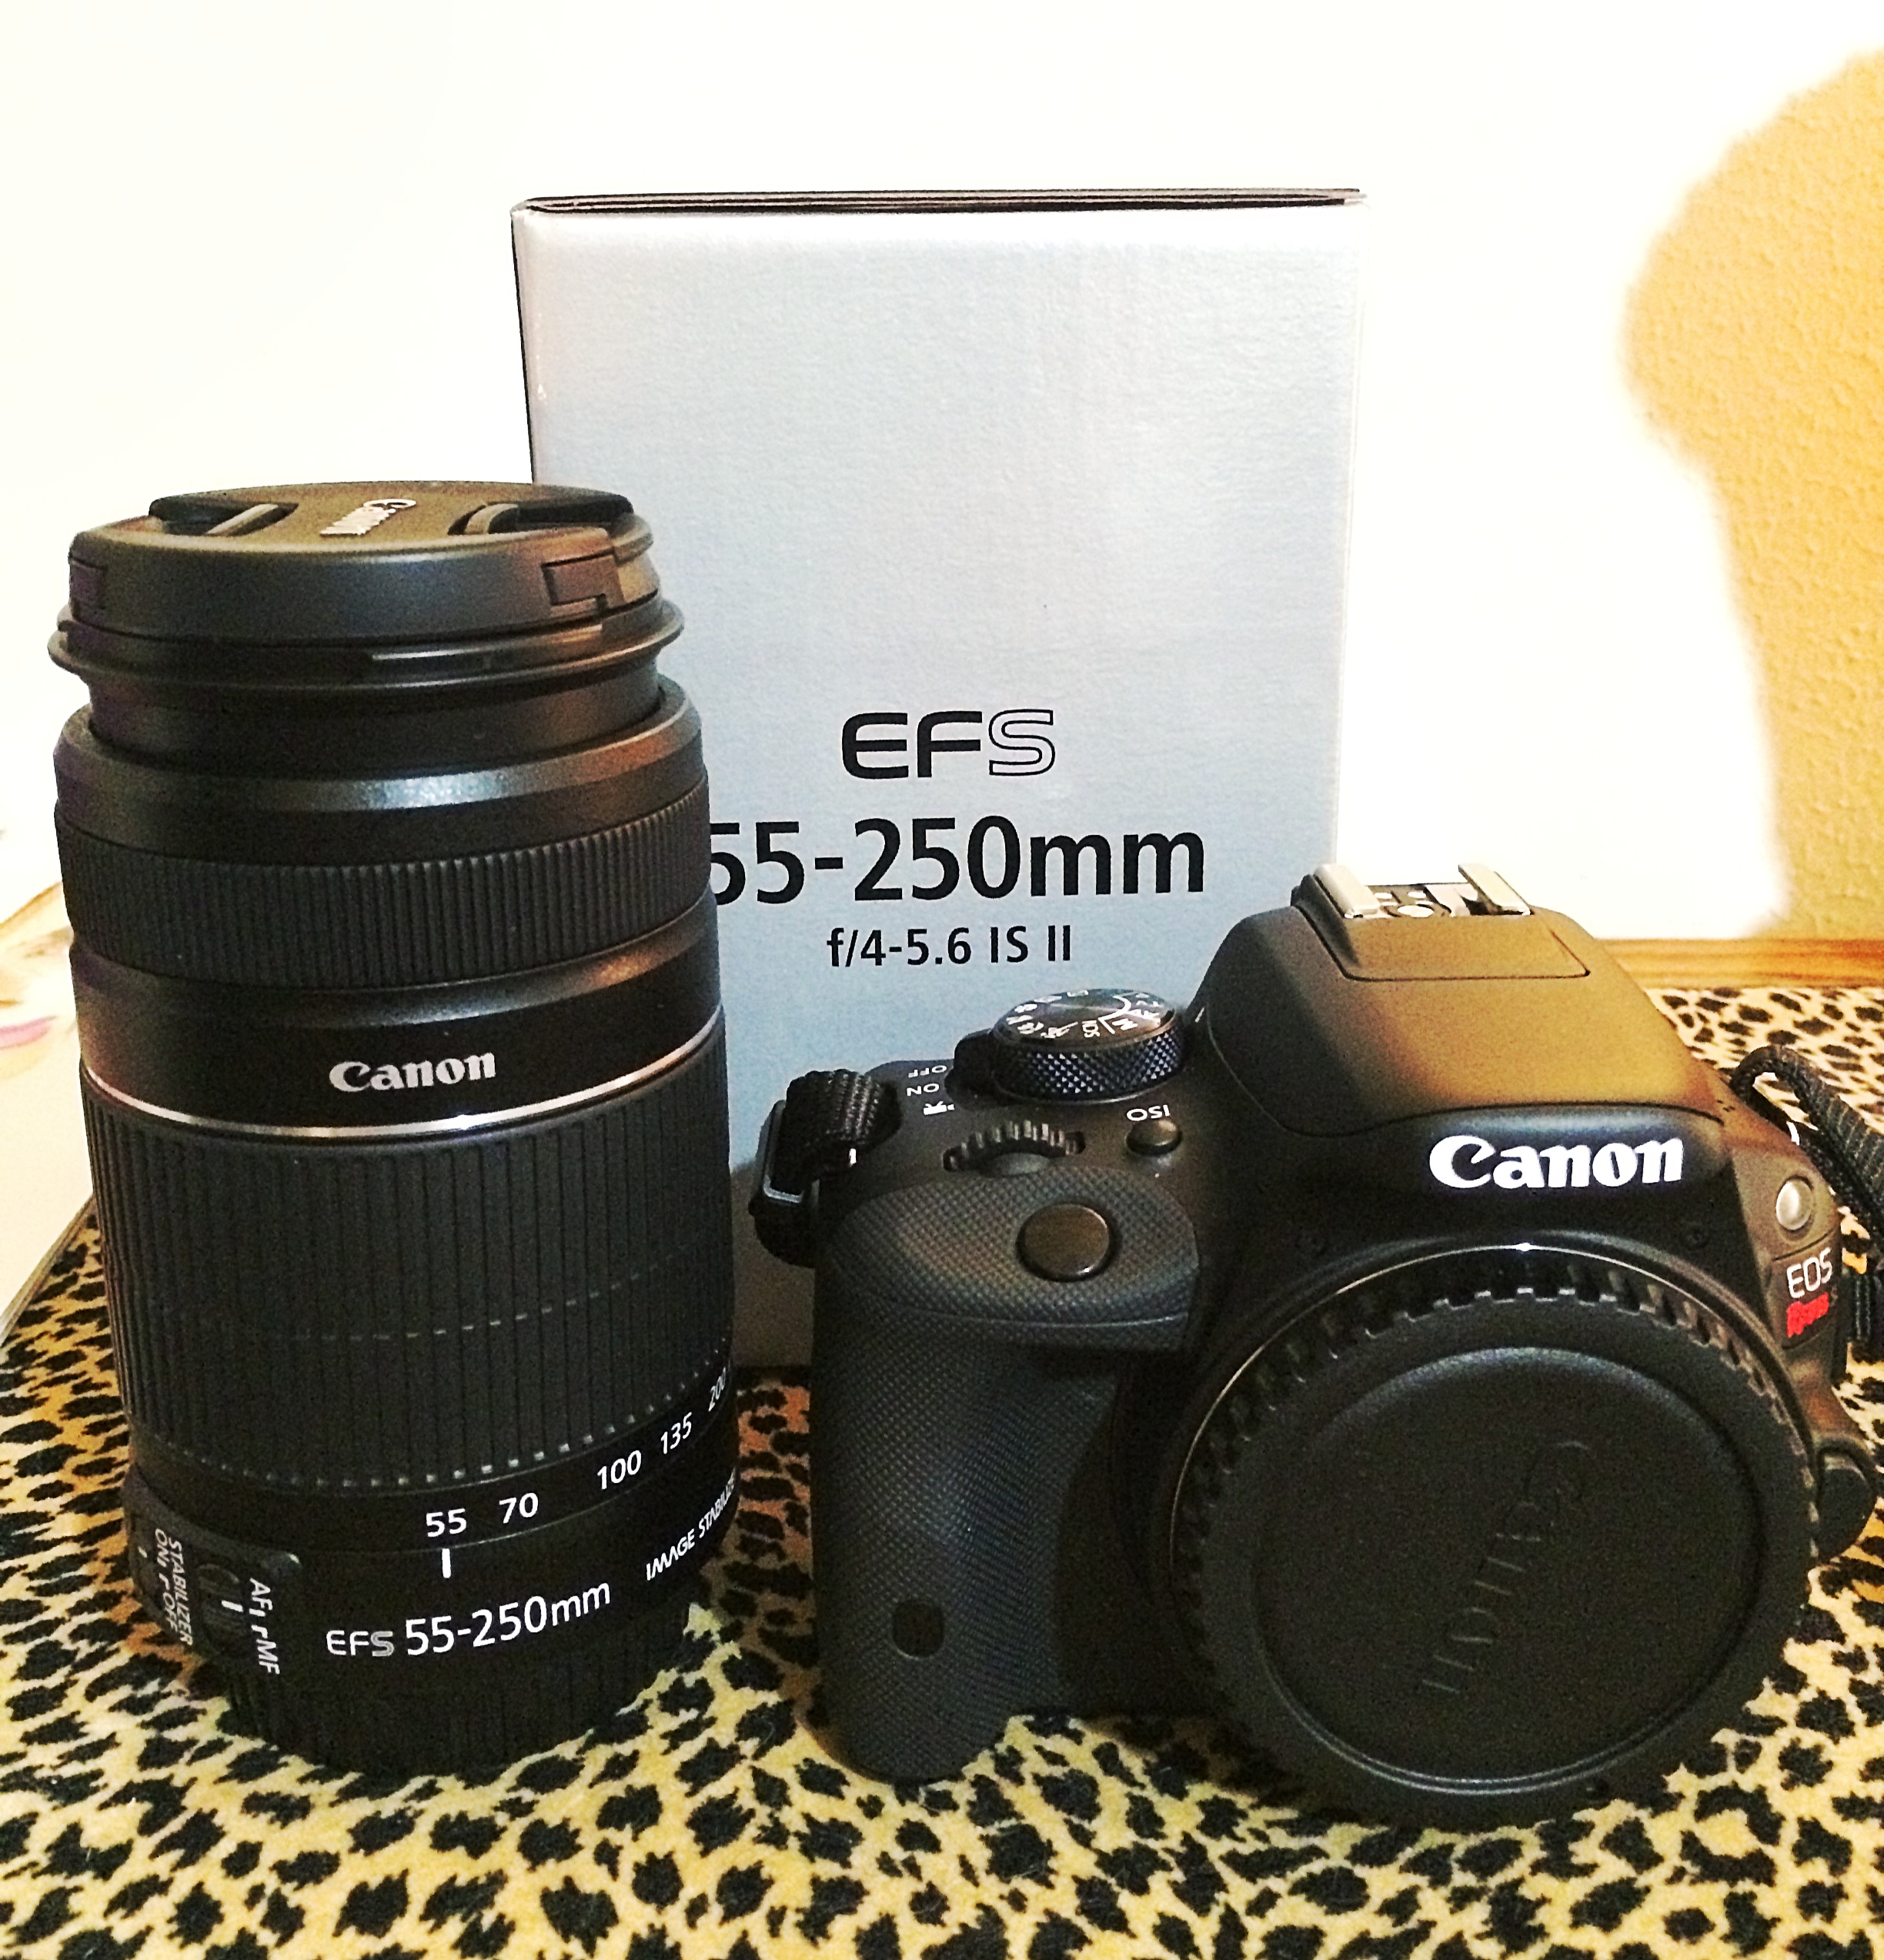
When I headed out Thursday morning to table-hunt, I threw my Canon SL1 with the 40mm lens attached into my purse with the intention to shoot some street stuff while I was out and about. I’ve been reading about the 40mm lens, and walkabout photography in general, and I decided to follow some of the advice I’ve received: I had a fixed shutter speed and ISO setting on the camera before heading out (although I did lower the ISO when shooting outside then bump it up a little when heading into a store), and I made a conscious decision to approach the focal length differently by trying to appreciate its simplicity. And, I shot in monochrome so I wouldn’t be worried about color. Never having shot in monochrome before, I didn’t realize that when I pulled the RAW files up on my computer they WOULD be in color – yeah, that’s how novice I still am at certain things. I went ahead and converted some of them back into monochrome anyway because the color was, in fact, not that great with the light already blasting everything out by 11:00 AM.
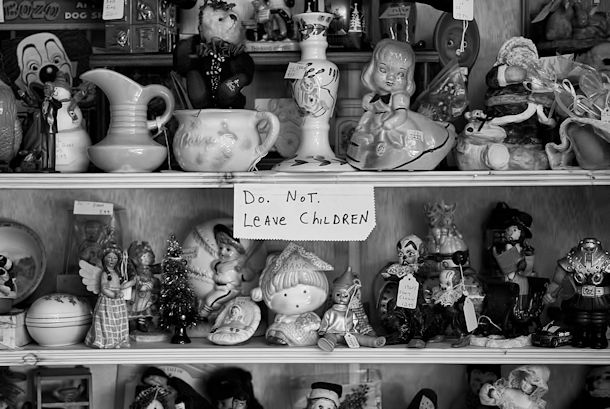
antiques3_Snapseed
Good advice

I took about 150 pictures, but most of them, quite honestly, bore me. I am not much of a street photographer, so this is probably always going to happen when I take these sorts of photos, Plus, I’ve shot this antique district several times before and over the years it hasn’t changed much, so it doesn’t really inspire me (it’s only a few blocks, and once you’ve taken a photo of the old buildings and Coca-Cola ads painted on the cracked brick walls, well, there’s not much else to shoot). Add in that I was on a specific shopping mission, and the photography came in pretty low on  my list of priorities for the day. Still, I had fun shooting the photos I did take, and the SL1 was a dream to deal with – so light I could easily shoot while holding the thing with one hand, and once I accepted the fairly boring perspective of the 40mm I enjoyed the experience. It’s a great little camera, and with that pancake lens on it in particular it’s a breeze to carry around. My only complaint is that the focal points are barely visible; on my 7D the points are bright red and clear and I can easily see where I am focused through the viewfinder, but on the SL1 I cannot see them at all because the red is so faint it disappears into the scene I’m trying to focus on. It’s a minor quibble, but it is irritating, and I’m wondering if there’s a way visually to brighten the focal points so I can see them better. I’ll have to check into that. What can I say – I’m an autofocus kinda gal.
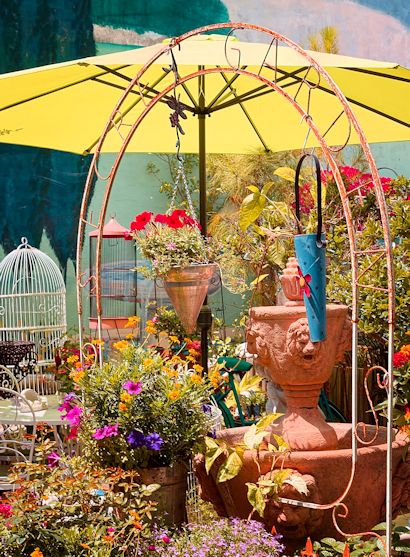
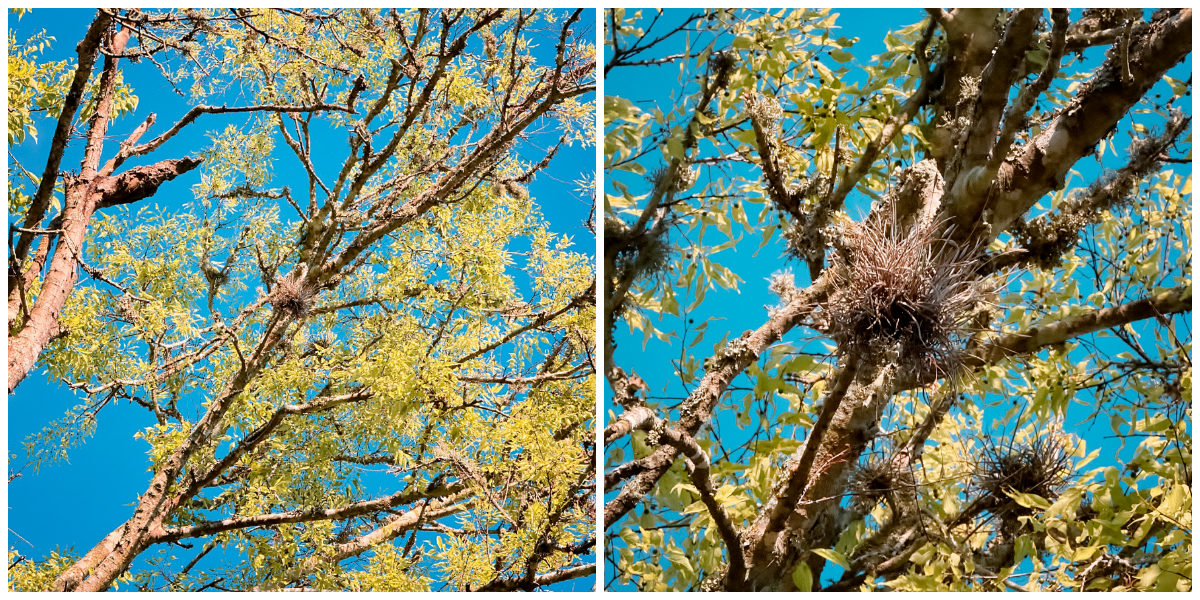
antiques4
Antique garden shop

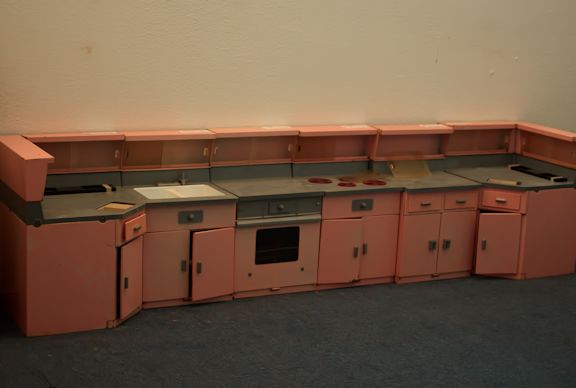
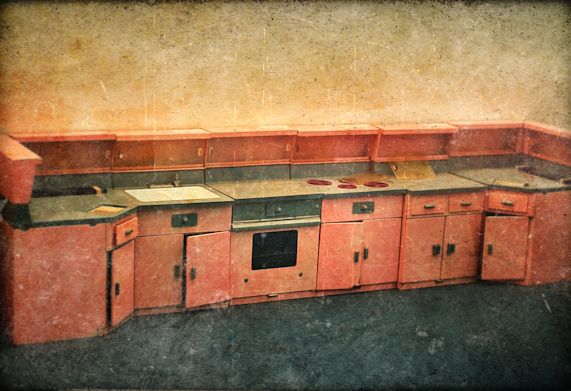
This next shot is a good example of how random, spontaneous scenes get the better of me when doing street-type photography. The photo is of a small doll’s kitchen set I found sitting on the floor of one of the antique shops I visited; there was a lot of junk sitting around it, but none of it was very well-placed to show the scale of the kitchenette. I probably should have moved things around to set up a better shot, but I just didn’t for whatever reason. I tend to feel rushed in these situations, especially when shooting inside a store where I am always concerned someone might not like what I am doing, and I rarely stop to frame things well much less actually set up a shot. So, I ended up with a shot of this amazing doll kitchen, but nothing to really indicate that it’s tiny:

antiques2

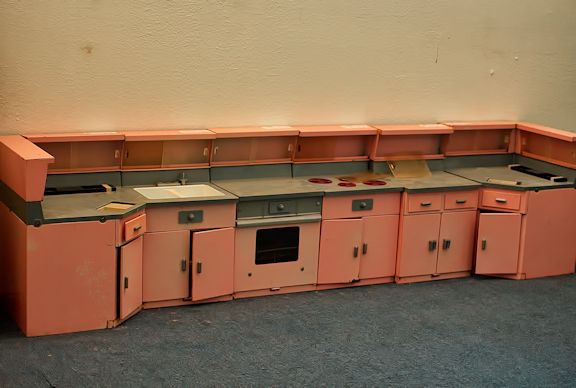
Another problem I often run up against in situations like this is framing; this would have been much better if I’d gotten the shot head-on rather than being off to the side, but again, that would have involved moving a lot of stuff around because, even though you can’t tell, there was junk everywhere that would have gotten in the way from any other angle. Anyway, I still liked how sad and decrepit this little mini kitchen looked, so I decided to mess with it and try to make it more interesting. First step was to run it through Snapseed to give it more color and detail:

antiques2_Snapseed

Then I decided to try and make the wall behind the set look more dingy and old; I used a texture layer in Paint Shop Pro to do that:

antiques2a_Snapseed

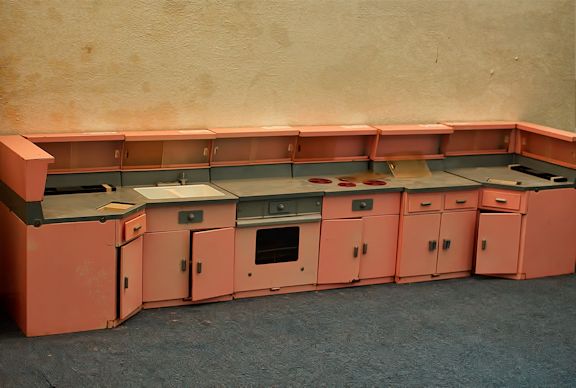
Then I decided the texture of the carpet was distracting, so I used Photoshop to smooth it out:

antiques2ab_Snapseed

Then I added some vignetting for a little extra visual interest:

antiques2abc_Snapseed_Snapseed

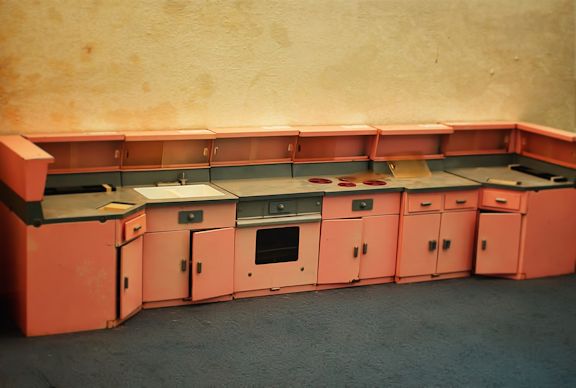
Buuuuut I decided I still wasn’t done. Now, I may have overdone it here, but I pulled the photo into Pixlr and gave it a go. Here’s the final result:

antiques2abc_Snapseed_Snapseed_pxr

Thank G-d for Pixlr, seriously. I have a few more shots I may process and share later, but that’s it for now. Have a great Friday everyone!

Lens Appeal

I’m not going to go on about my new Canon SL1 again, I’ll just share a few photos to show pics with the 55-250mm I bought for it.

zoomtest4_Snapseed

This is an EF-S lens, so I thought meant I wouldn’t be able to use it with my 7D, but apparently I can. I’m not sure why I would do that, though, when I already have the L-series telephoto to use with it; I guess it could come in handy if I need a zoom but the weight of the L-series becomes too heavy. Other than that, the real reason for this one was to have a zoom lens for the SL1 – it definitely adds weight but overall the Rebel still feels light with it on.

Photo May 29, 6 50 48 PM_Snapseed

I have to agree with people who comment on the cheap-ish feel of this lens, but once I just put the thing on the camera and start shooting with it I can get over it. It only put me out $180 so what else should I expect but lots of plastic, which on the upside keeps the weight down. And it took pretty nice photos as well.

zoomtest5_Snapseed

Since all I did was wander around the backyard again, I don’t have a whole lot of thrilling pics to share. I mostly just wanted to test it out and see if it would work – which it will. The last photo I’ll share is one showing the maximum zoom, I took it of a bird’s nest (or something, I think it’s a bird’s nest but what the hell do I know about nature) in one of our front yard trees; the shot on the left is at 55mm while on the right the lens is at 250:

zoomcollage
Not bad!

So there it is – the new toy is fully loaded and ready to roar. I took it up to the school again today and used it to shoot some portraits of our head football coach, who won the Coach of the Year award for our school’s division. It performed beautifully, and if I’d remembered to send myself a copy of the picture I’d share it with you here, but I did not. So you’ll have to trust me when I say it took fabulous shots.

The students’ last day of school was today, so tomorrow will be interesting; just all of us winding down and transitioning into summer. There’s a faculty party tomorrow night but I never, ever attend social events at the conclusion of the school year. I’m already done, and prefer to go straight home after the last day and rest rather than spend yet more time talking to people with whom I work. I’m just never in the mood for it. So hopefully I can get some more pictures done soon – I’m wanting to get dressed up and levitate again, but just haven’t had the time these past few weeks. I bought a few vintage pieces I’d like to try on and try out, but they may have to wait awhile longer.

Office Shots

I took my new camera up to school today to take pictures of our head coach, who won an award as coach of the year in our division, but then the day got so crazy I didn’t get a chance to do it. Once things finally did die down, I remembered that I had the camera with me, so I attached my 50mm (which I’d also brought along) and wandered over to the office of a friend of mine, who is the admissions director for the school. She’s also an artist and art teacher, so she has loads of stuff all over her space that makes for interesting photographs.

officetest1_Snapseed
Believe it or not, this is a pen.

I keep waiting to be disappointed by this camera (and I know I’ve only had it two days), but so far I’m just not. With the basic stuff I did today it performed quite well.

officetest2_Snapseed

I was screwing around with ISO settings and other things right before taking these photos, and unfortunately I forgot to switch them back when I was done, so the pics are a little grainy but that’s user error (I had the ISO set to 1600 and should have had it much lower). Even at a high ISO though, they look pretty good. I still think the color comes out a bit dull but I can fix that in editing.

officetest4_Snapseed

I played around with the focus settings a bit and this time, with the 50mm the focus was fast and sharper than when I used it the night before. I’d tell you what I did but being me, I can’t remember and didn’t really understand what I was doing anyway.

officetest5_Snapseed

Kind of amazing all this stuff is in one office, isn’t it?

officetest6_Snapseed

I also found white balance to be tricky once again; I didn’t have enough light to get the ExpoDisc to work, and the AWB confuses me. When editing the RAW files they just didn’t function as I am used to, and I could never tell if I got the balance right. I messed with it in the first few shots, then said to hell with it and left the color as it was SOOC. Still gotta work on that.

officetest7_Snapseed

I love this last one; it came out super-sharp:

officetest8_Snapseed

So, yeah. I’ll try not to turn this blog into the I Love My Canon SL1! show, but I am getting the telephoto lens in soon, so I’ll have to share the results of that at least. Who knows – maybe that’s where something here will finally go amiss. I could sure see it happening. But in the end, the lenses I already own are going to work out fine.