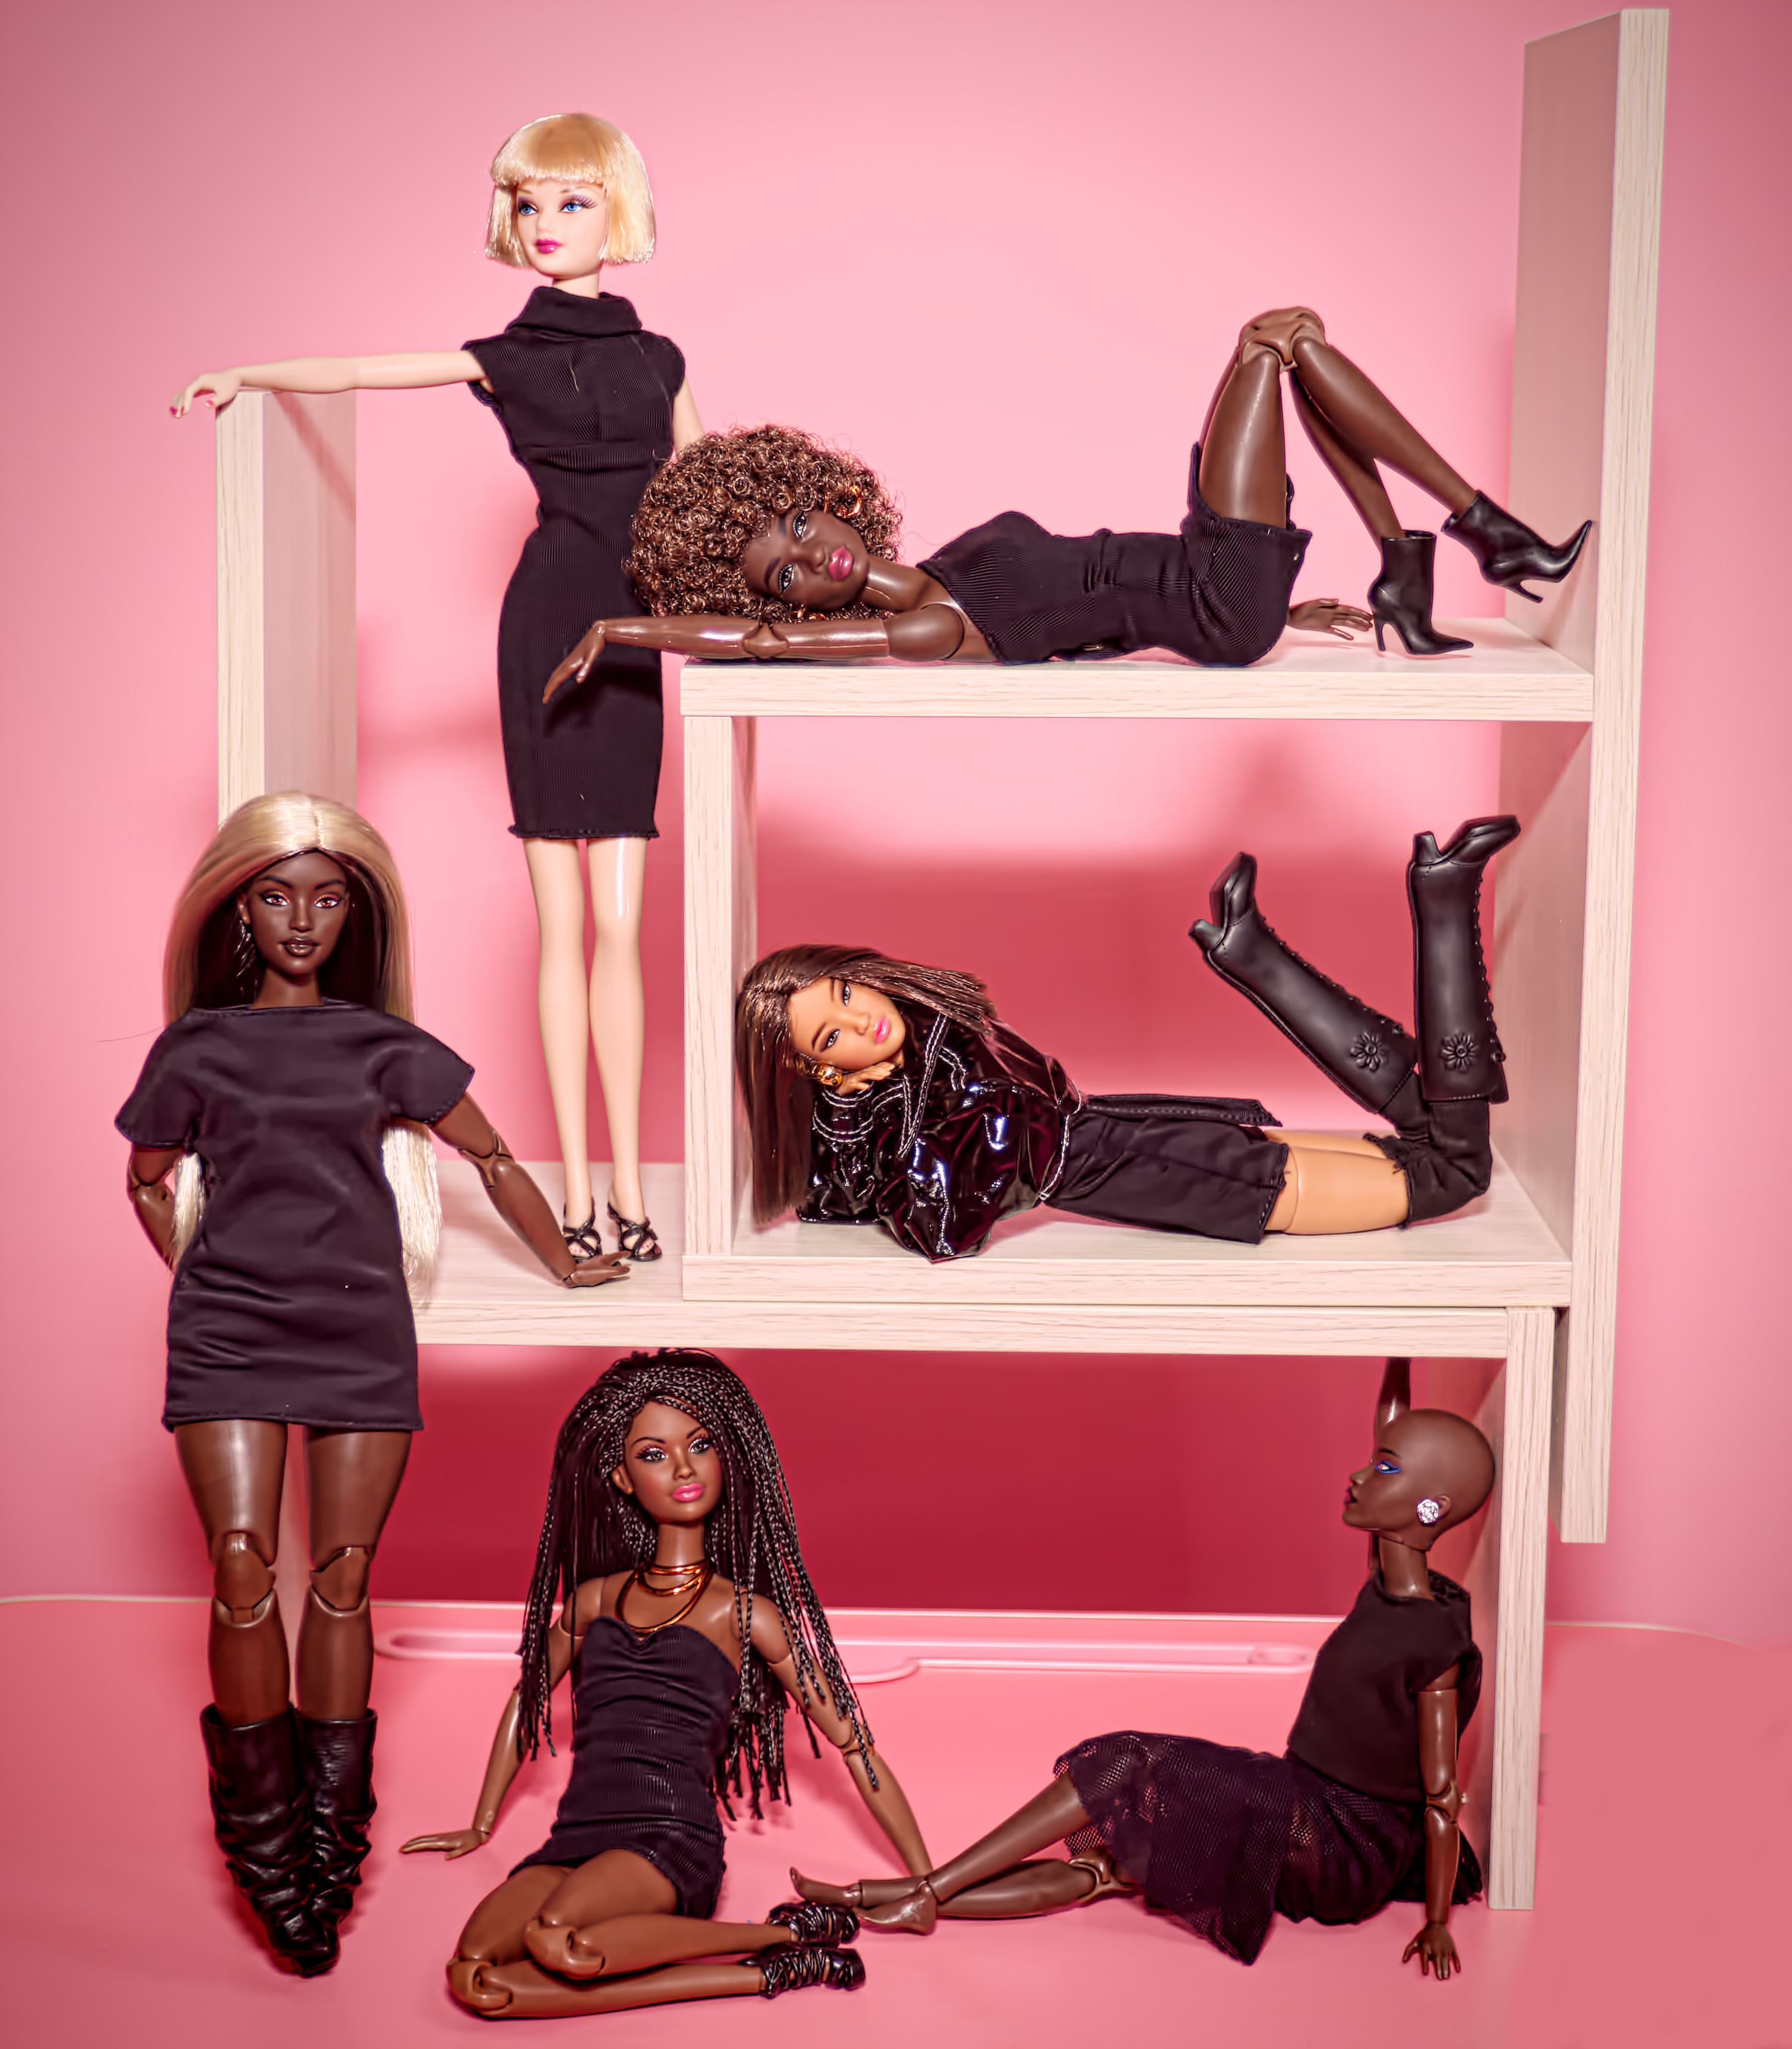
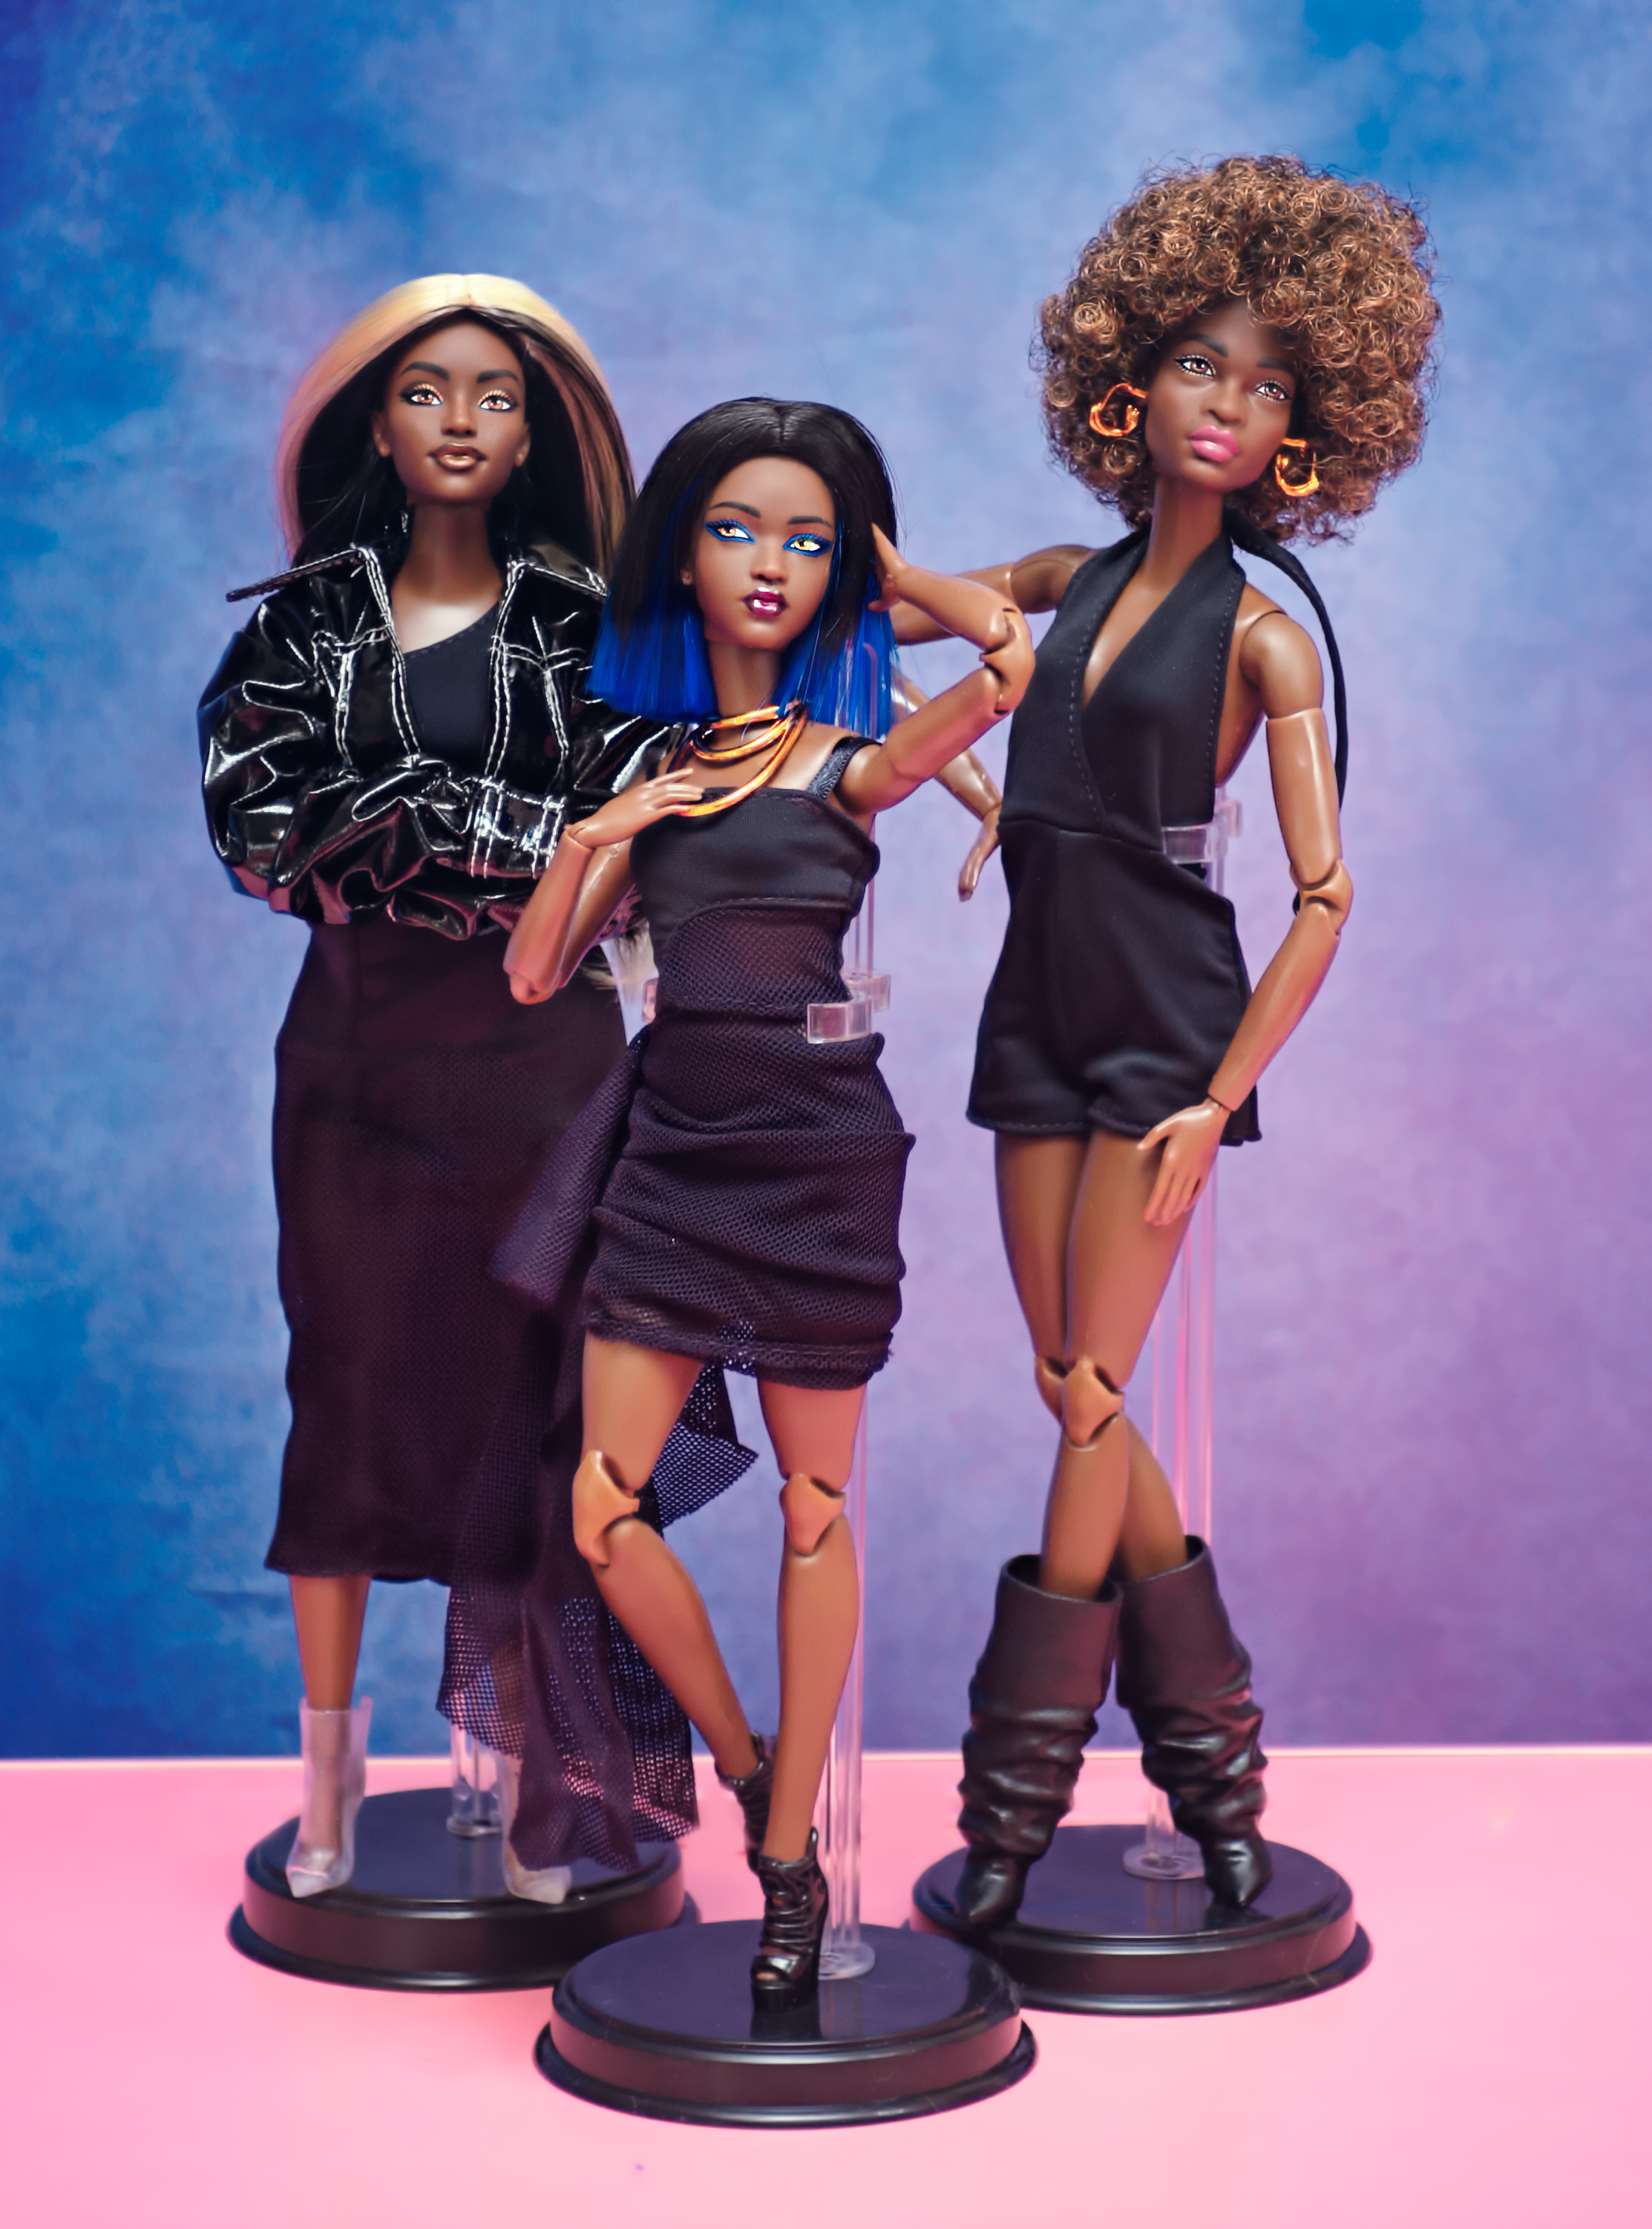
My next photoshoot with my You Create Kit #1 Barbies was an improvement over the previous one. I actually didn’t mind the time it took to set these up for some reason; I guess I am getting used to the differences between other types of photography and doll photography. I’d also like to start taking photos of Nacogdoches and East Texas, but that’s a post for another time – I haven’t started doing it yet so we’ll see how that goes.
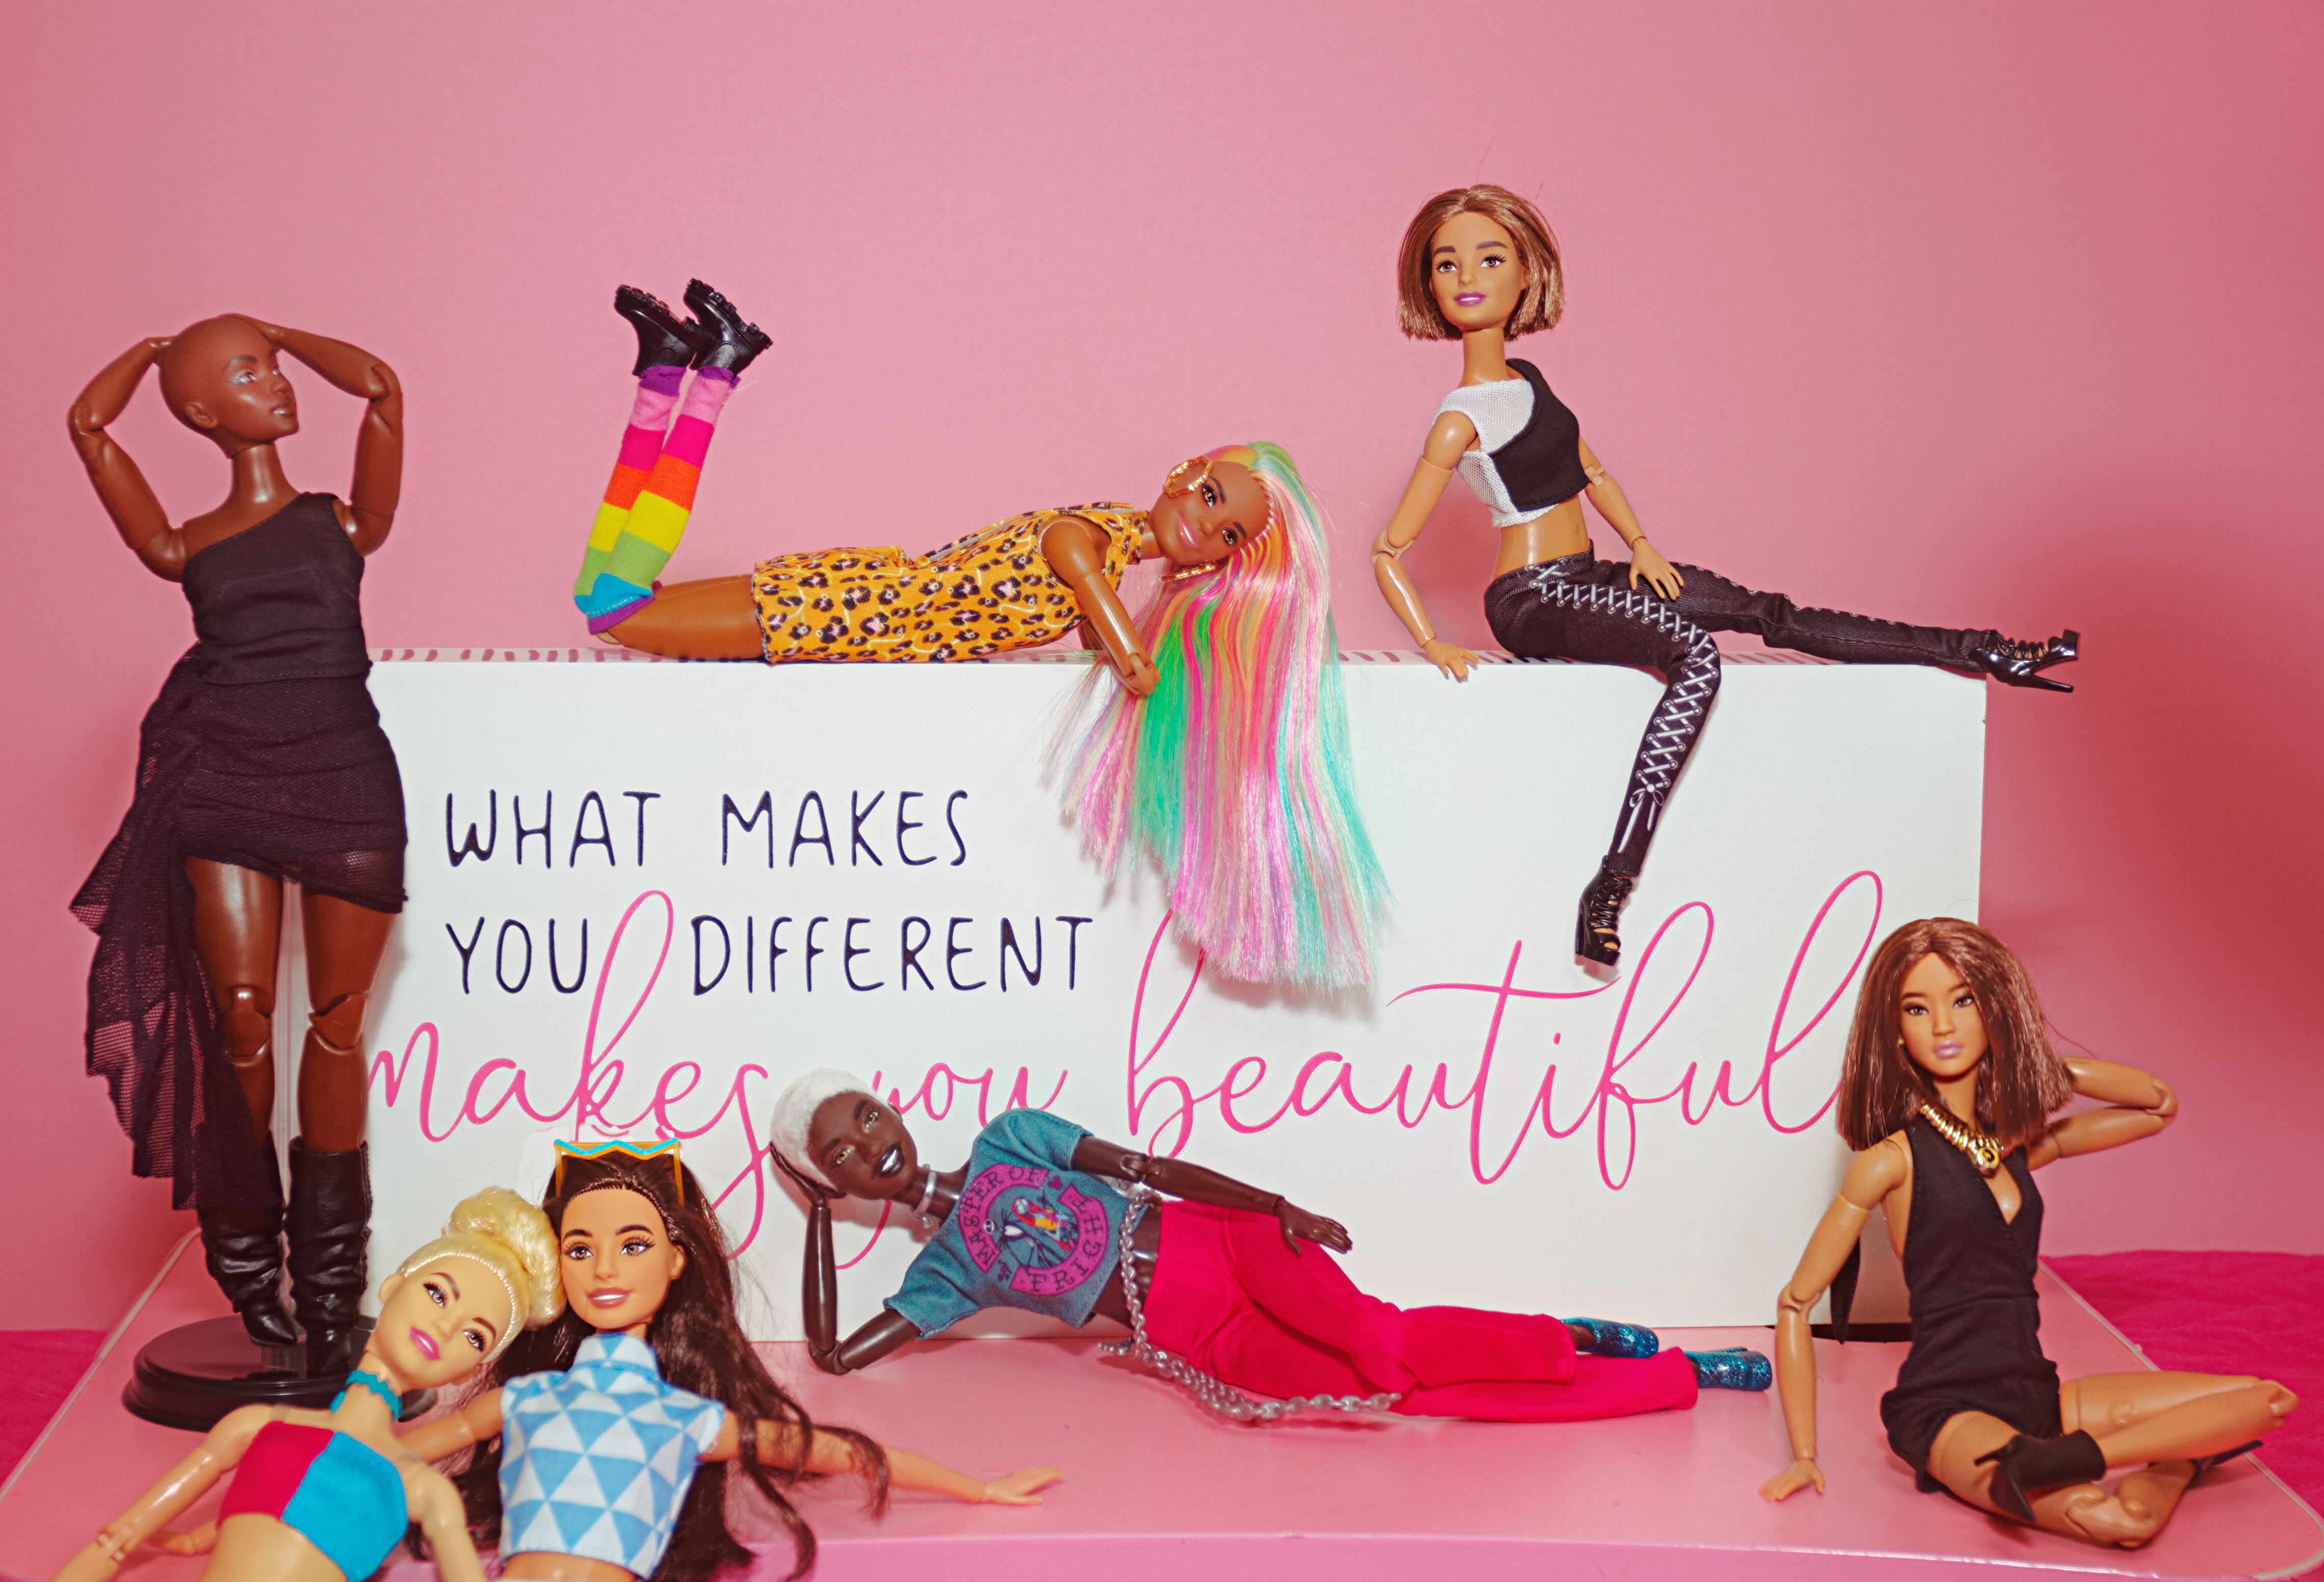
This sign was hanging up in my bathroom but it fell off the wall, so I figured what the hell, let’s take pictures of it! I don’t think it totally works because there’s a lack of diversity among these dolls – there are different ethnicities represented, and one curvy doll, but for the message of the sign I think there should have been more variety for it to be truly effective. Mattel makes Barbies in wheelchairs, with prosthetic legs, vitiligo, and Down’s Syndrome – just to name a few – and the inclusion of such dolls would have really worked better. But I worked with what I had.
It was a happy accident that the lighting turned out so cool in these shots. I tried putting a light bender on my external flash and the results were better than I would have expected! Lots of nice shadows to play with.
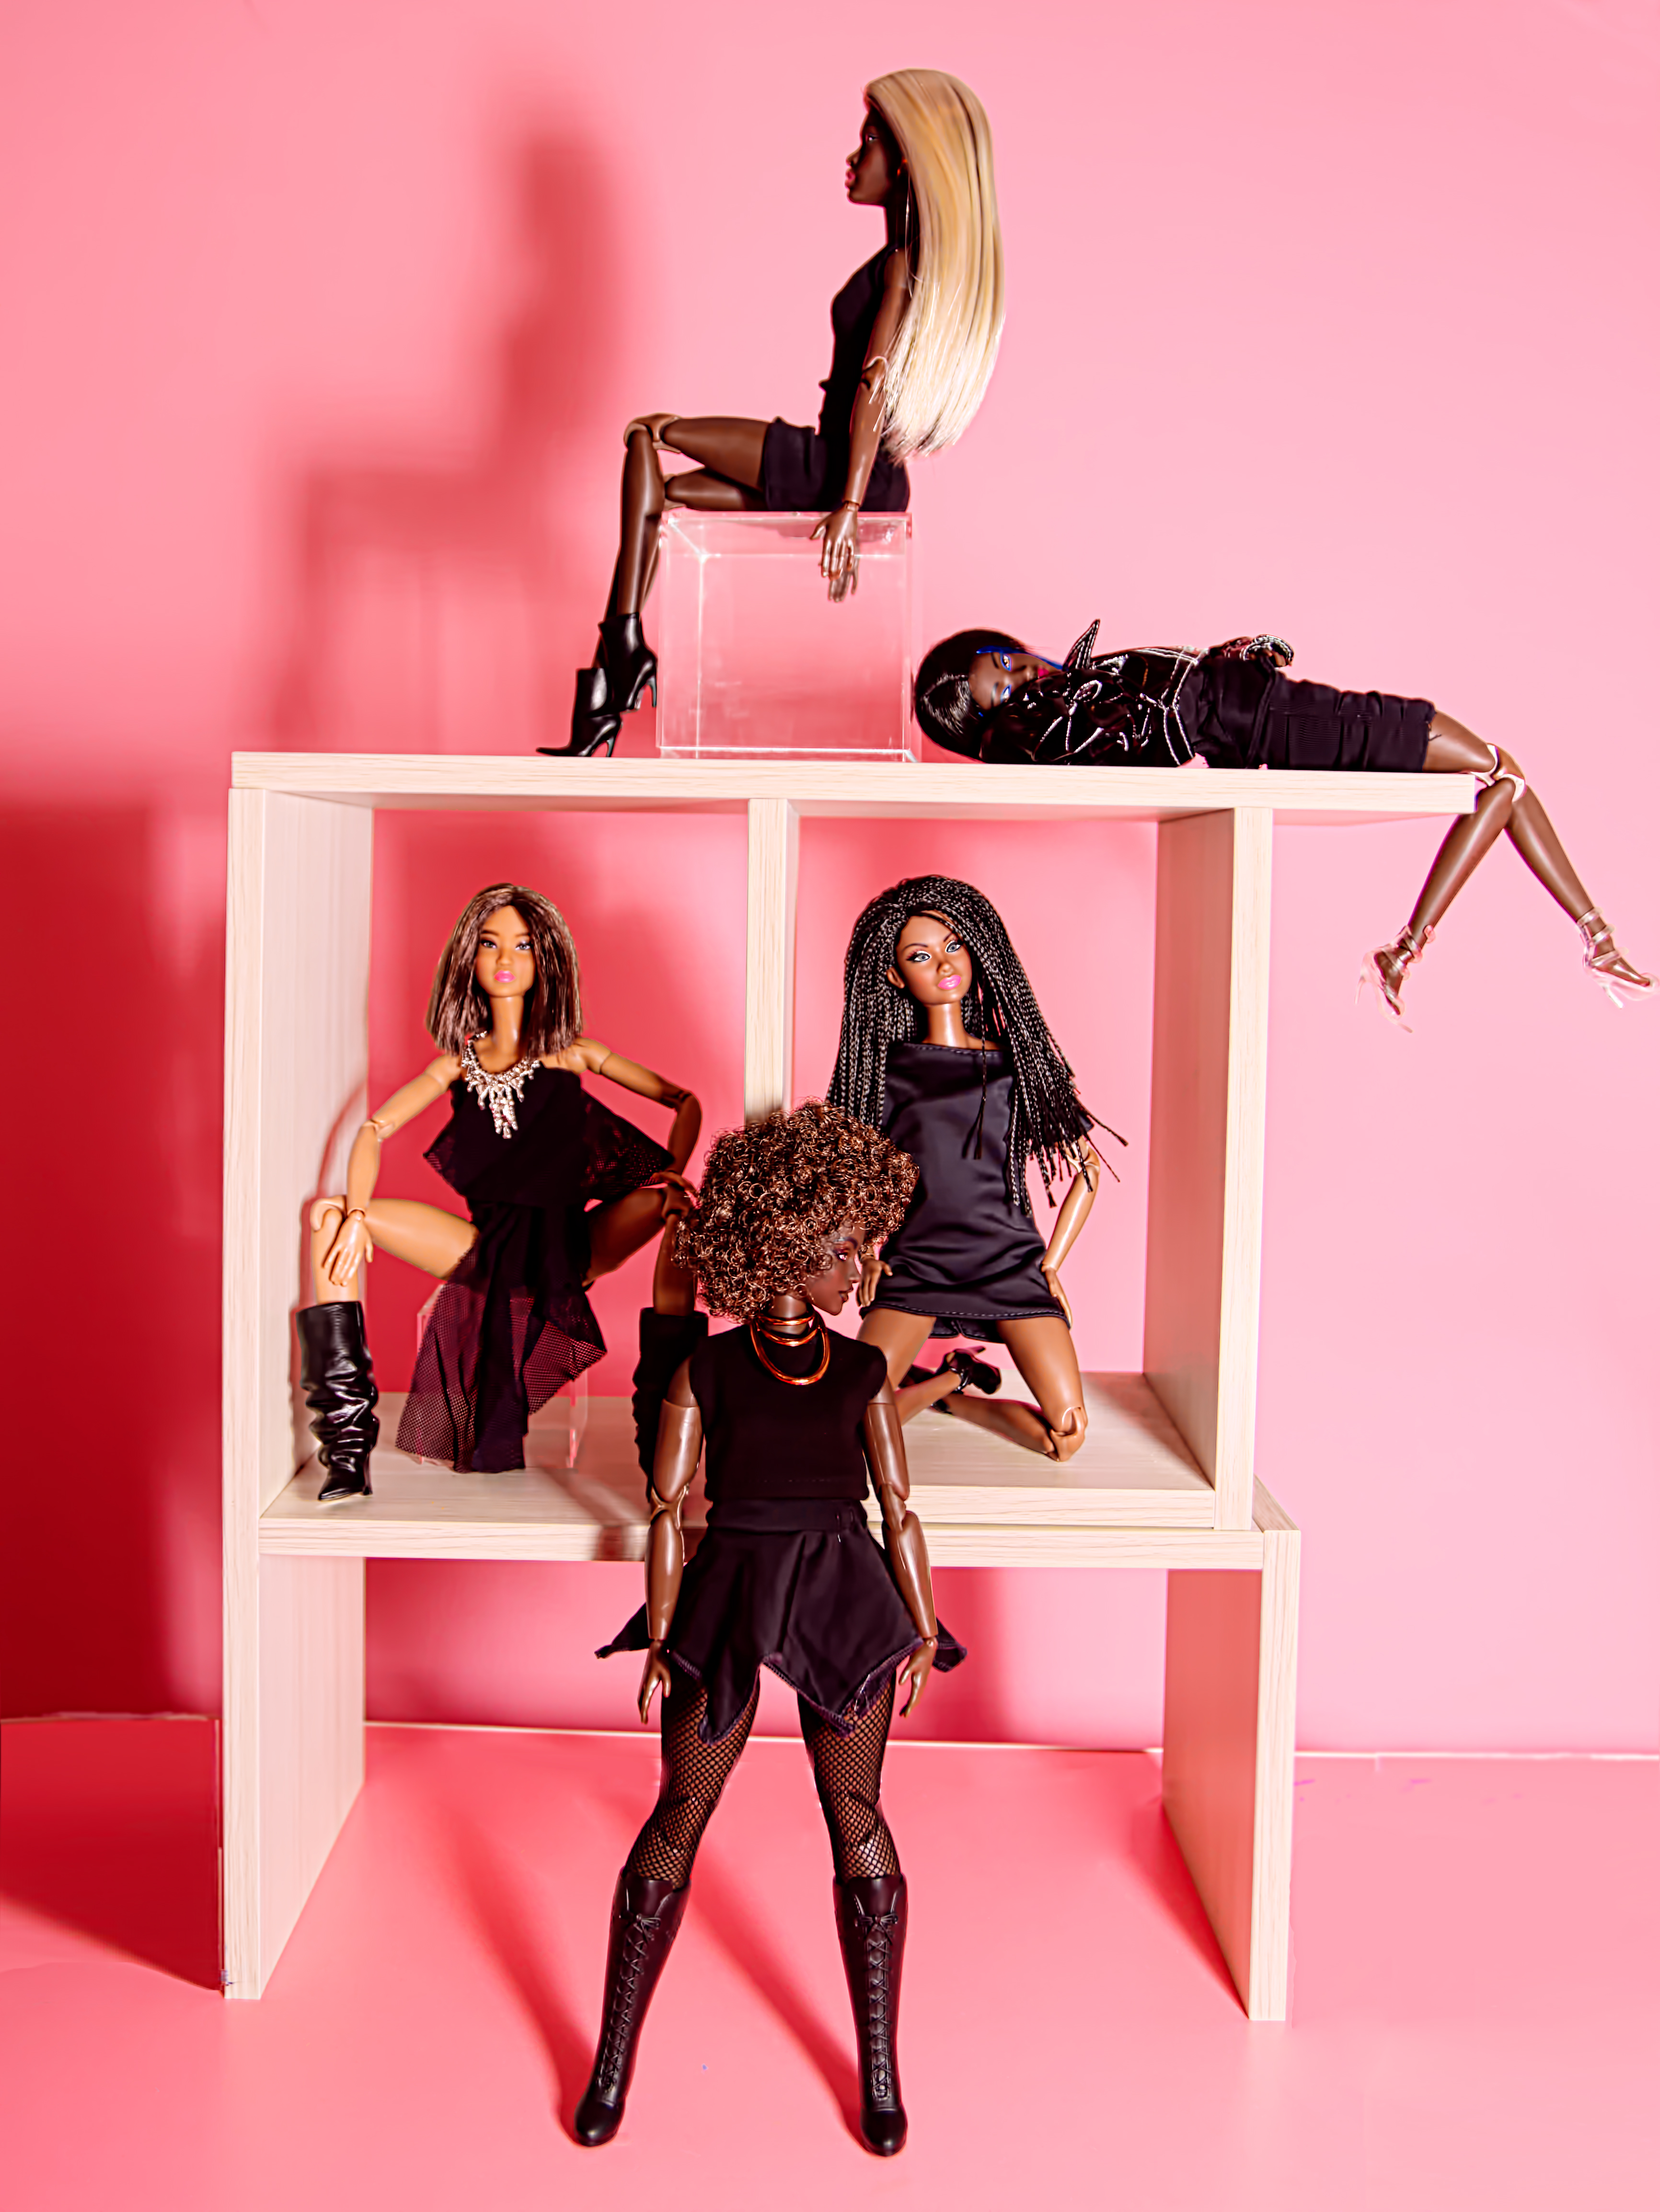
When I first started photographing dolls, the stands made me crazy .I really thought I had to find a way to edit them out of shots, which is tedious and imperfect. But now I include them if they need to be included without giving it a second thought. However, I’ve also gotten better at finding ways to pose dolls without using stands, too. It did take forever to get the doll with the short bob and scrunch boots to stay leaned against the shelf wall though; she fell over every time I messed with any other part of the set. The “set,” by the way, is a collection of table shelving I got off of Amazon that can be put together in different ways. Kind of makes me think of a Bob Fosse “All That Jazz” set.
Look ma – no stands!
I’ve been working on re-bodying some of my original Barbie Basics, which came on non-articulated bodies. As much as I love their original body molds, they just don’t work for photos, so I’ve taken some of my dolls that are more “character” based (like my Barbie movie ones) and swapped out their articulated bodies with the Basics from the early 00’s. I tend to use Barbies with less recognizable face molds in my photos, so the ones based on familiar characters don’t need to be as posable since they’re just going to stand on a shelf for the most part. Also, I have a few collector Barbies that come clothed in pieces that can’t be removed, so they don’t really need articulation, and I re-body those as well.
Once I got the setup going, it was quite fun to move all the dolls around into different positions (as you can see LOL) and the Basics clothes being so coordinated and interchangeable made changing up their outfits a breeze. So even though at first I was less than thrilled with this line, the kit concept changed my mind on them completely. I’ve since purchased one other, which leaves me three more to go – the only one I probably won’t get is the petite one from this release; I really dislike her outfit and I’m not thrilled with her face mold either.
She looks better in the out-of-box photos I’ve seen posted on Reddit and Amazon reviews, but I still think I’ll give her a pass to save some money. I don’t attempt to collect an entire set of any release as it’s too expensive, and there’s always at least one I don’t want. For my money, choosing to dress a petite doll in a maxi skirt was a big fail here, and even though I can use the maxi dress elsewhere, I still don’t like the doll enough to bother with it. The other three, though, I still want to acquire.
I just got this one in yesterday, and I have to say these curvy dolls are growing on me – especially now that more clothes fit them. I wasn’t super-impressed with her after seeing the stock photos, but real pictures of her face changed my mind. She’s really gorgeous.
This is a tall body, and her skin tone should match the three dolls from my kit, which makes her head easily swappable with the others. Yay!
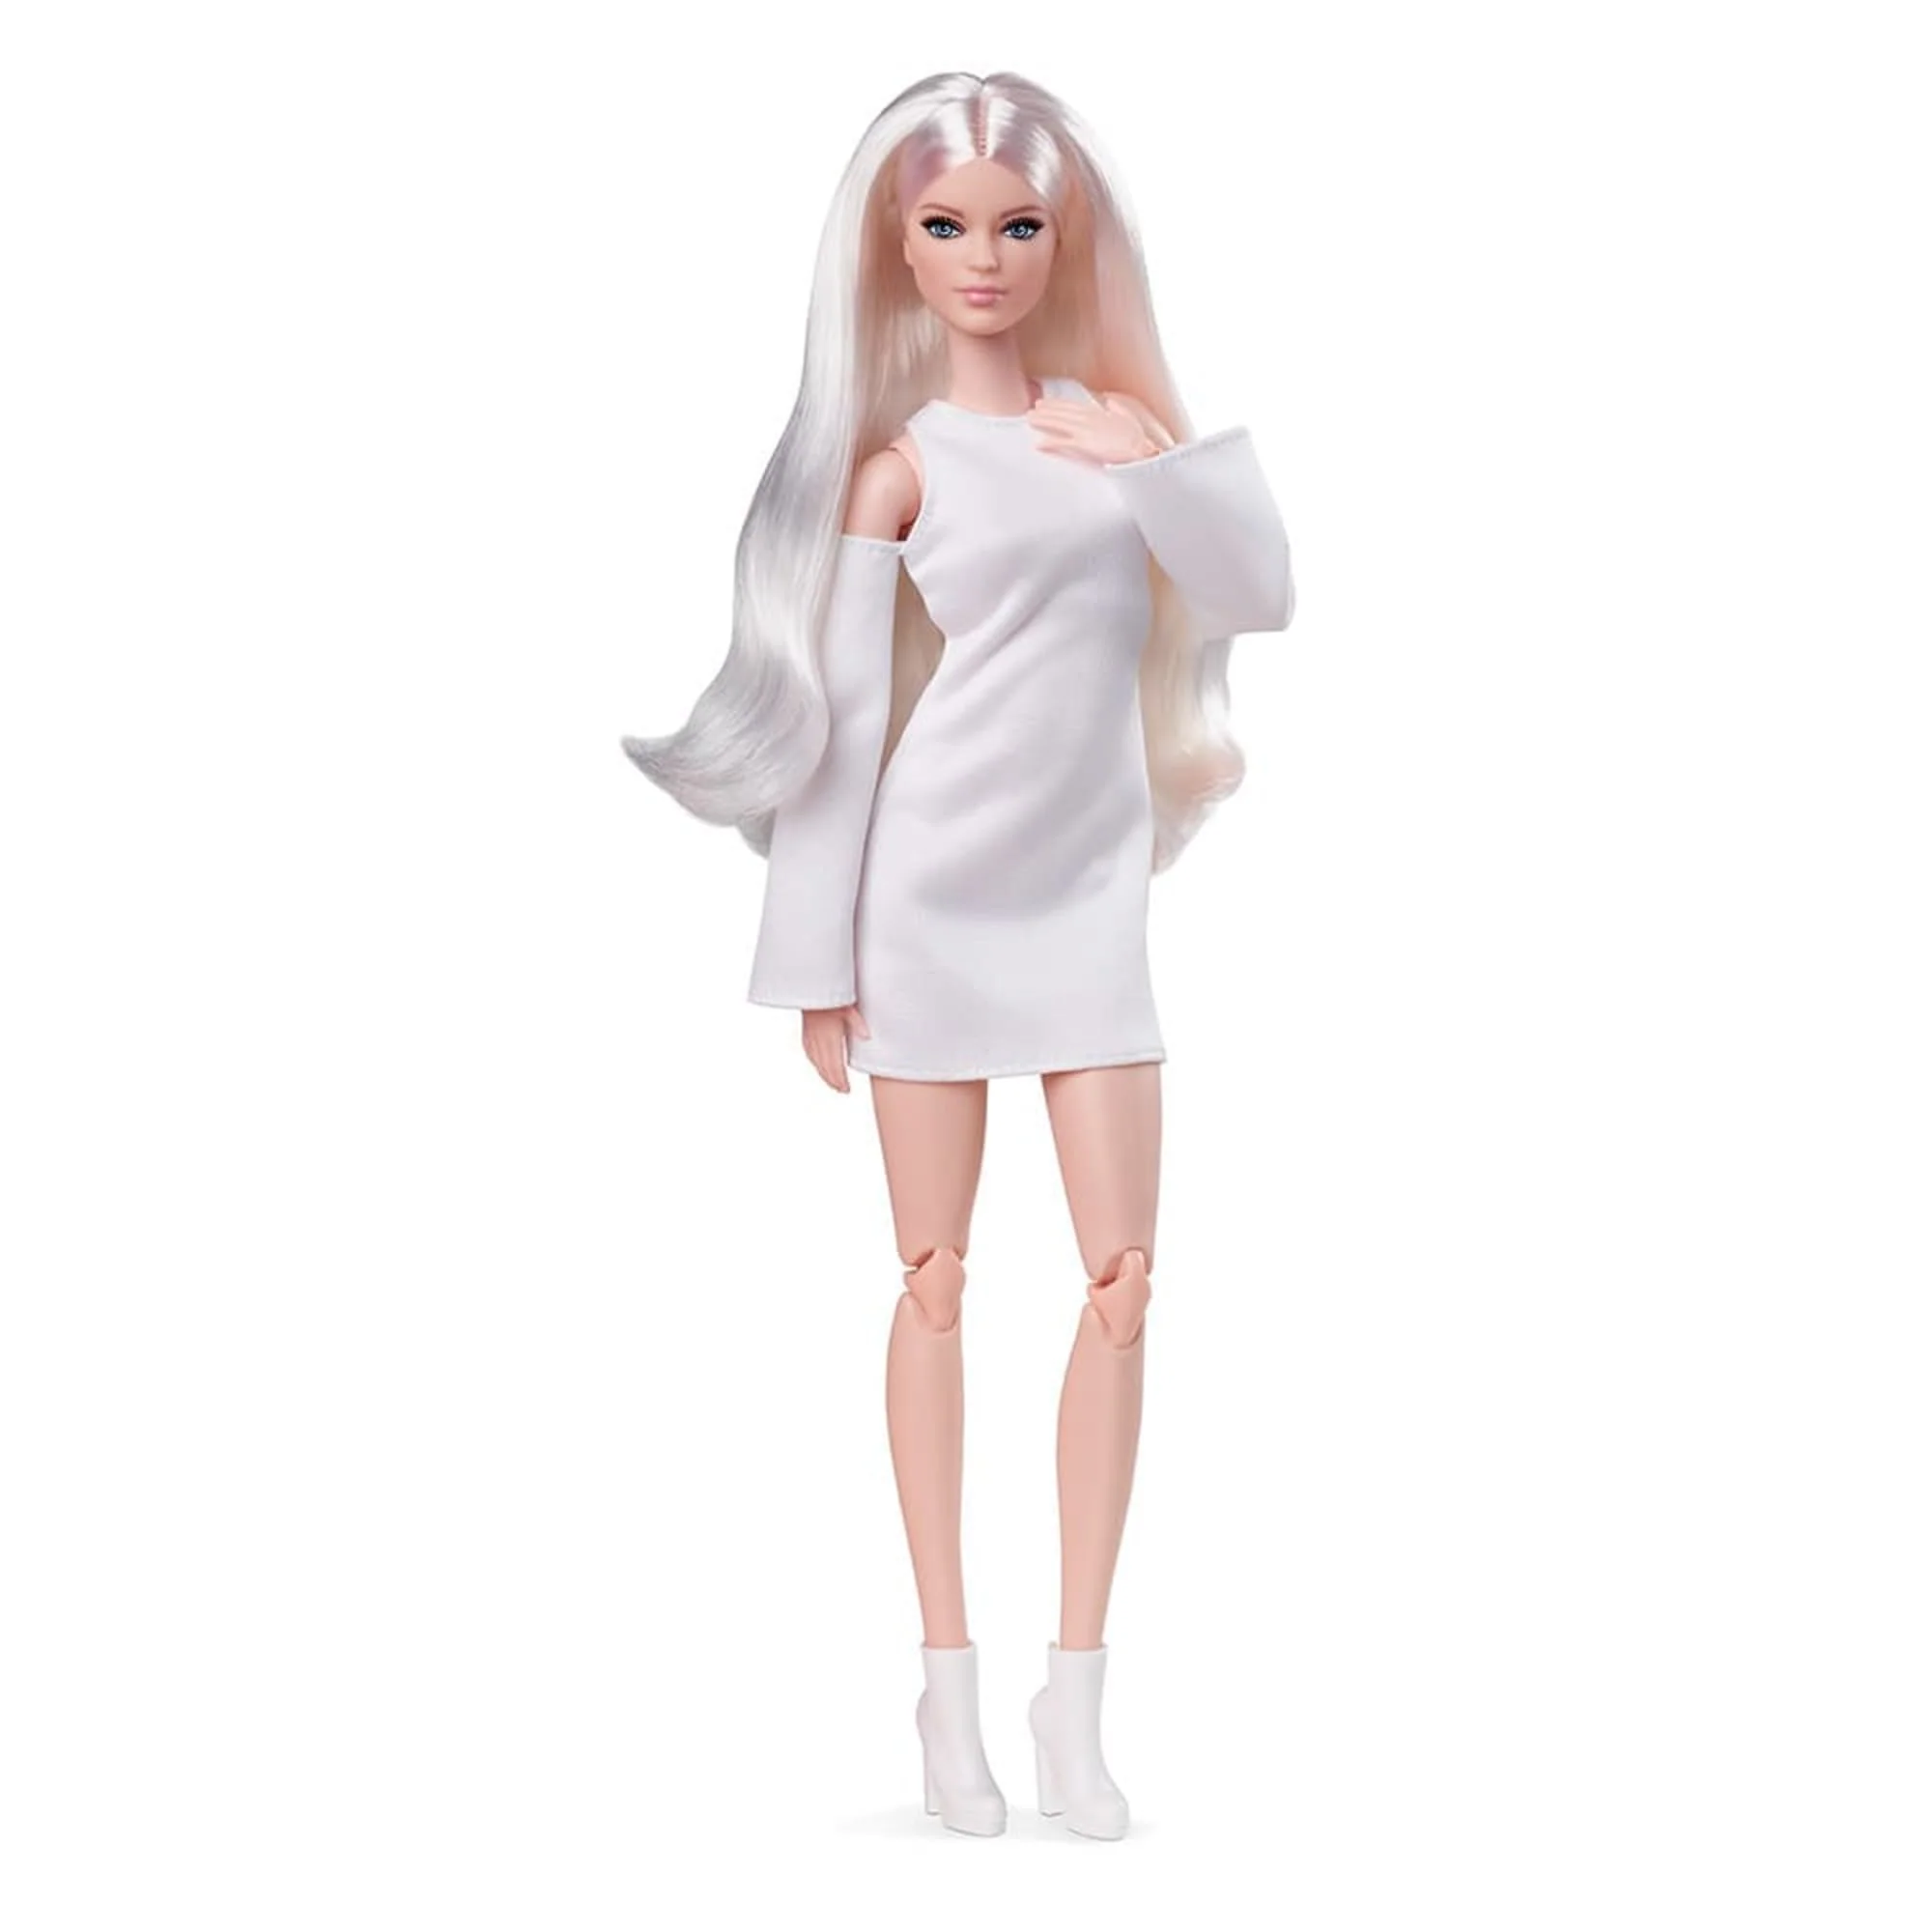
I totally missed the last platinum-haired Barbie release; when I could have bought her for around $35, I kept passing on her, and now she costs around $150. So I bought this one from Amazon last night. Blonde Barbies are usually my last choice, but these platinum-haired ones are everything.
The one that got away
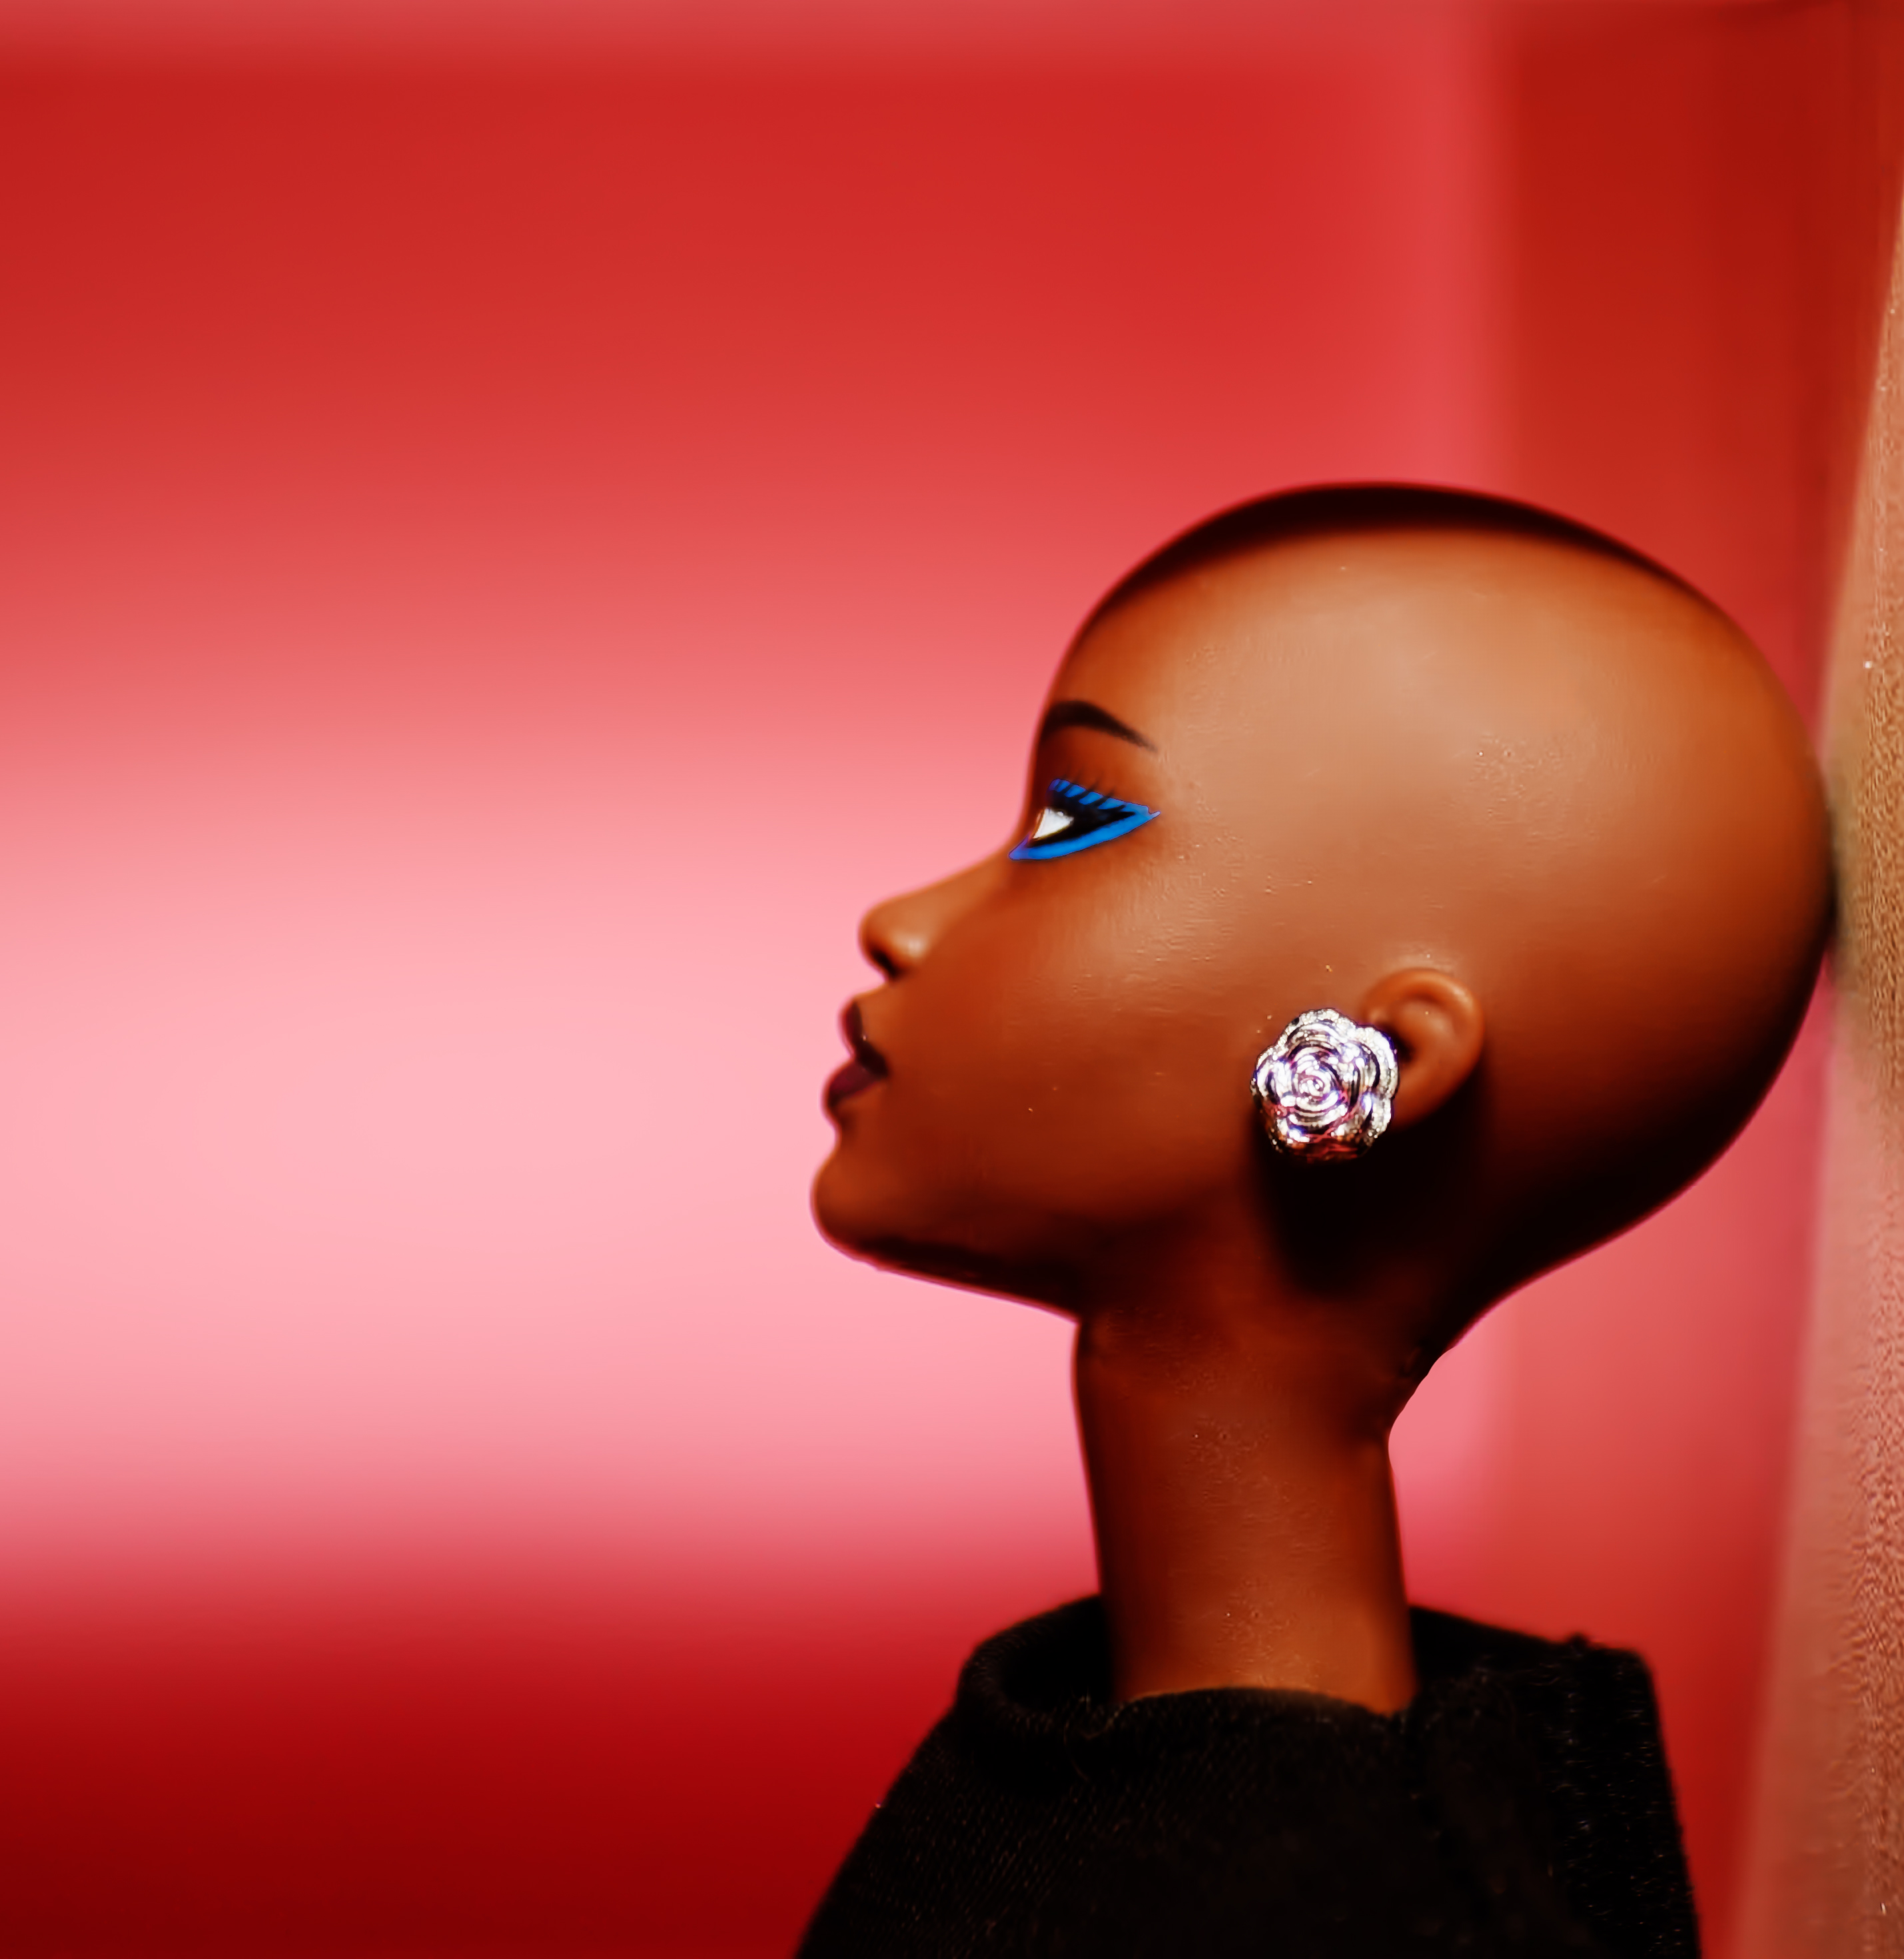
Last but not least, I took some individual shots of the dolls while working on this shoot, so you can see the face detail better.
This doll is from the original Basics line of the 2000sThis is not a Basics doll but is from the Barbie Looks series that was released in the fall of ’24
Also, how amazing do these kit dolls look bald?
That’s all for now – I’m sure there will be more doll shots in the near future. Also I am working on another found footage horror review, and have written a few poems I could upload as well. Lots going on!
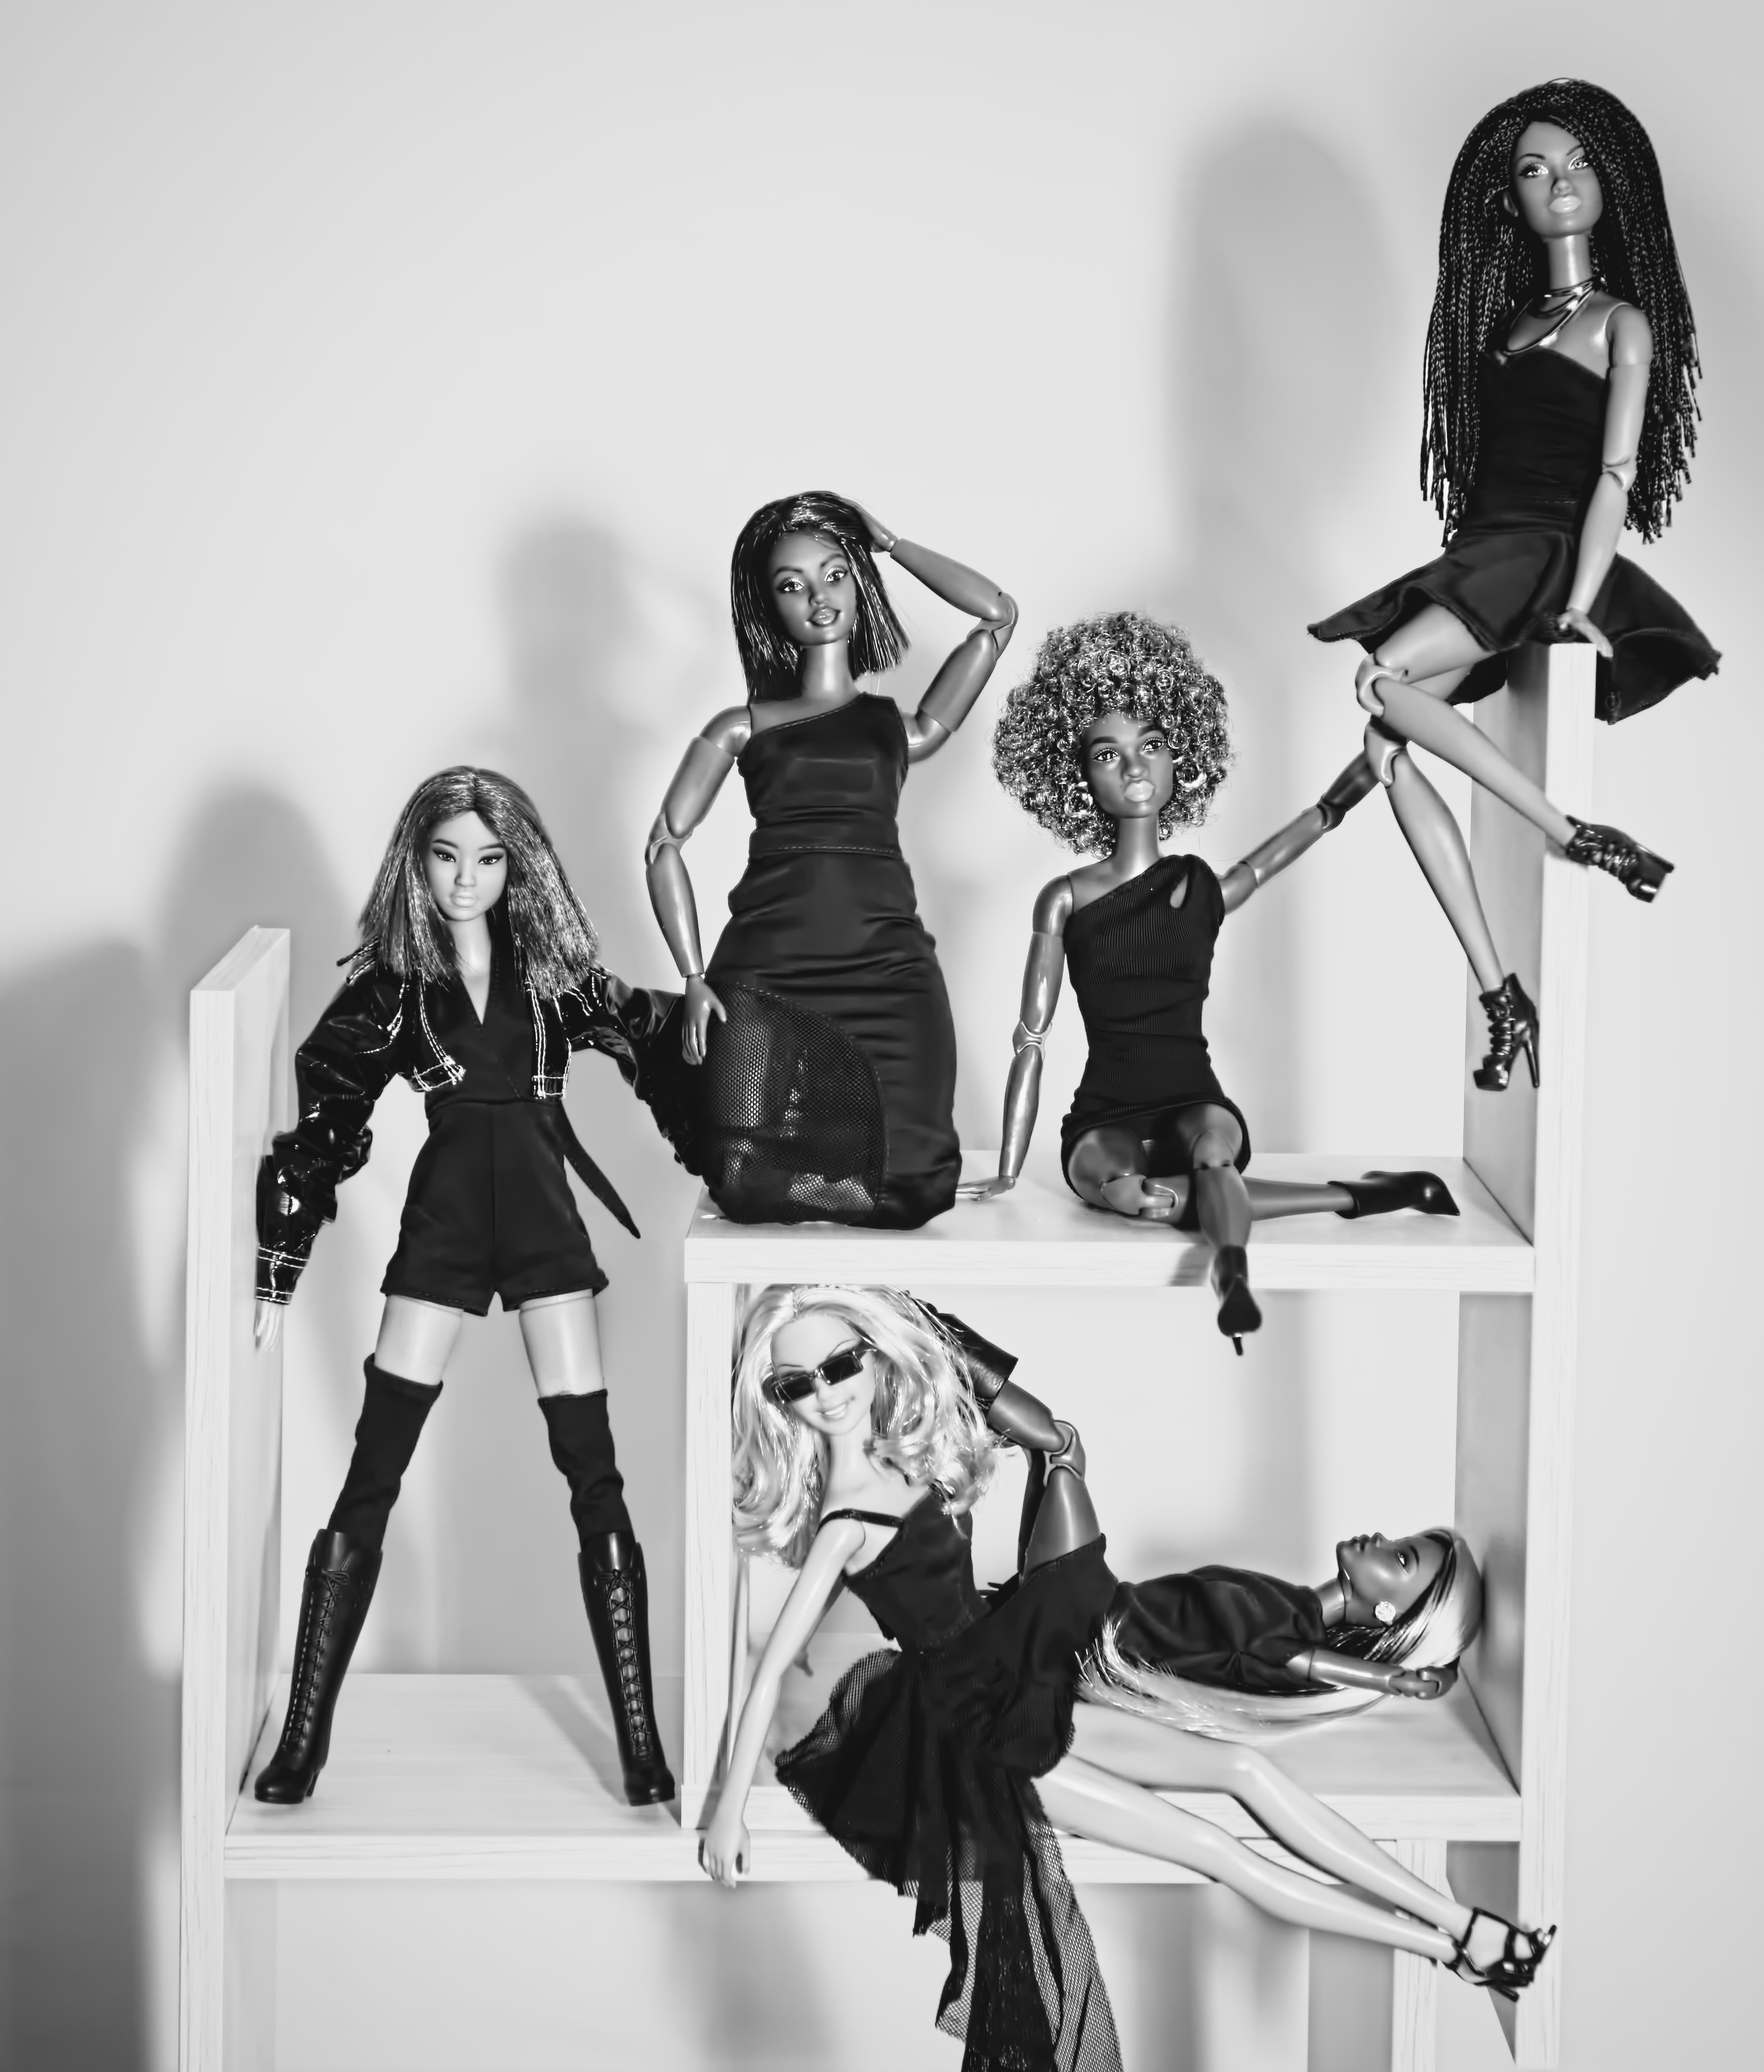
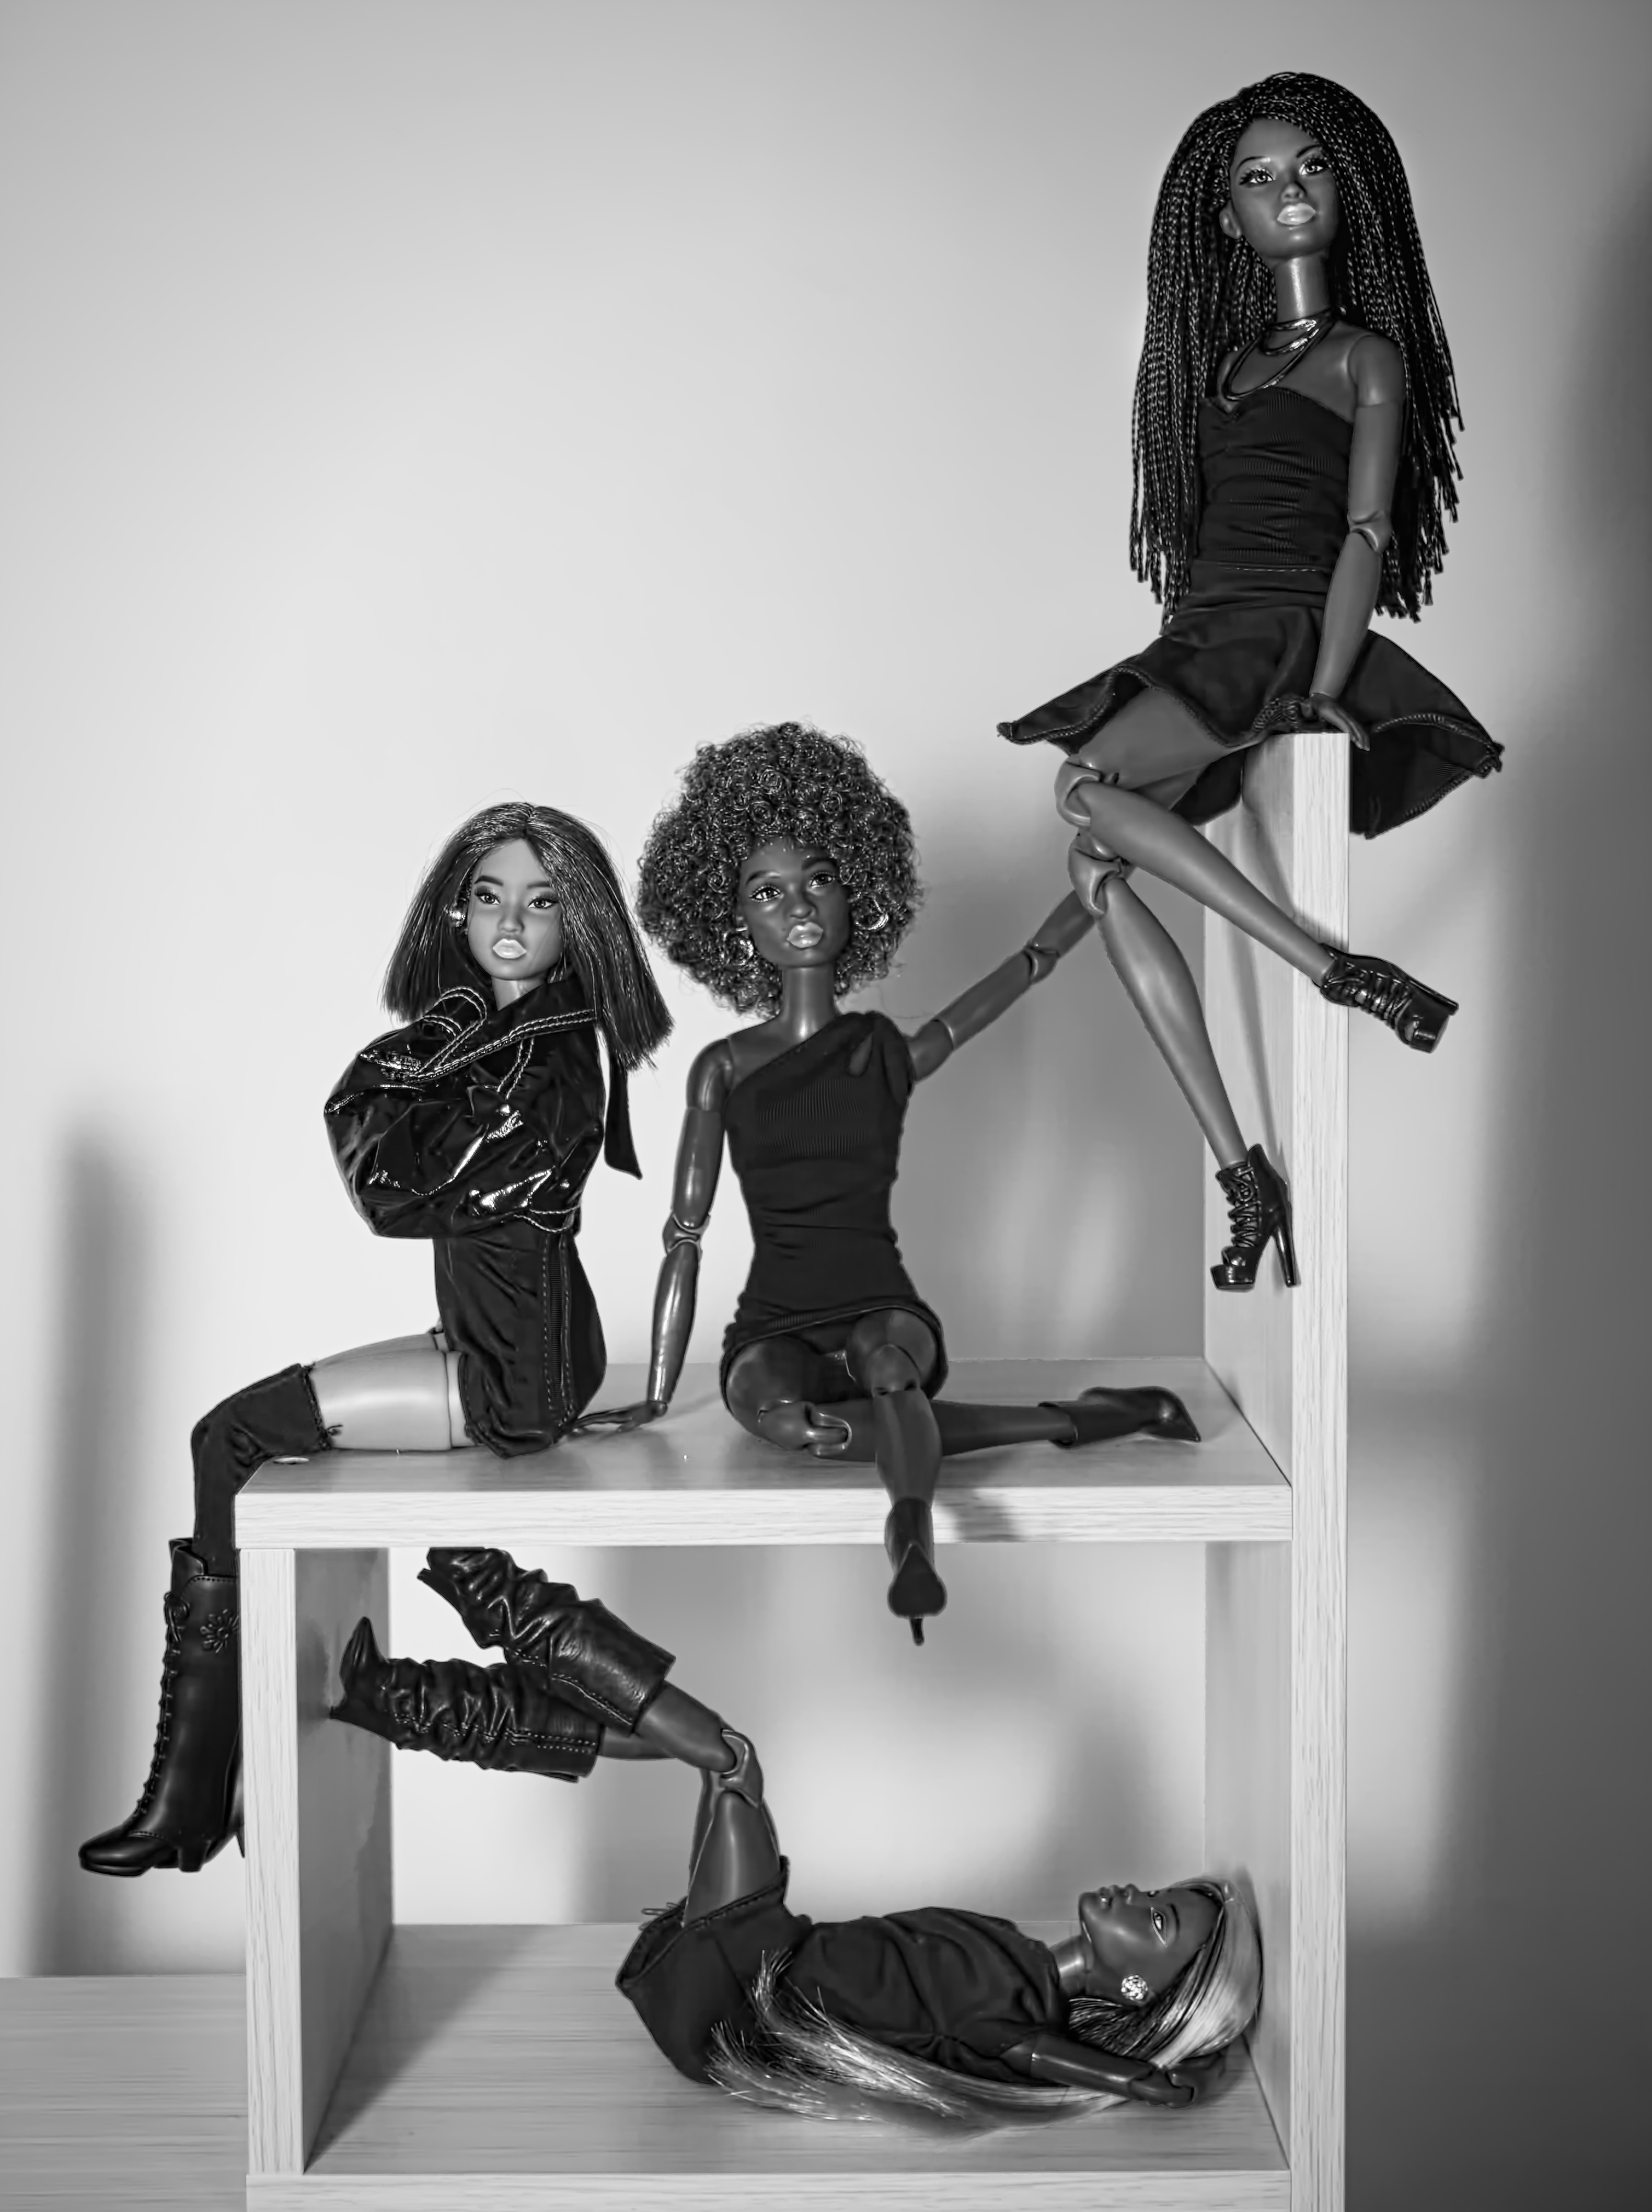
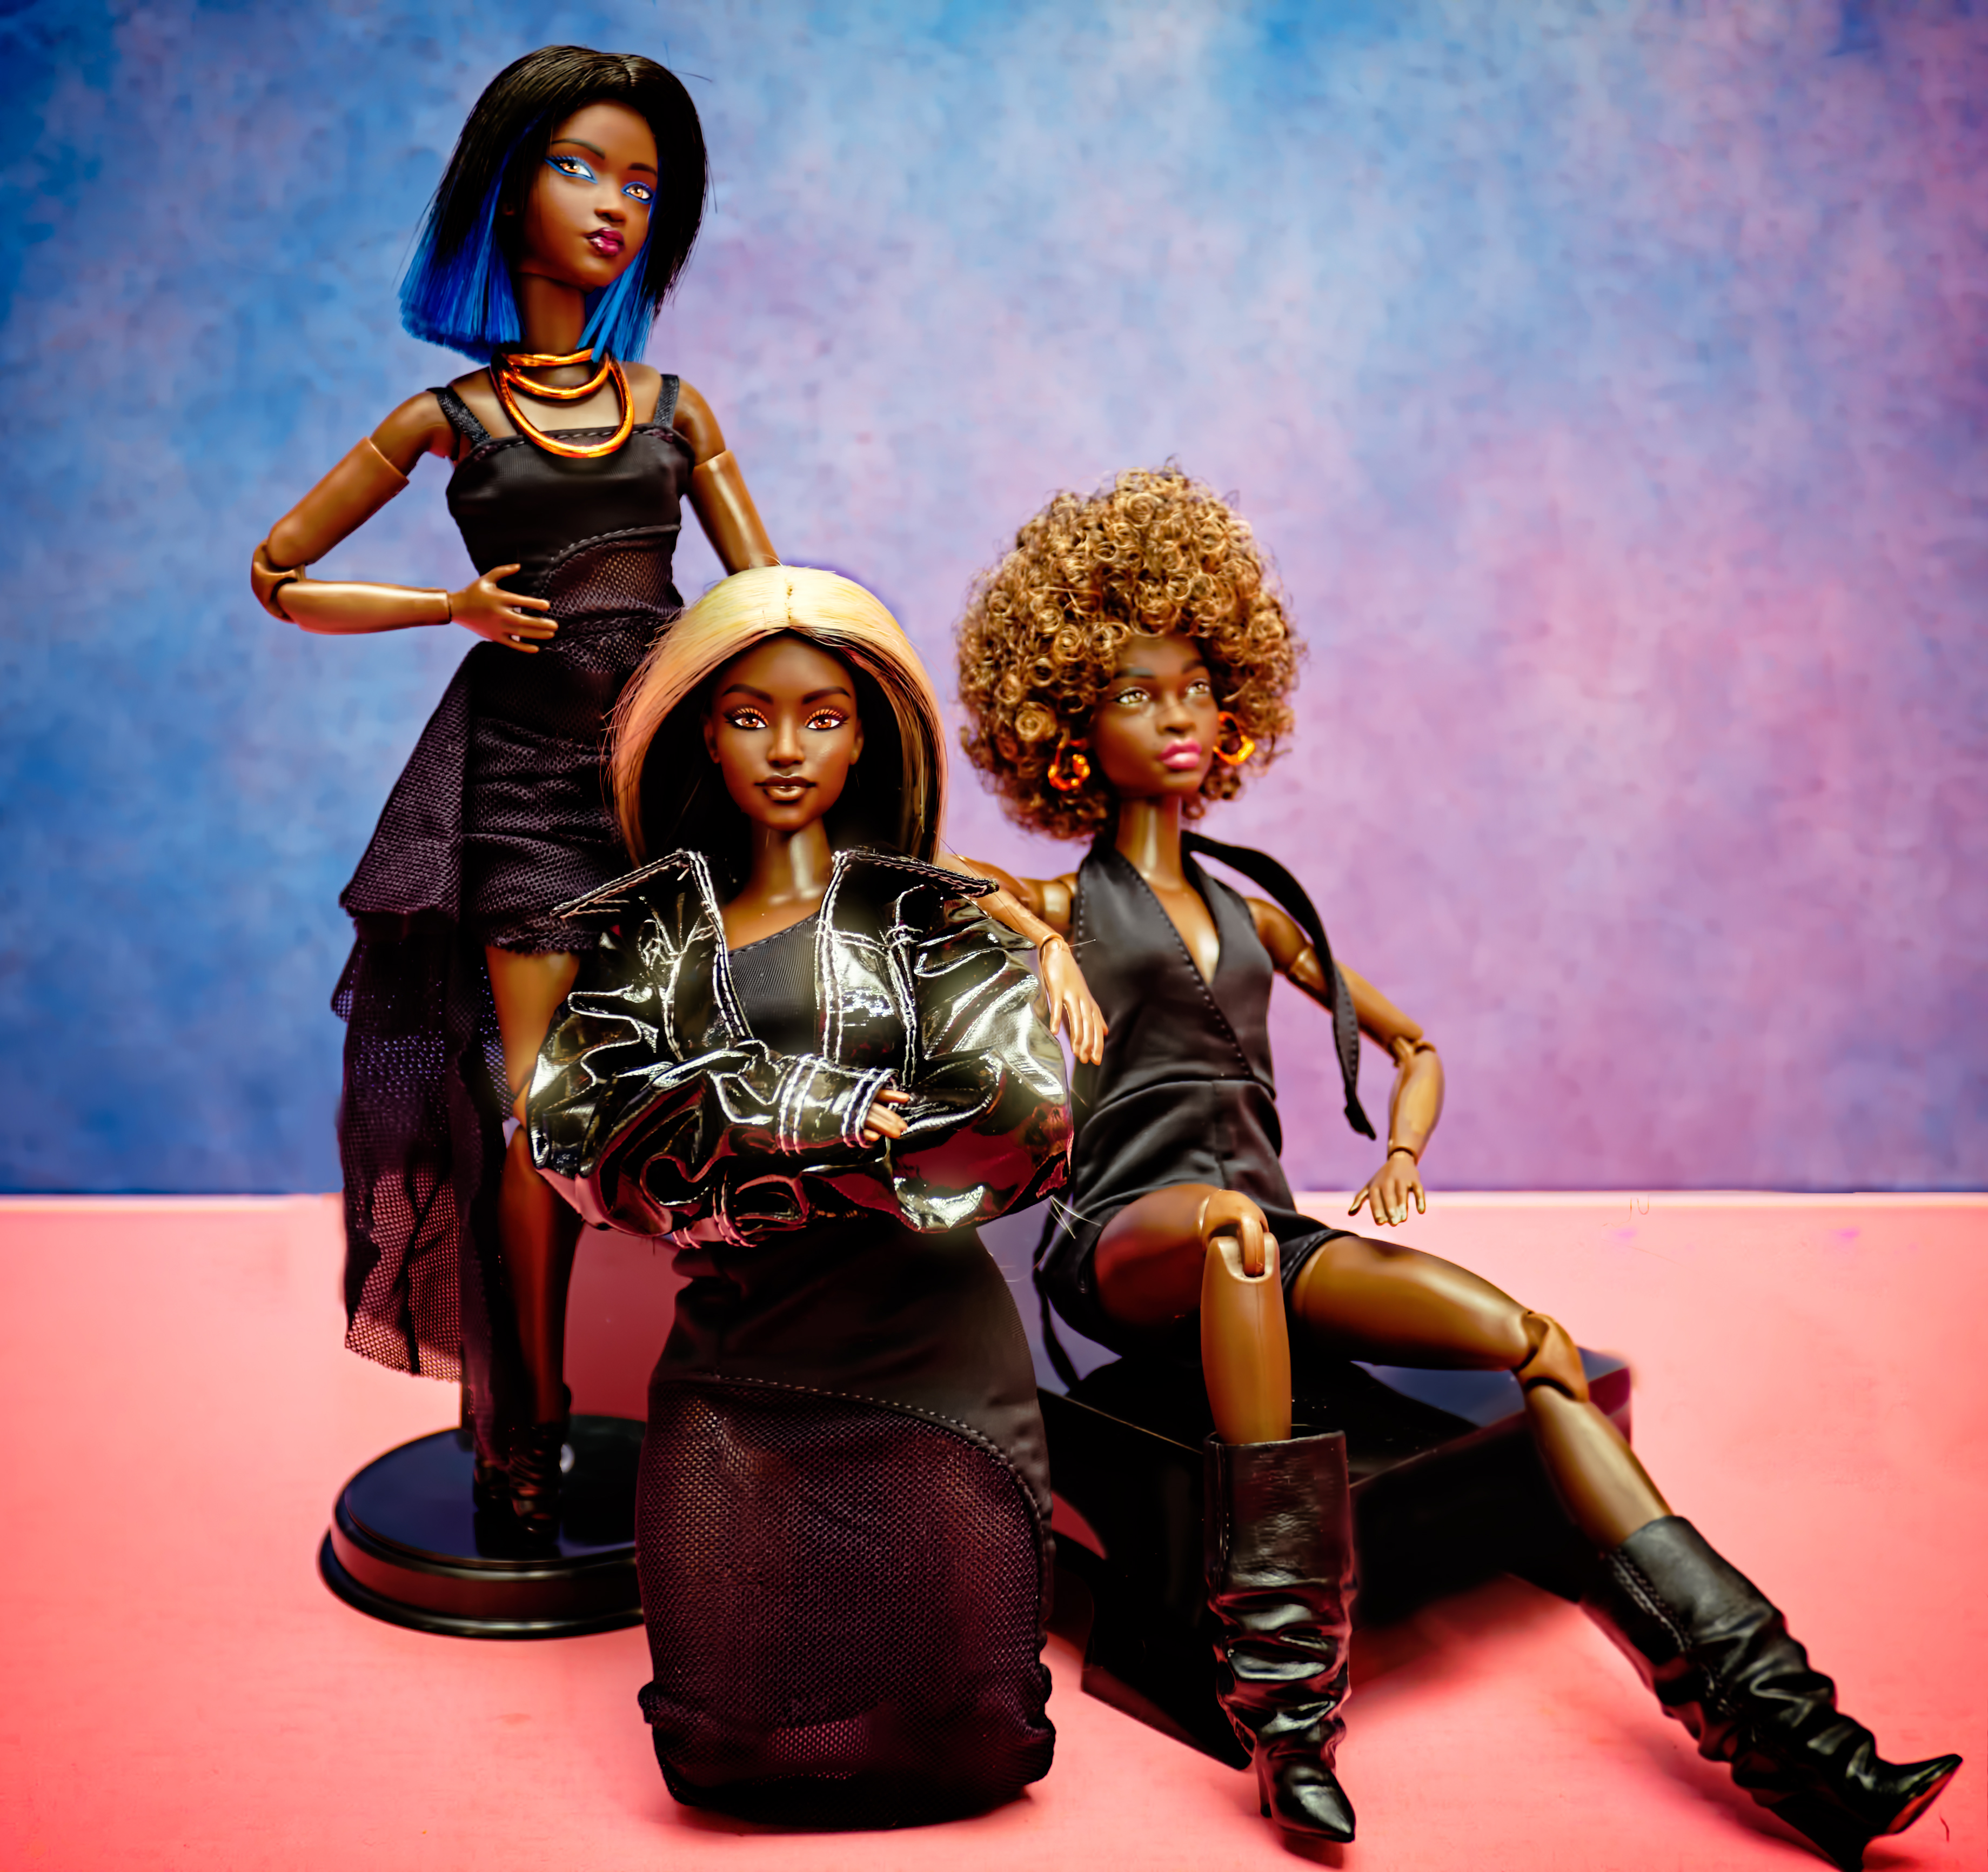
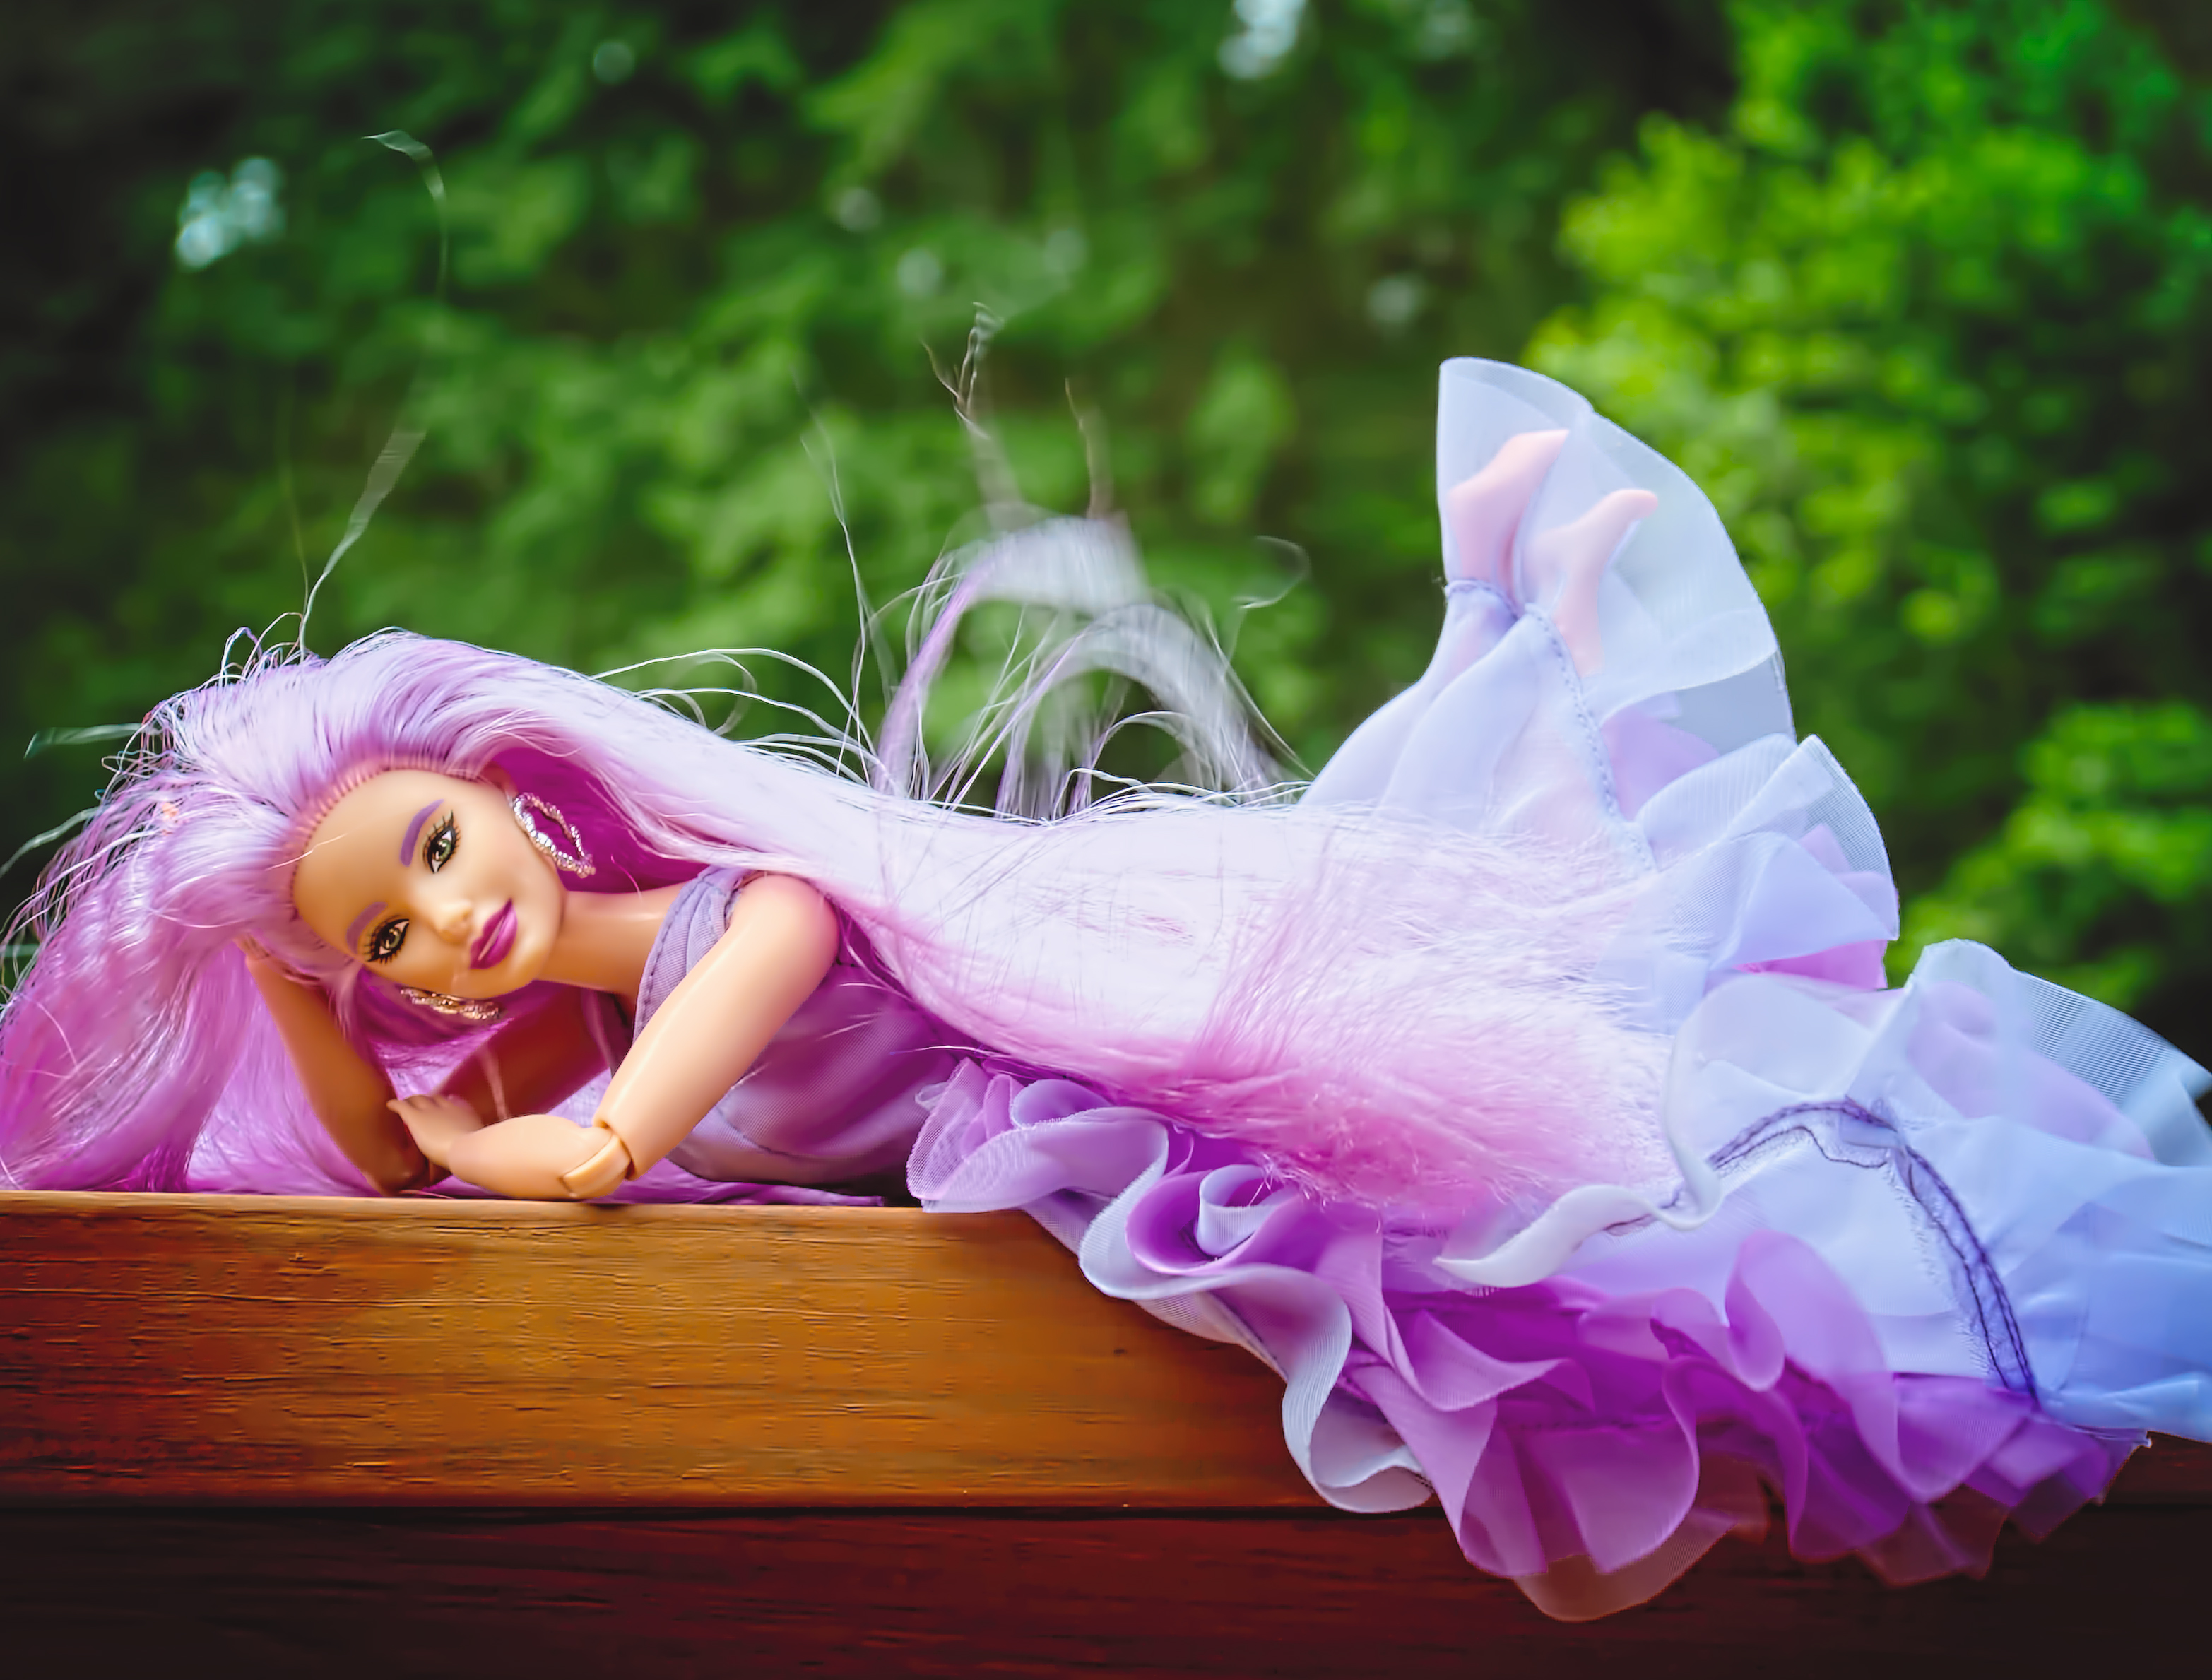
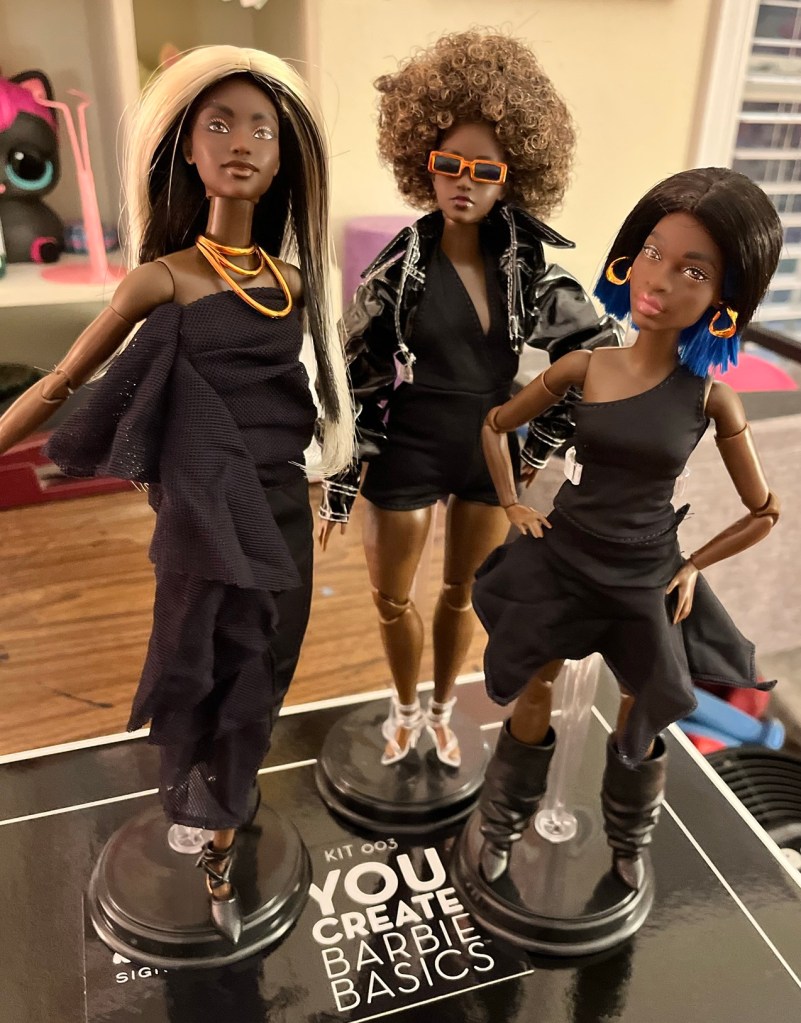
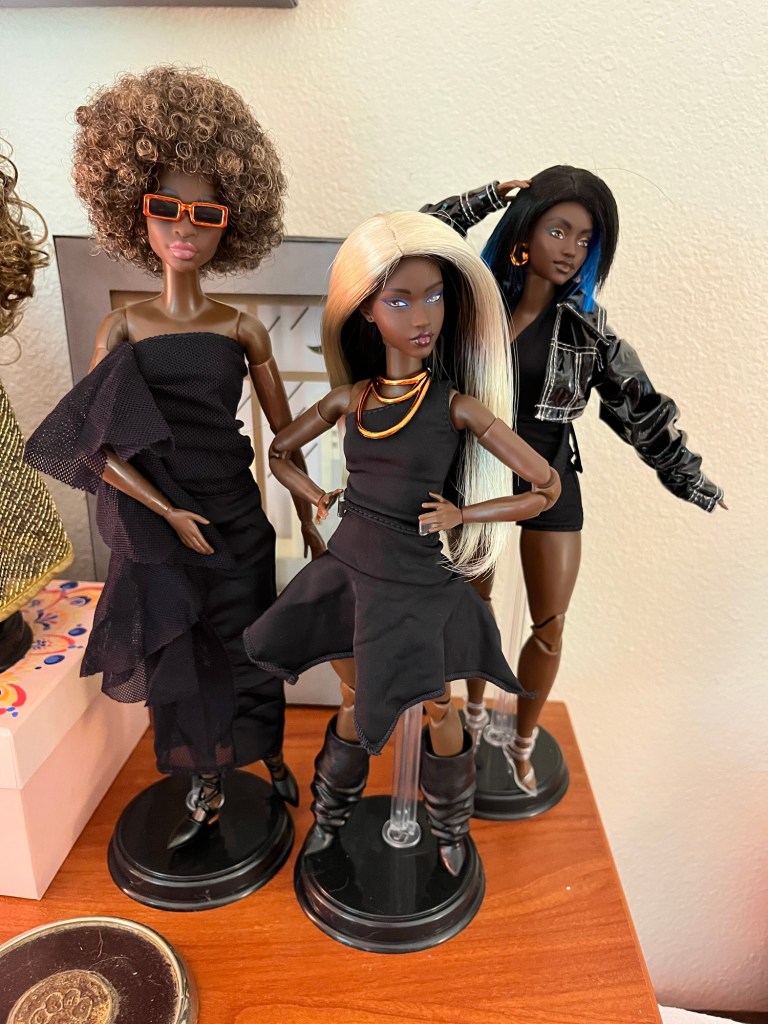
I’ve taken some better photos of my kit #3 dolls, as well as one I got at Goodwill for $2.50. Someone donated a huge stash of Barbies to the Goodwill near my house, and the haul I got from them is unreal. But more about that later. Let’s take a look at some better kit photos.
My only gripe with this set is the doll with the blue and black wig – something about her face just does not photograph well. Her face always comes out looking flat, for lack of a better word. I probably need to get some shots of her solo in different wigs and see if that makes a difference.
The curvy doll is the one who looks good in every single wig, and she even rocks a bald look like a boss. She also wears all the outfits best, as these fairly simple, stretchy pieces benefit from some added curves.
I mean, come on
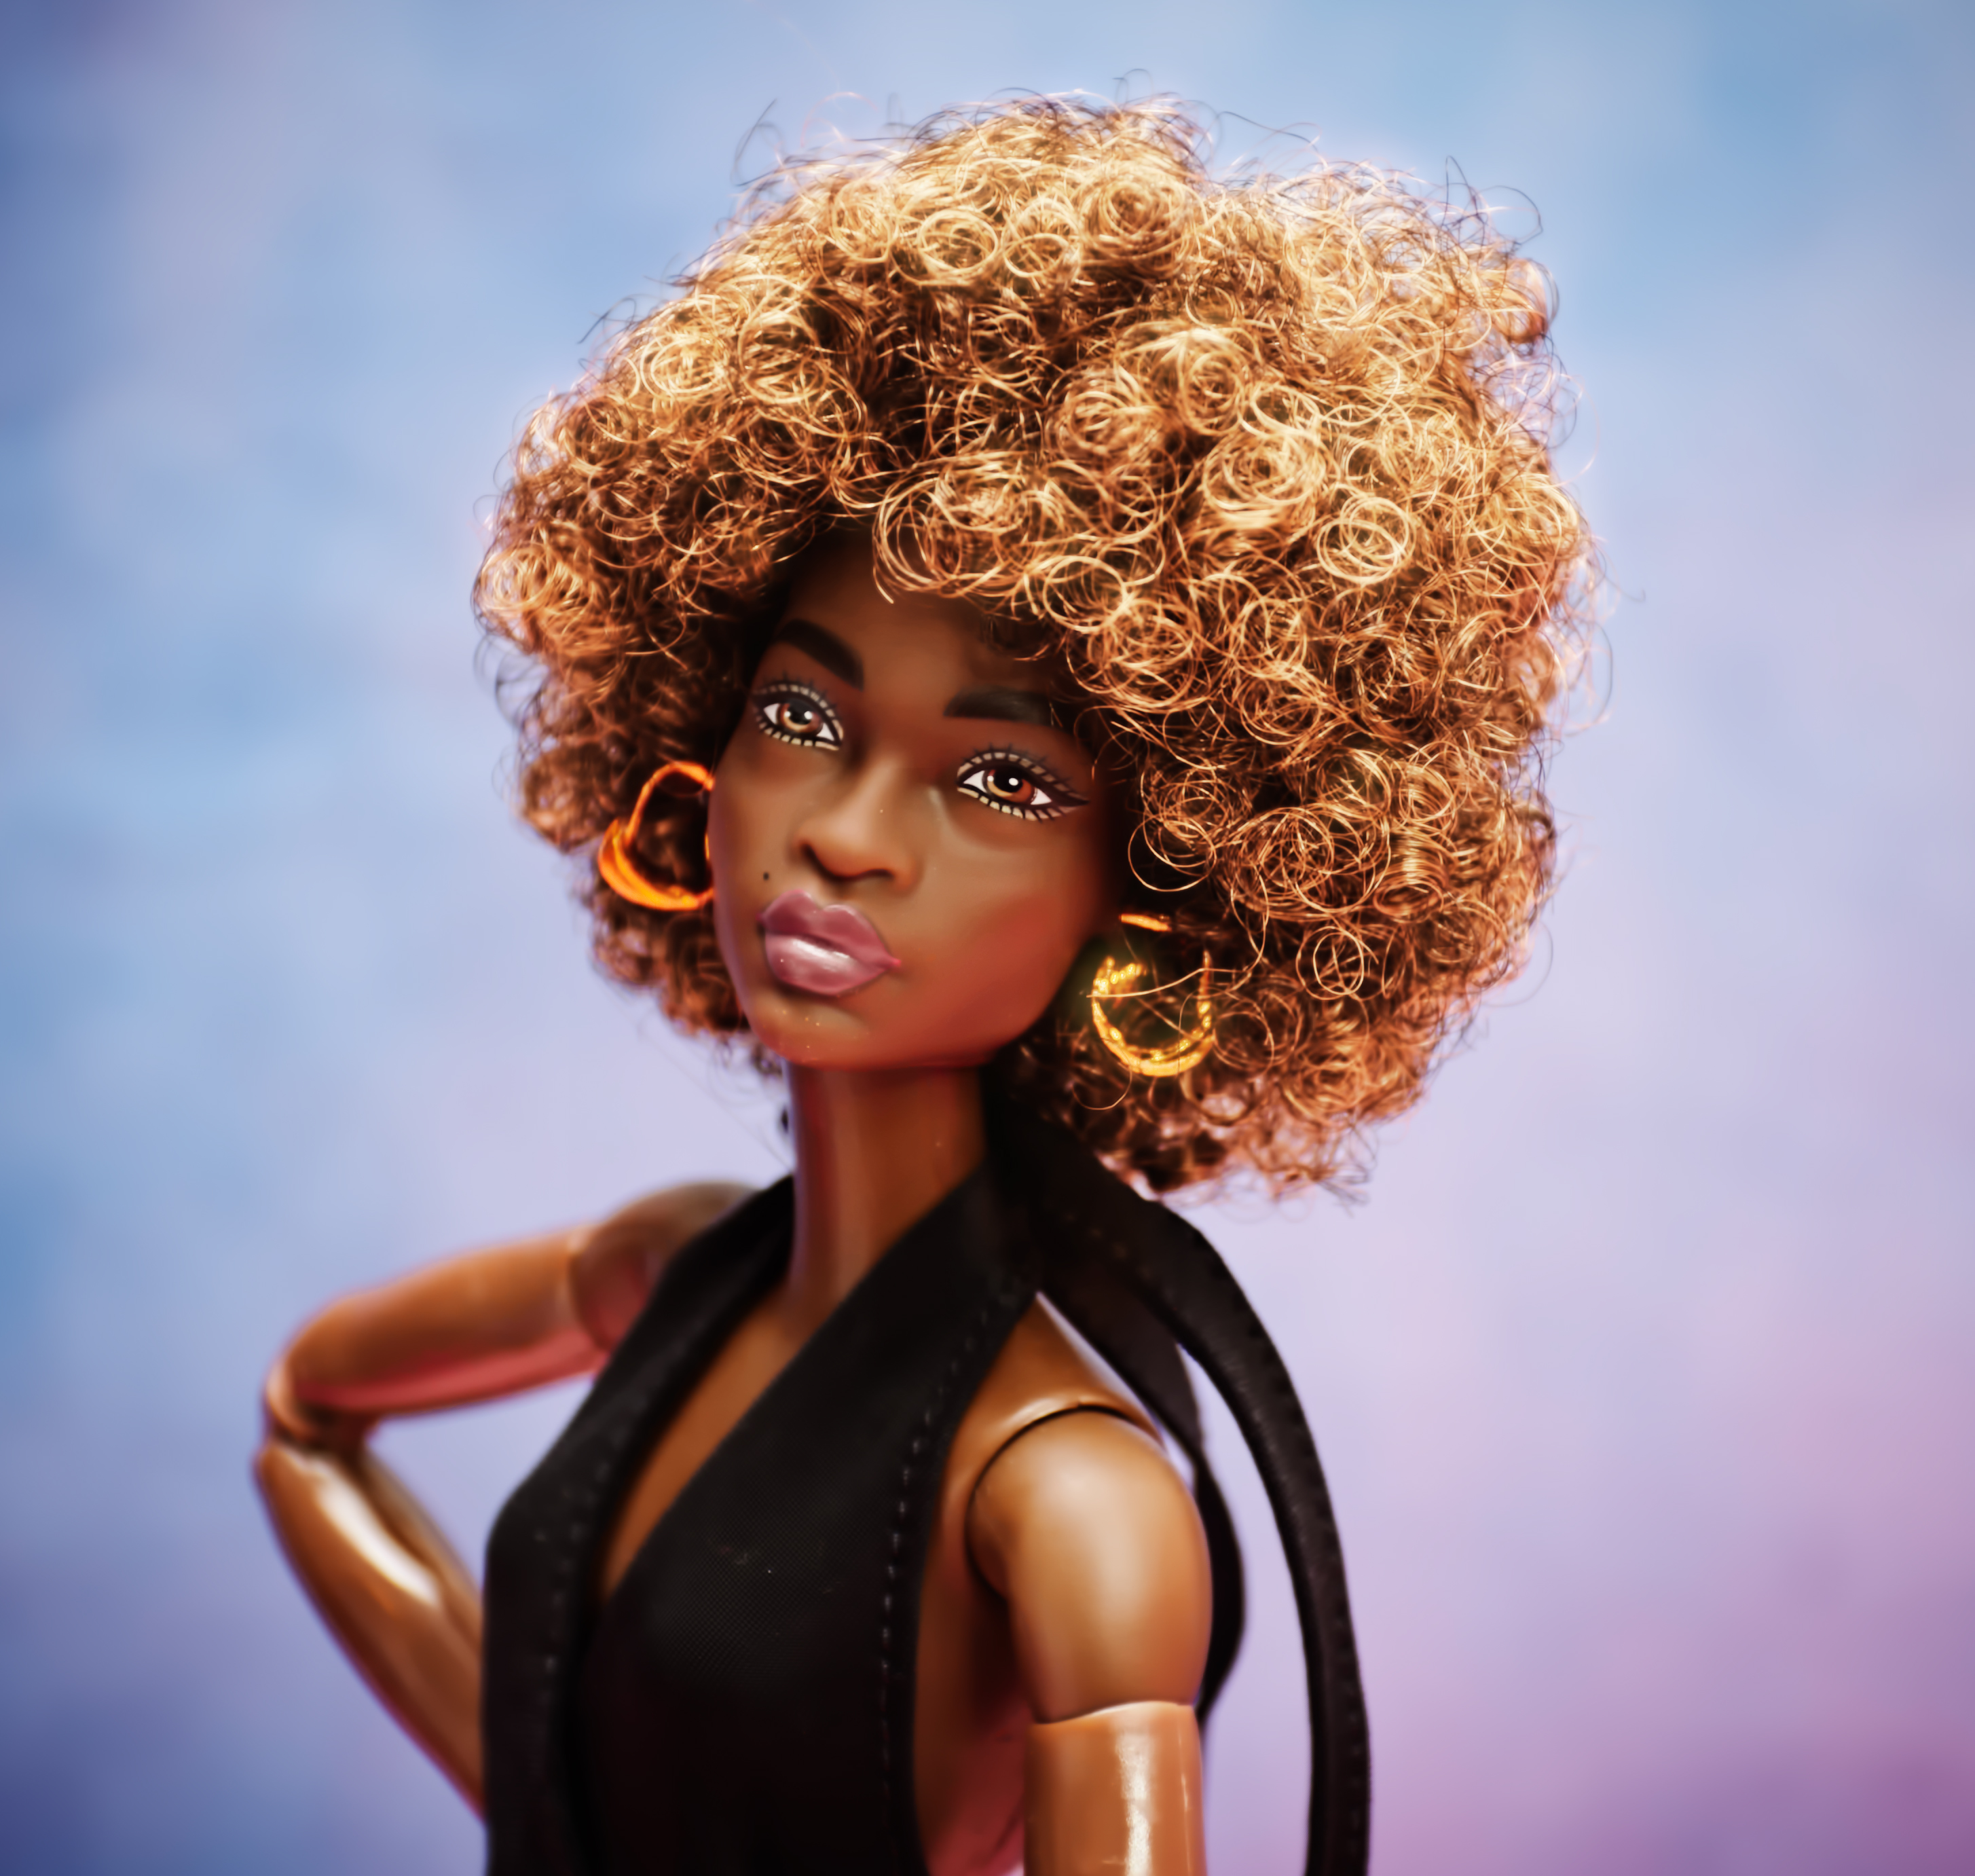
As I mentioned in my last post, the tall model looks best in that Afro wig. I guess I should describe them by face mold instead of body type since they are all interchangeable, but I’m not familiar enough with the names of the different molds and am too lazy to look them up. Suffice it to say that the dolls in these configurations are my favorite, but I haven’t played around with them much to be certain.
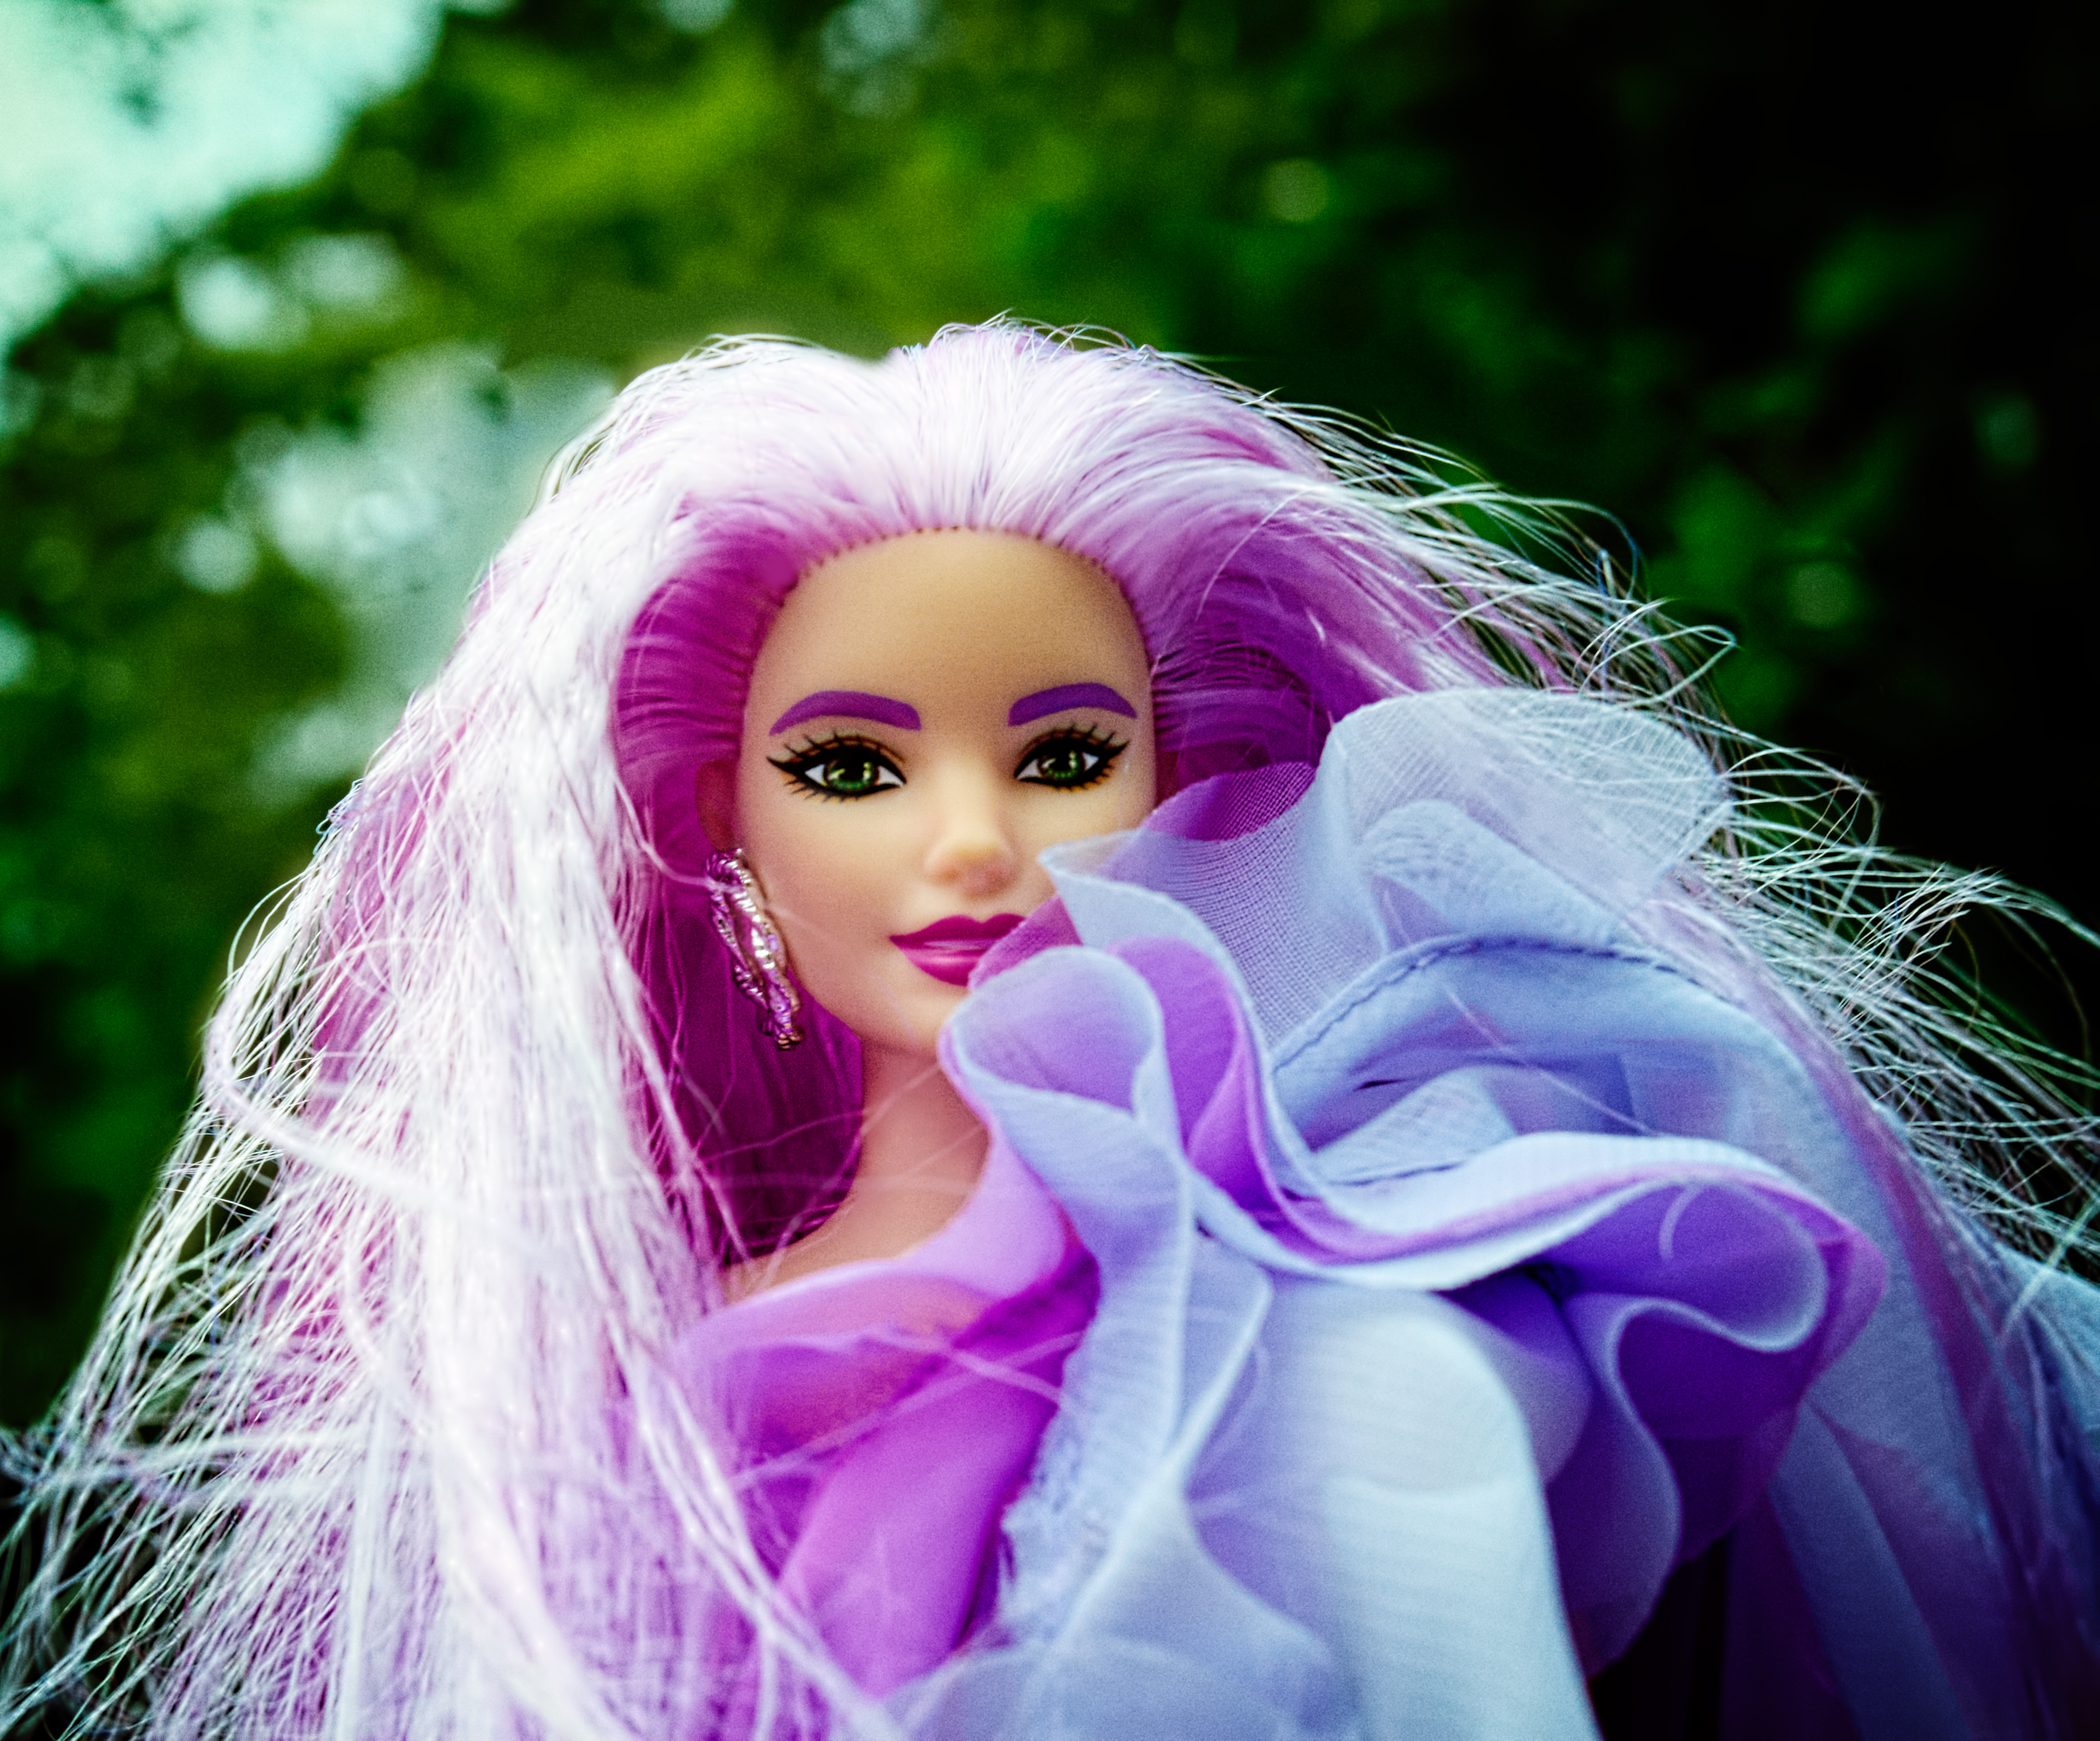
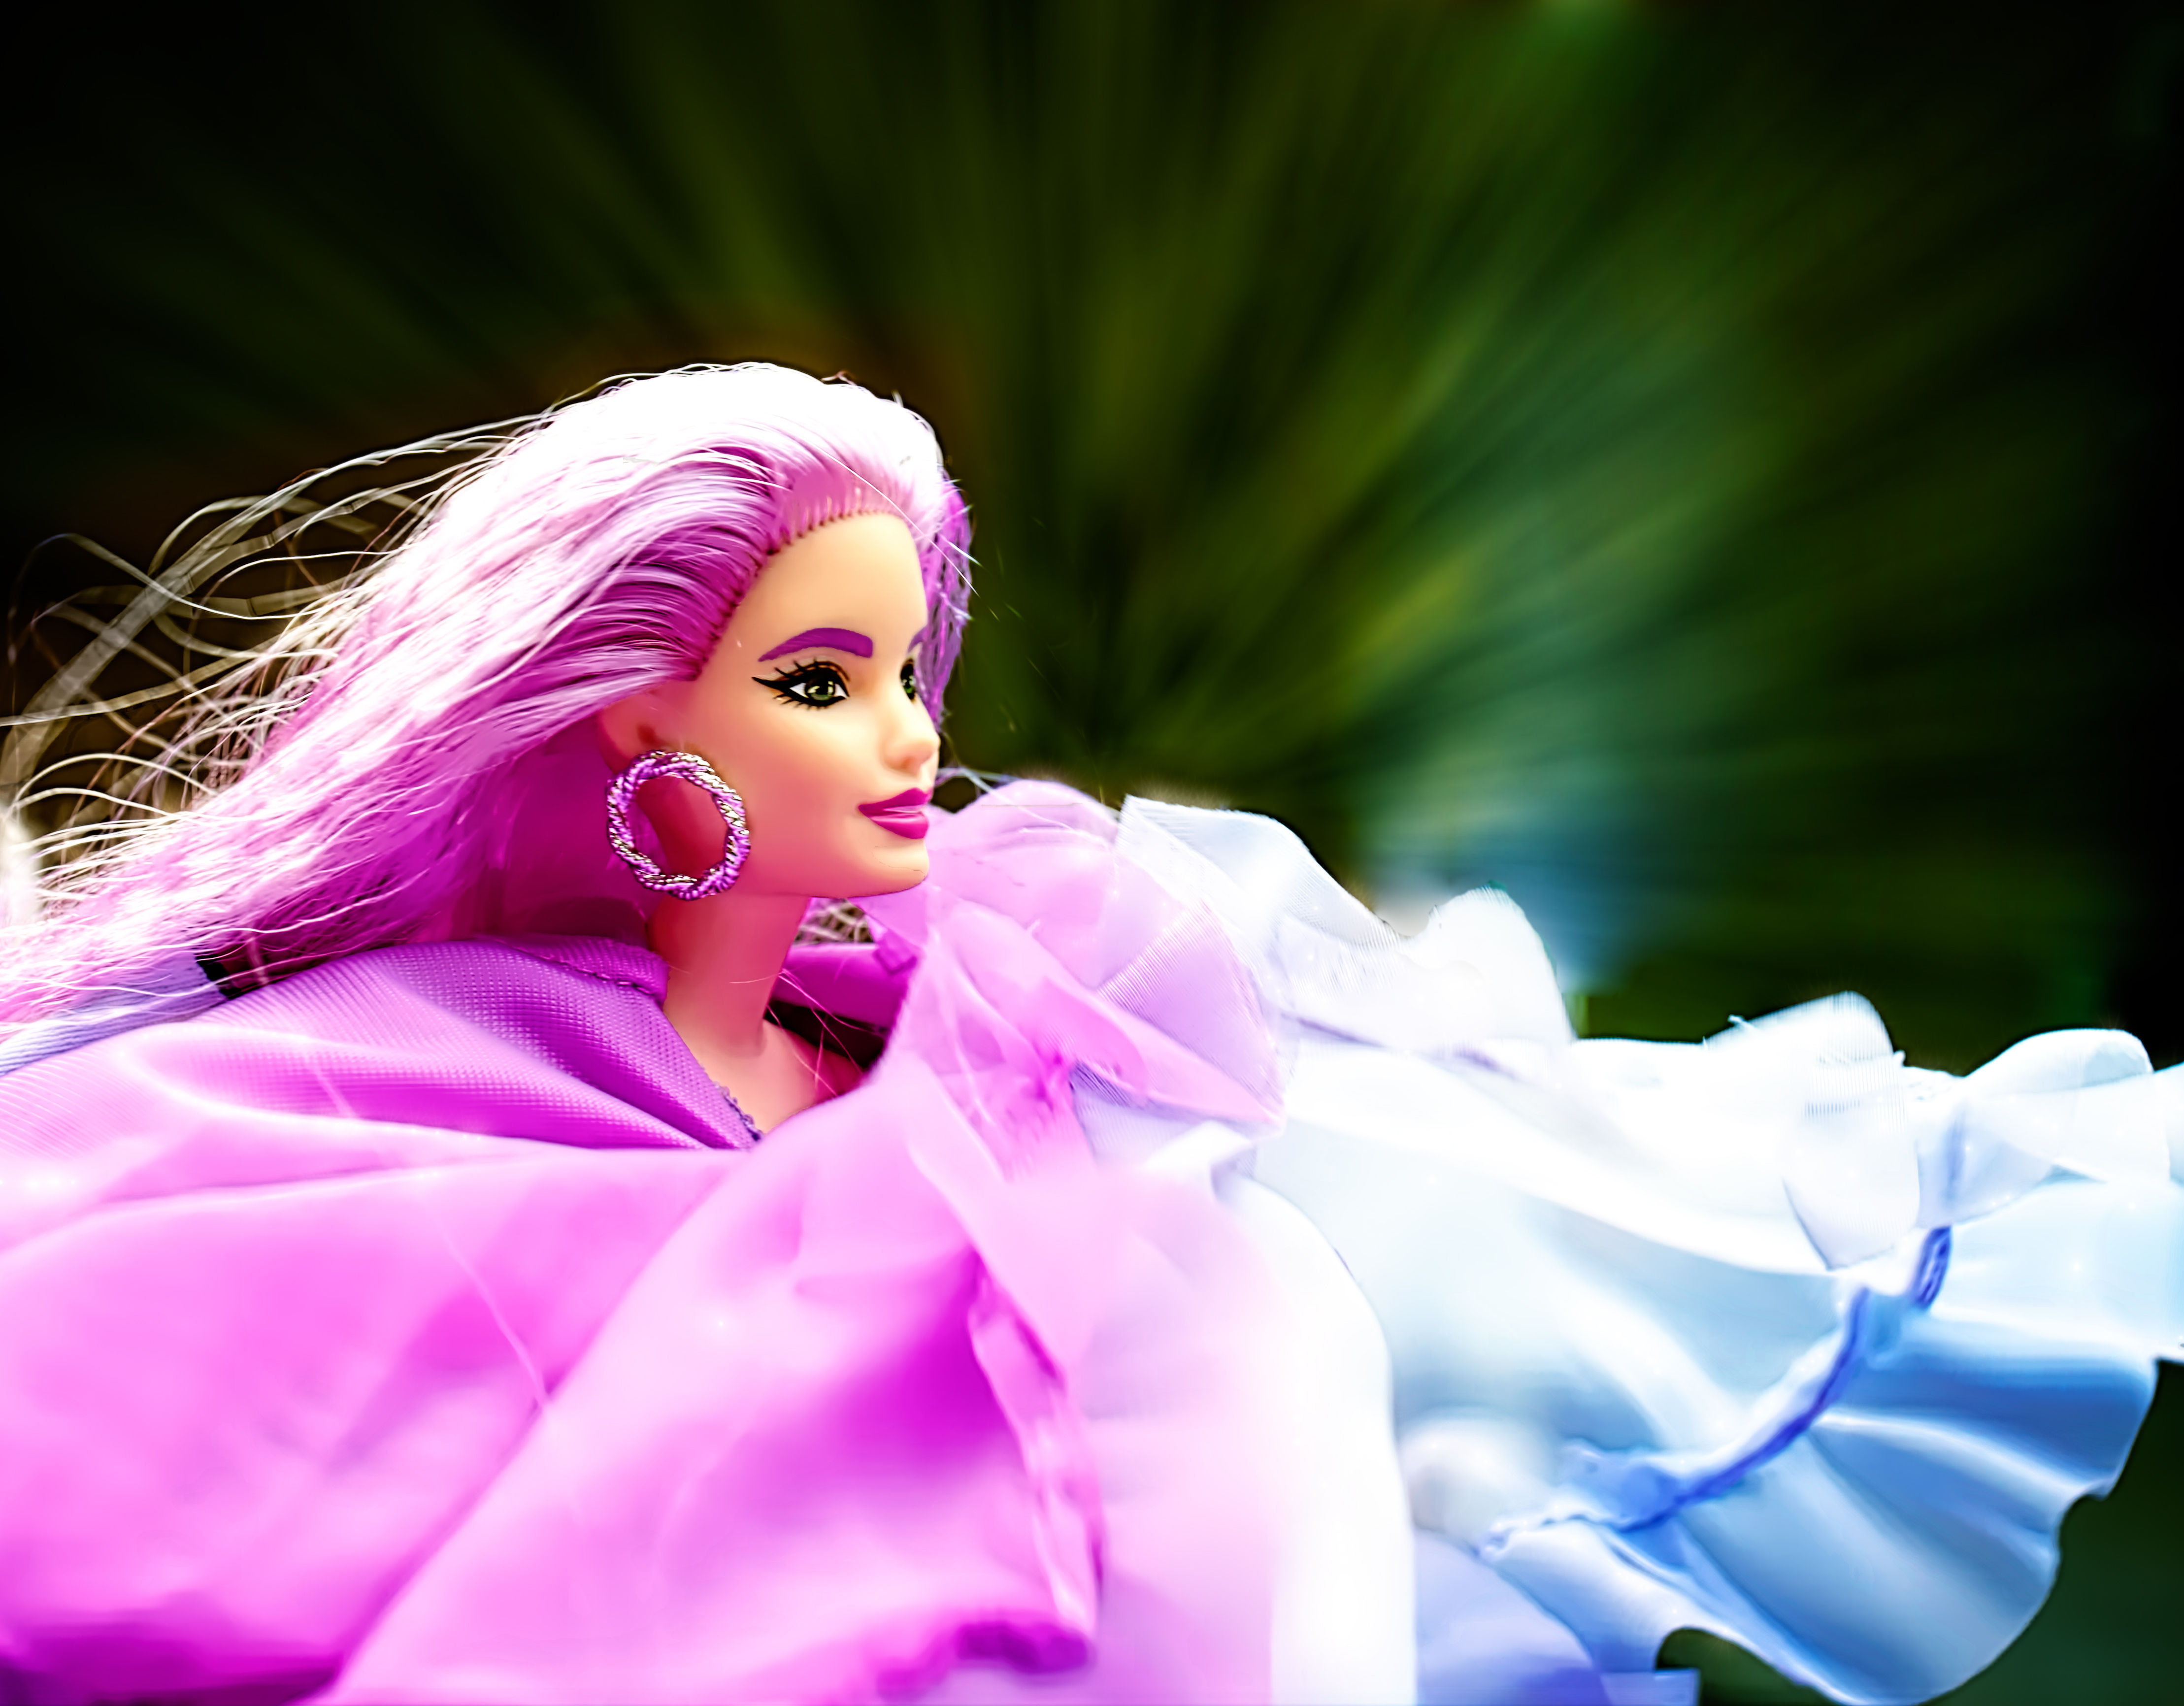
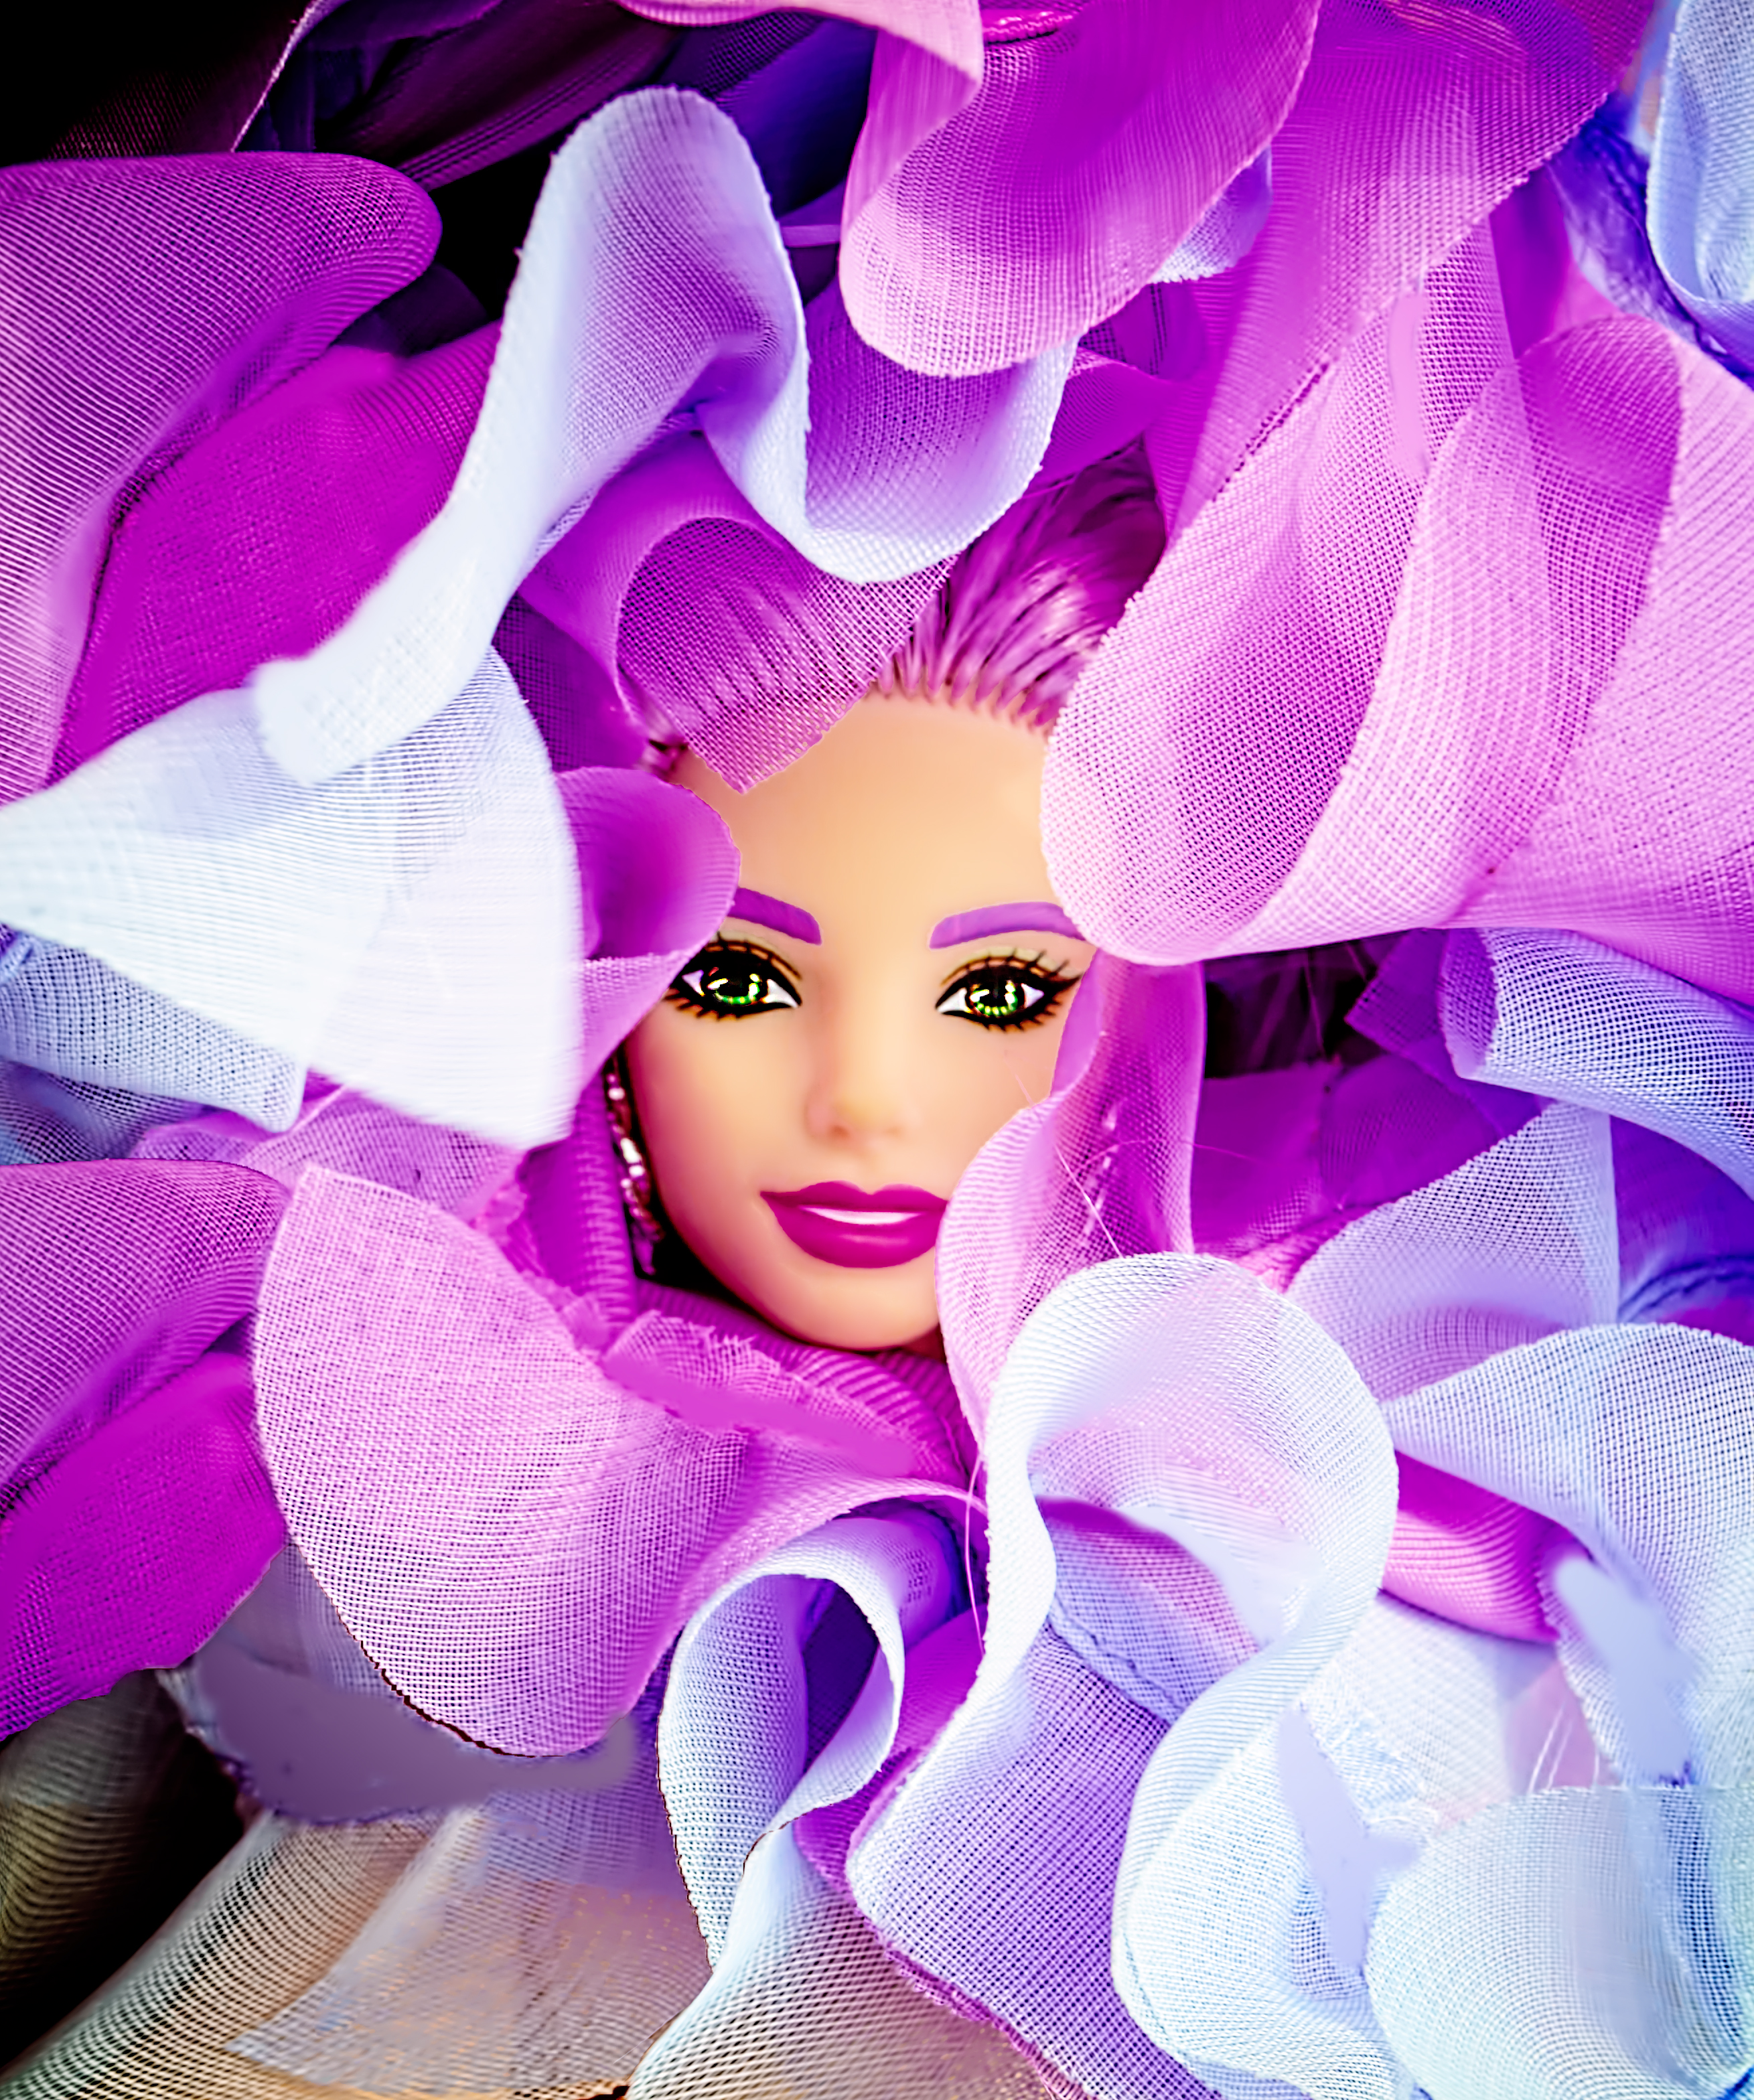
Moving on to one of my Goodwill finds, it was windy yesterday, so I took this one out to see if I could get any decent shots of her hair and dress blowing in the wind. The results were mixed, but I had fun shooting them and felt like I came away from this set with a better understanding of how to shoot dolls and have fun while doing it. So I’m feeling a little more confident now.
I’m pretty sure this is a Barbie Extra doll; she came with different clothes on so I can’t be sure, but she looks closest to this one:
Bummed I didn’t get my hands on that purse
The dress she’s wearing in these shots is from a Liz Taylor doll I got for a steal on Amazon several months ago; since this is a curvy doll and Liz has a seriously snatched waist, I couldn’t close the dress in the back, and it gapped out a lot. But I used some body software I have to fix the rather shlumpy shape she had with the back unfastened.
Doll hair sure doesn’t move like wig or natural hair, and it’s surprising how much wind it takes to get it to move. I’m still working on that, as I certainly learned plenty of tricks to make my hair move around in portraits, but as of now I’m still learning how to get similar effects from doll hair. I have many shots of her falling over as the wind knocked her down for sure – not only was it windy, but I added a warehouse fan and pretty much had to blast it right up in her face as best I could. Even then, the dress moved a lot more than the hair did.
I got a lot of stray wispy hairs flying about rather than all of it moving at once, which makes things look a little messy. Also, I had the shutter speed way too slow in about half the pictures, so instead of capturing the hair’s movement, I ended up with a lot of hair blur. So as I said, still learning over here. Oh, and I remembered my old habit of wearing clothes in weird ways for added effect, and since I loved the two colors in the skirt of this gown, I took a lot with her wearing it upside down. This made up a bit for the lack of real movement in the hair. Remember my motto: when in doubt, strangely wear your clothes for more interesting shots.
Also, my tendency to over-process shots really has to be reigned in with these dolls. I guess because I am already dealing with a fake person, the photos can’t take a lot of fakery when it comes to editing. Most of these shots I over-processed the first time and had to start completely over. The only exception is the one above; it has that strange lens flare because there was a big pole in the shot that was distracting, so I found an effect to blur it out entirely. So heavy edits can still be used to fix errors or flaws, I guess, but what I’m learning is that when I’ve got an already great shot, I need to keep it simple instead of trying to make it, well, greater.
As I mentioned above, I came away from this shoot feeling more satsfied with the results and more energized than I have since switching to photographing dolls, and I even enjoyed shooting outside for once. So I’m hopeful I can move forward with more success and satisfaction. In fact, I took over 900 shots during this set, so you know I was feeling it.
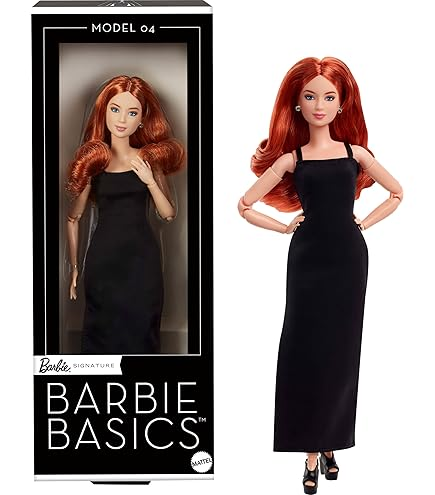
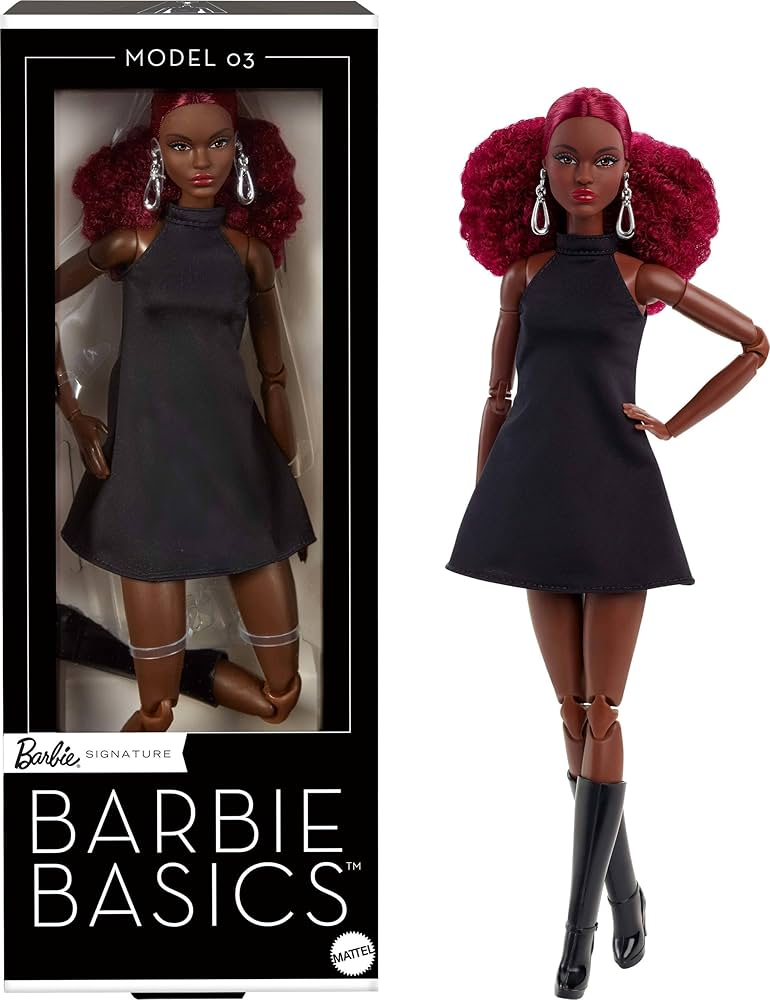
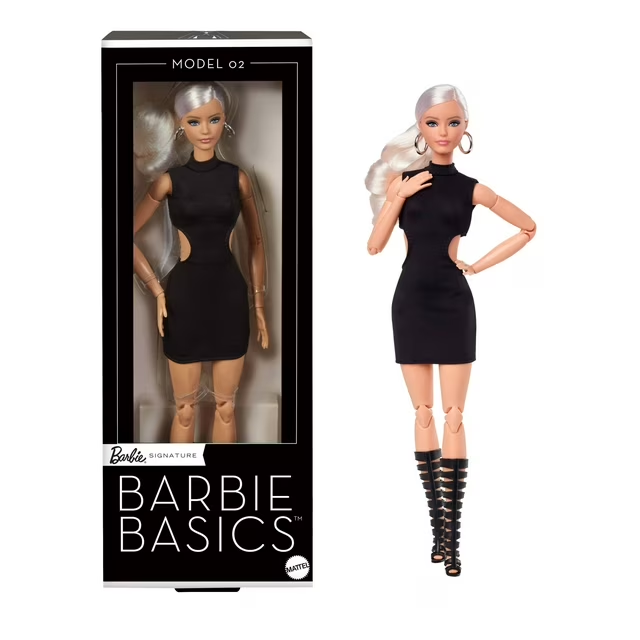
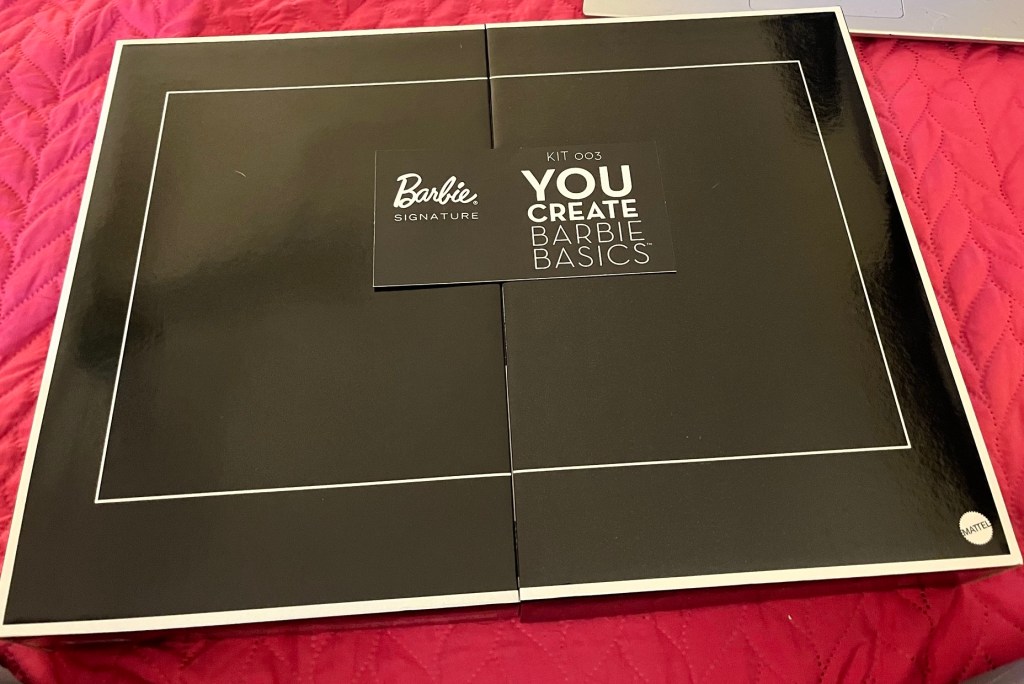
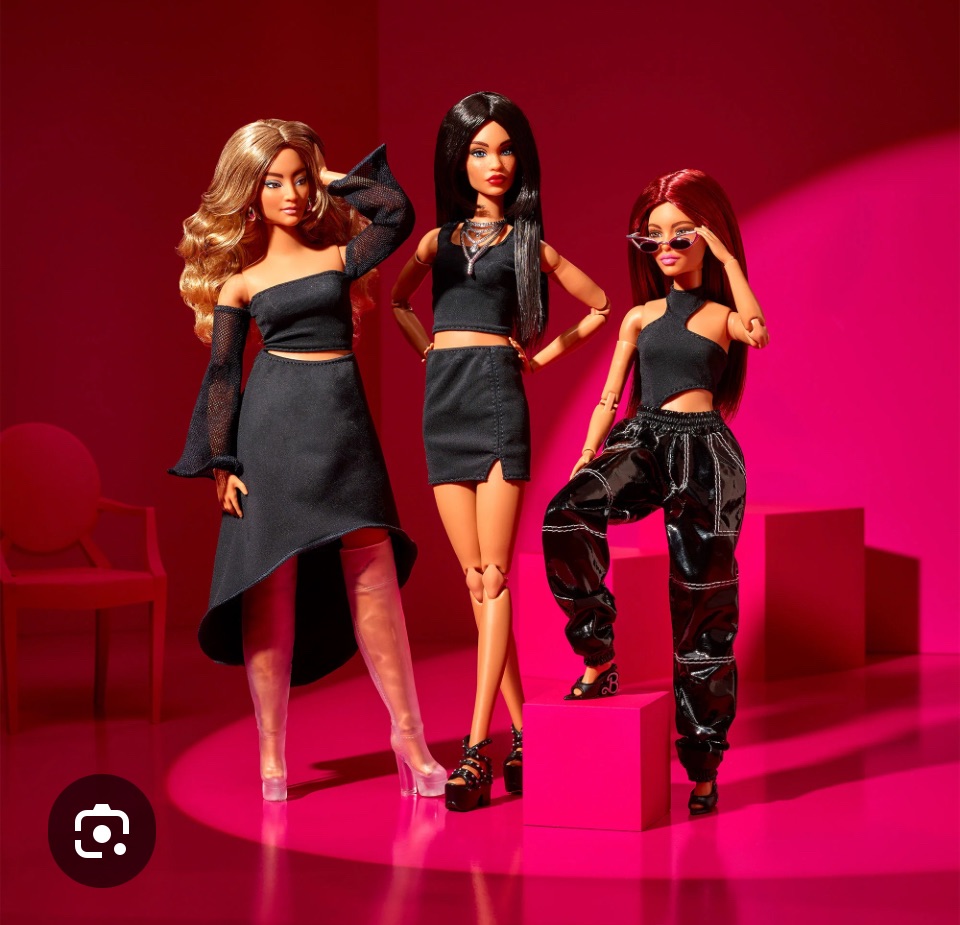
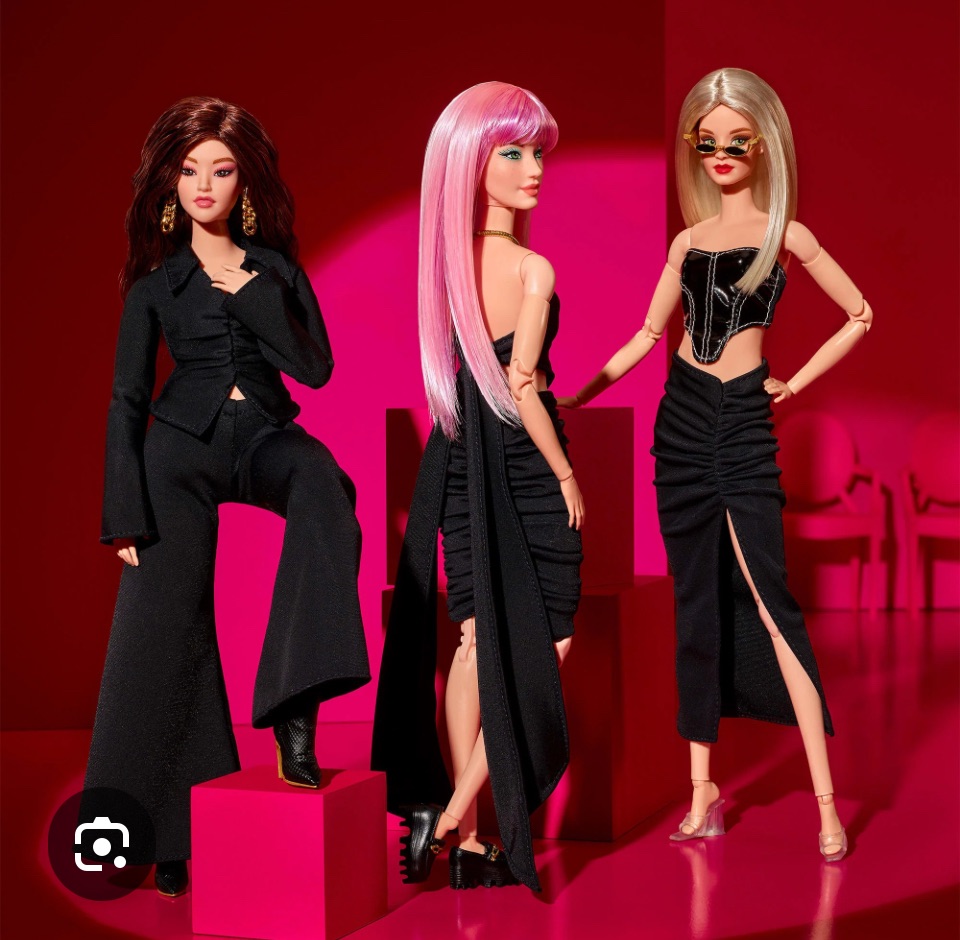
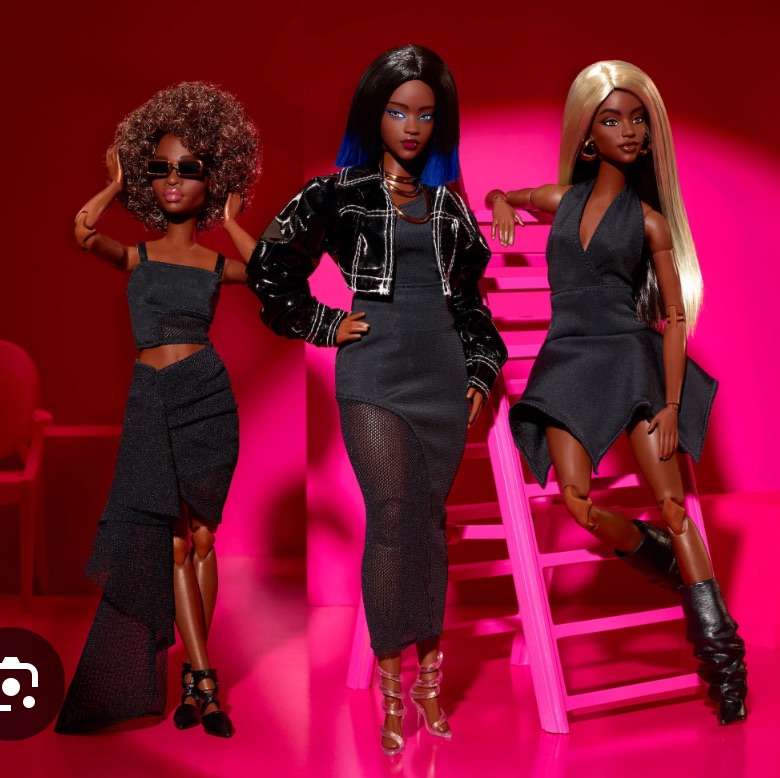
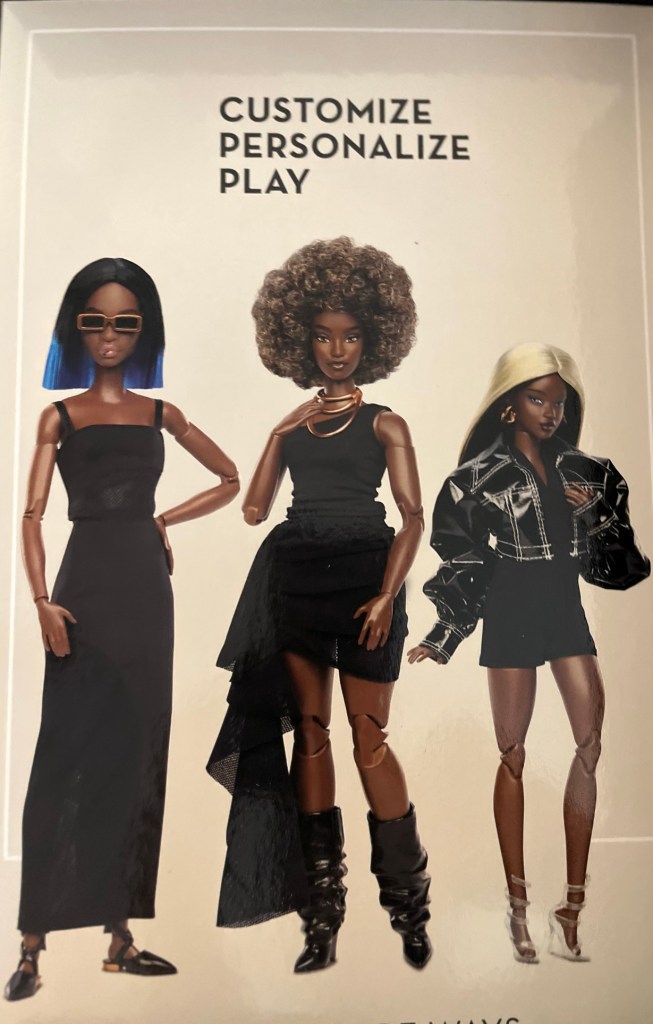
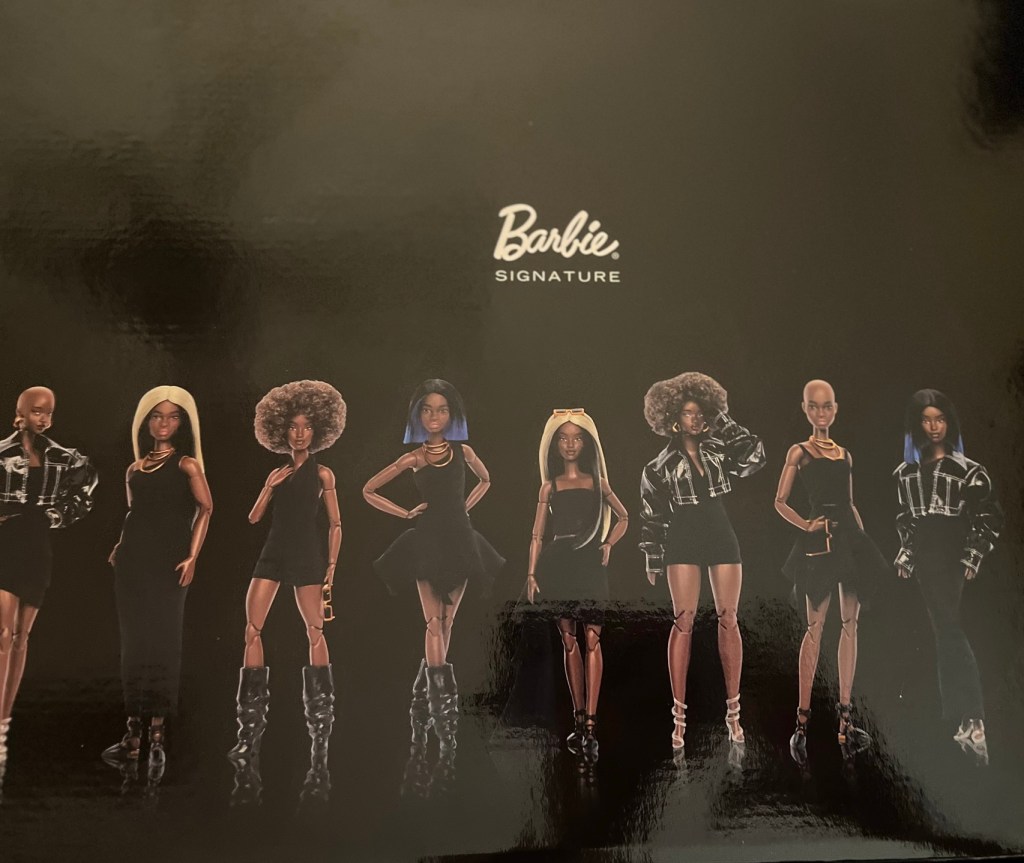
Mattel released three of these customization kits last month (March 2015), and although they didn’t do much for me at first glance, some YouTube videos and Reddit posts convinced me to give one a try.
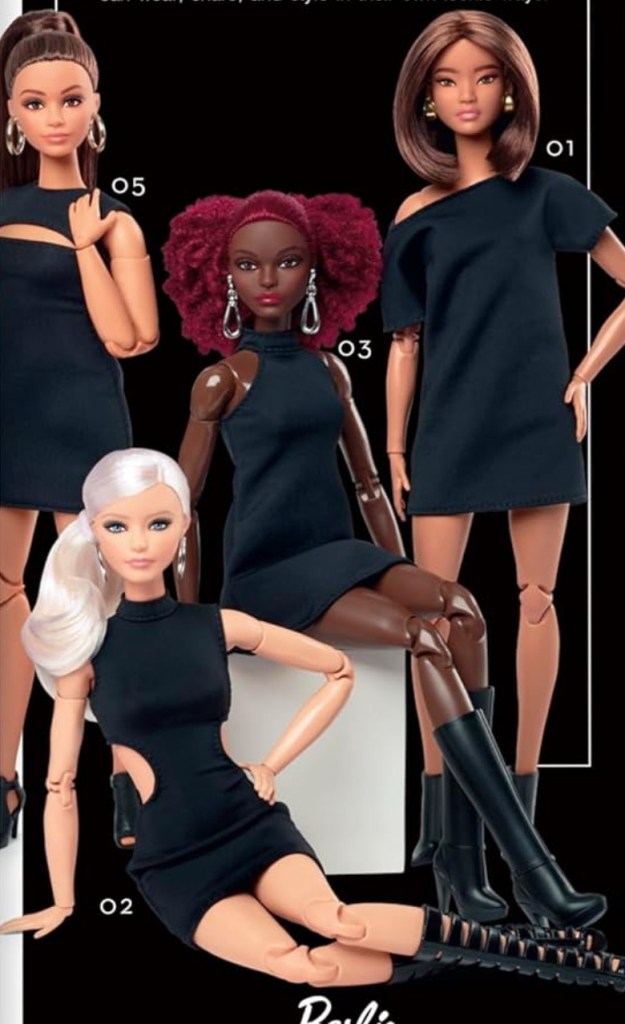
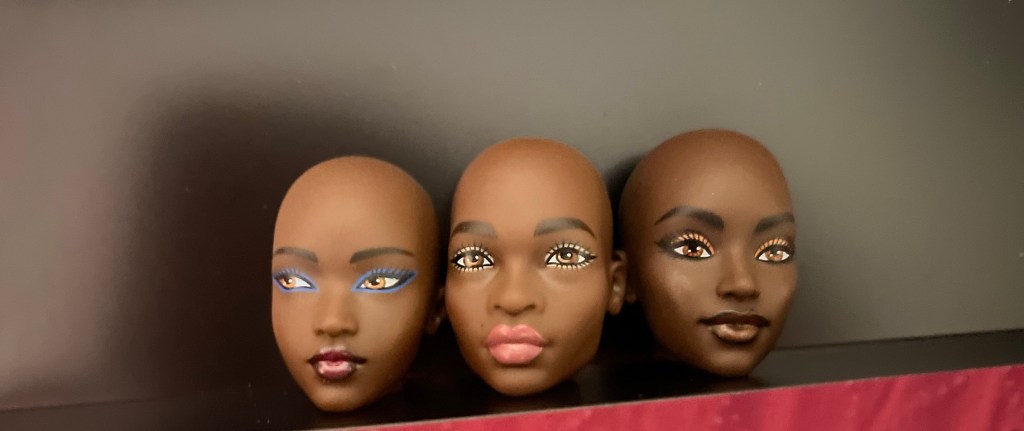
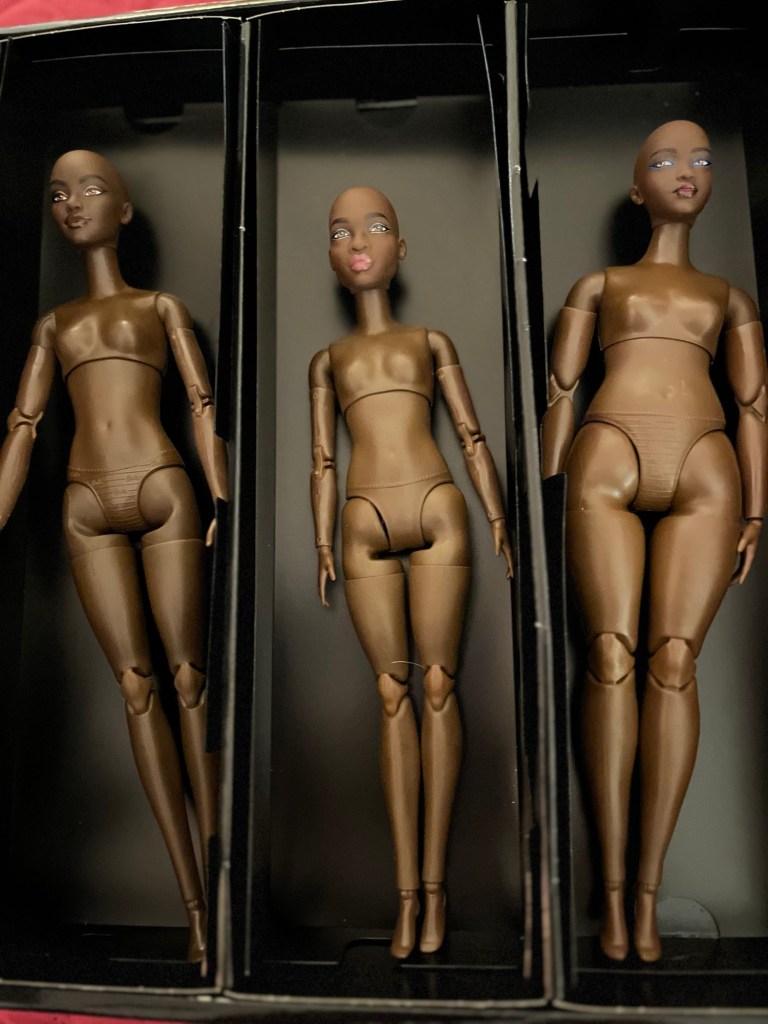
Each kit comes with three different doll bodies – #3 has a petite, tall, and curvy – and three bald doll heads. Mattel has modified the neck peg to make the heads easier to remove and swap, and the individual Barbie Basics dolls they released earlier have the same neck peg as well as matching one of the three skin tones.
Individual dolls at $25 each
These kits are $100 each, which isn’t bad considering what comes with it. Customization has been a thing for years, so it makes sense Mattel would jump on the bandwagon. I started customizing last year, and have found skin tone matching to be the hardest part by a long shot. For the most part, I just try to get close, but others want that exact match which can be hard to find. So it is great to get three dolls with the same skin tone and a fourth doll you can add to the collection. I’d like to think this awareness would carry forward with other dolls, but I doubt Mattel is going to dedicate attention to perfect matches with $8 play line dolls – some of which have beautiful faces that people want to put on better doll bodies. Most likely they will keep the skin matching to the basics line and a few others like the Looks series, and I imagine they’ll limit the new neck peg to a few lines as well. We’ll see.
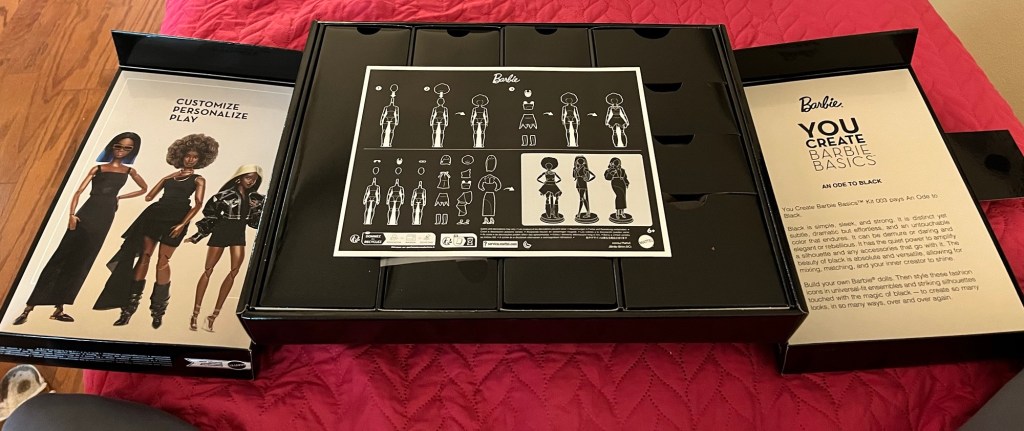
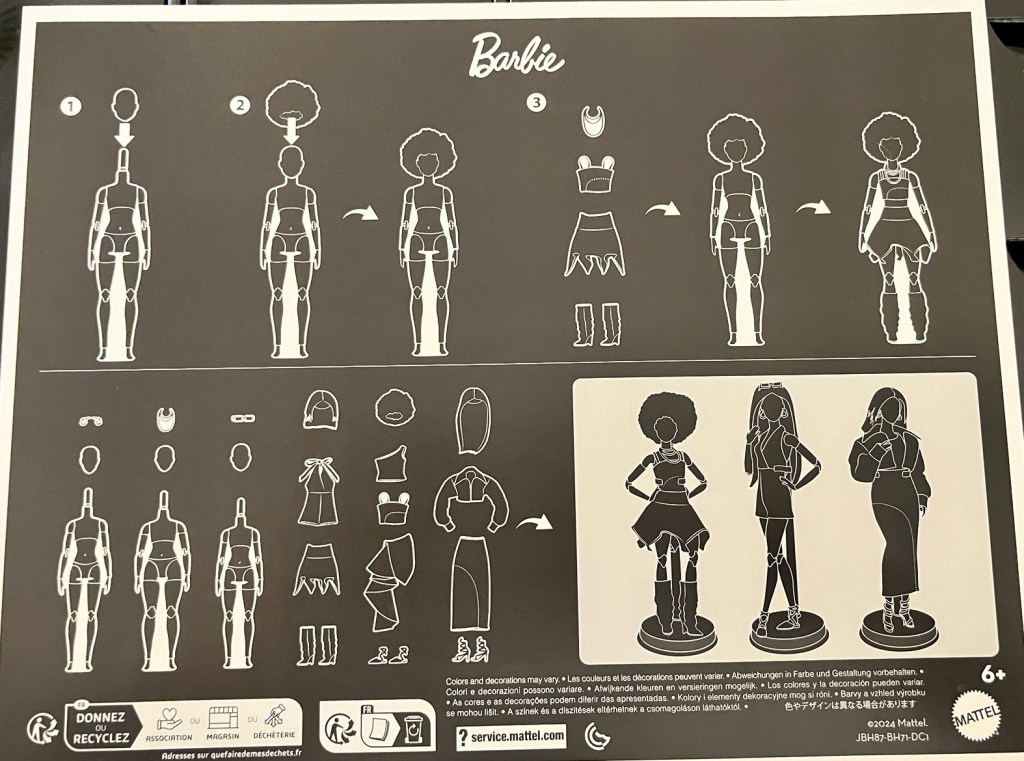
It comes with instructions!
Reception to these kits has been mixed; some doubted the price would be justified while others questioned if the quality would be satisfactory. Personally I’ve tried wigs I bought on Etsy with other dolls and haven’t been satisfied with the results, which is what initially turned me off of these; the last thing I needed was more Barbie wigs I would never use. But more about the wigs in a bit; suffice it to say I am thrilled with my kit.
I chose kit #3 because I thought it had the prettiest face molds. I also liked the clothing pieces of this kit best, although there are some pieces from other kits I would have loved to see in this one. I’m curious to see which kit sells the best.
Kit #1 – it’s fine, but I found the wigs a little boring and I haaaaate those transparent bootsKit #2 – I freakin’ LOVE those creeper shoes and the wide-leg pants, but the faces didn’t do it for me. Maybe someone would want to swap? Kit #3 – my choice
I feel like Mattel put a lot of thought into these kits, addressing more than skin tone matching problems. I love curvy doll bodies in general, but they don’t have anywhere near the clothing options of the other dolls, so the kits and the individual Basics dolls utilize material that can fit any body type, including curvy ones, which is really useful. And the new neck peg really does mean you can remove and switch a doll head without having to apply heat, although you do still have to push them on and pull them off a bit which made me nervous at first. I can’t tell you how many doll heads and bodies I’ve ruined by breaking the next pegs, and I was scared of doing it again, but so far so good. Rest assured if anything broke while I was head swapping Mattel would have had a return on their hands.
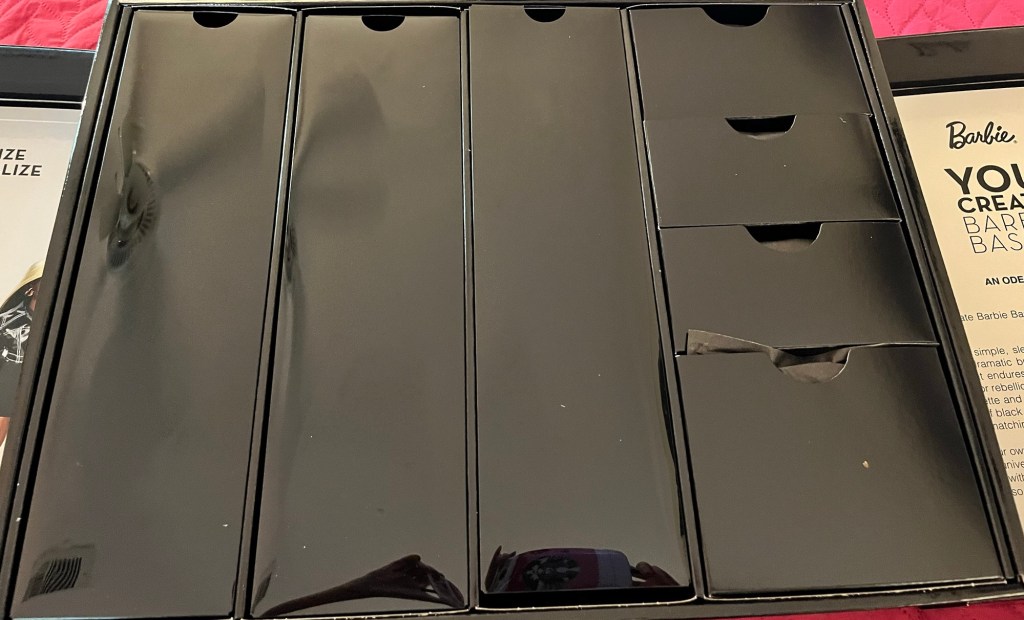
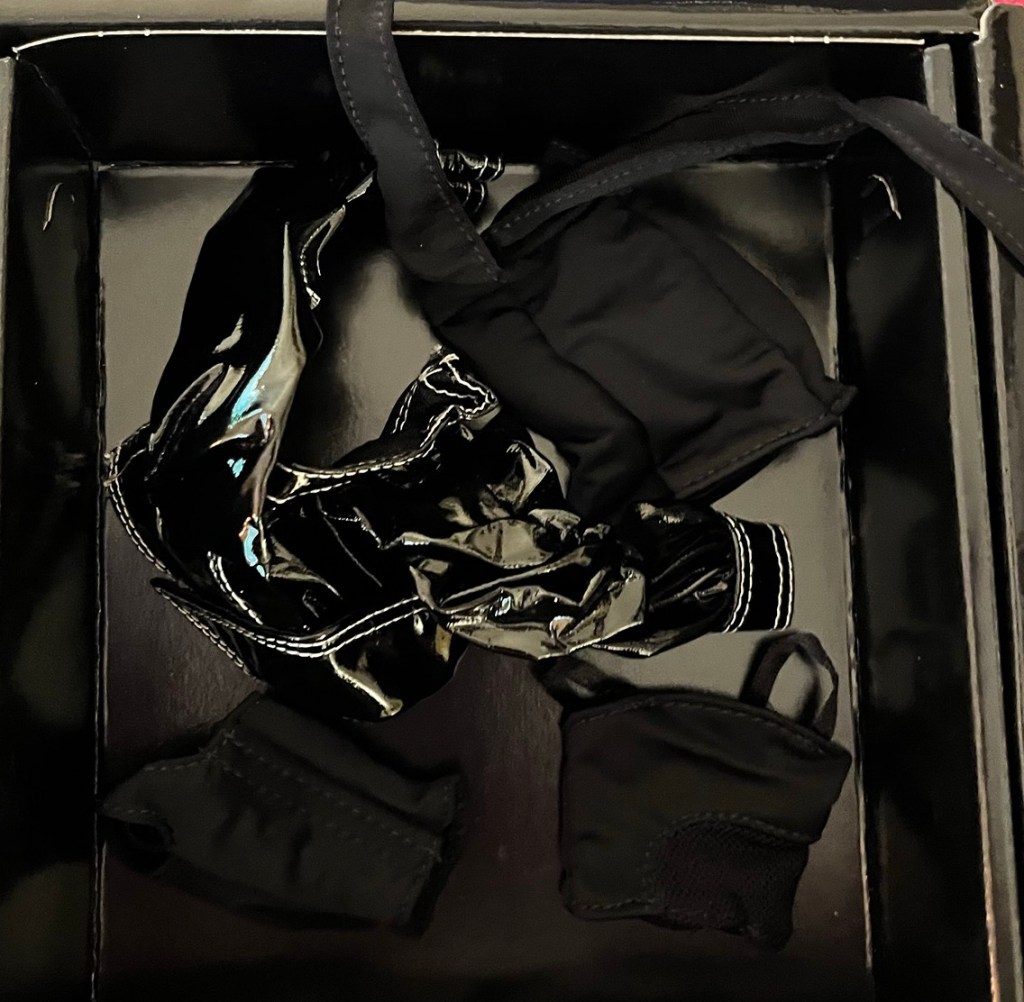
The box is sturdy and worth keeping, even for people like me who do not keep their dolls in the boxes. The containers holding the dolls are plastic and can be repurposed. The containers holding the clothing and accessories are cardboard, but sturdy, and can probably also be repurposed. I’m not gonna lie; I never keep my authenticity certificates, but I will keep the instruction page because it’s kind of cool.
I don’t know if this was another example of Mattel paying attention to complaints or not, but either way, take note that these dolls are only affixed to the box at TWO PLACES, and by loops instead of punch tags. And, no punch tags in the back of the dolls’ heads – just a wee plastic cup holding them in place so you can pop the heads out easily. So yes, it can be said that these dolls were easy to remove from the packaging, saving us all countless hours of frustration.
Each body has a suggested head paired with it, so I started out following Mattel’s lead but didn’t stick with that very long. More on that in a bit.
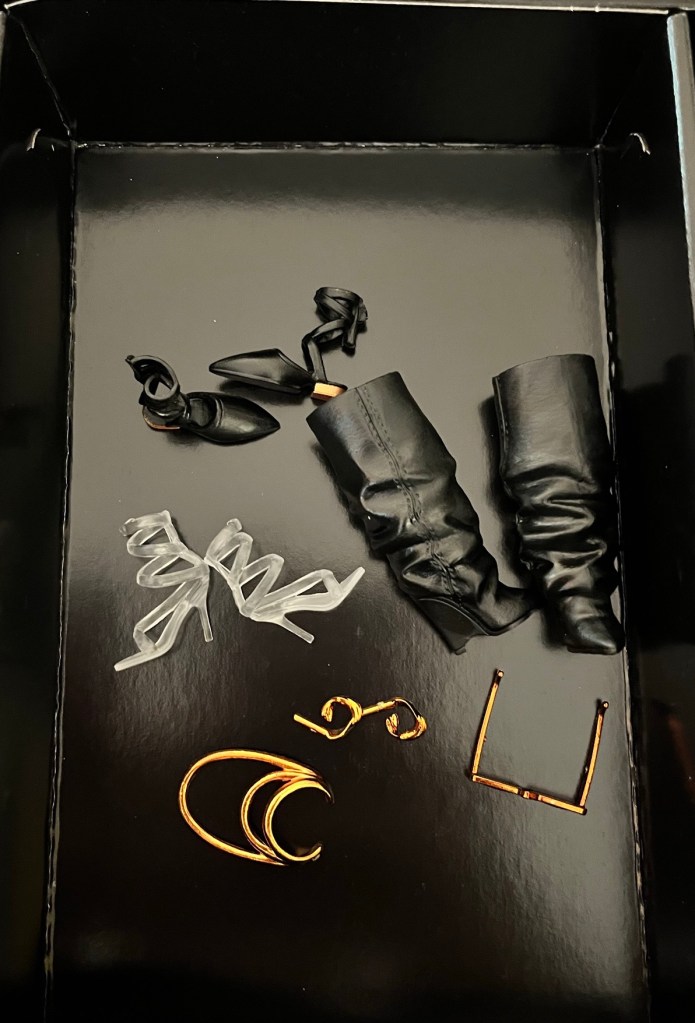
Each of the little compartments held nicely wrapped items, which is always a fun touch, and the wigs came wrapped in little hairnets. The clothing pieces are all made of a nice, stretchy material that feels substantial instead of flimsy, unlike a lot of Barbie clothes. The shoes are nicely detailed; this kit included a pointed toe flat with ankle straps as well as a slouchy boot, and the flats have a little painted gold heel. I love a good flat, but in Barbie world they’re pretty rare, so I’m always going to snatch them up when I find them. Each kit also has one transparent pair of shoes (hence those hideous boots in kit #1) and I almost like the ones in my kit, except the heels do that thing where they immediately fold inward which looks incredibly weird. The accessories are shiny instead of the dull plastic Mattel usually uses, but there’s not much to choose from here. One pair of earrings, one necklace, and one pair of sunglasses for three dolls total just doesn’t add up, so Mattel, do better in this area next time around. For $100 I think each doll could have had their own earrings and necklace at least.
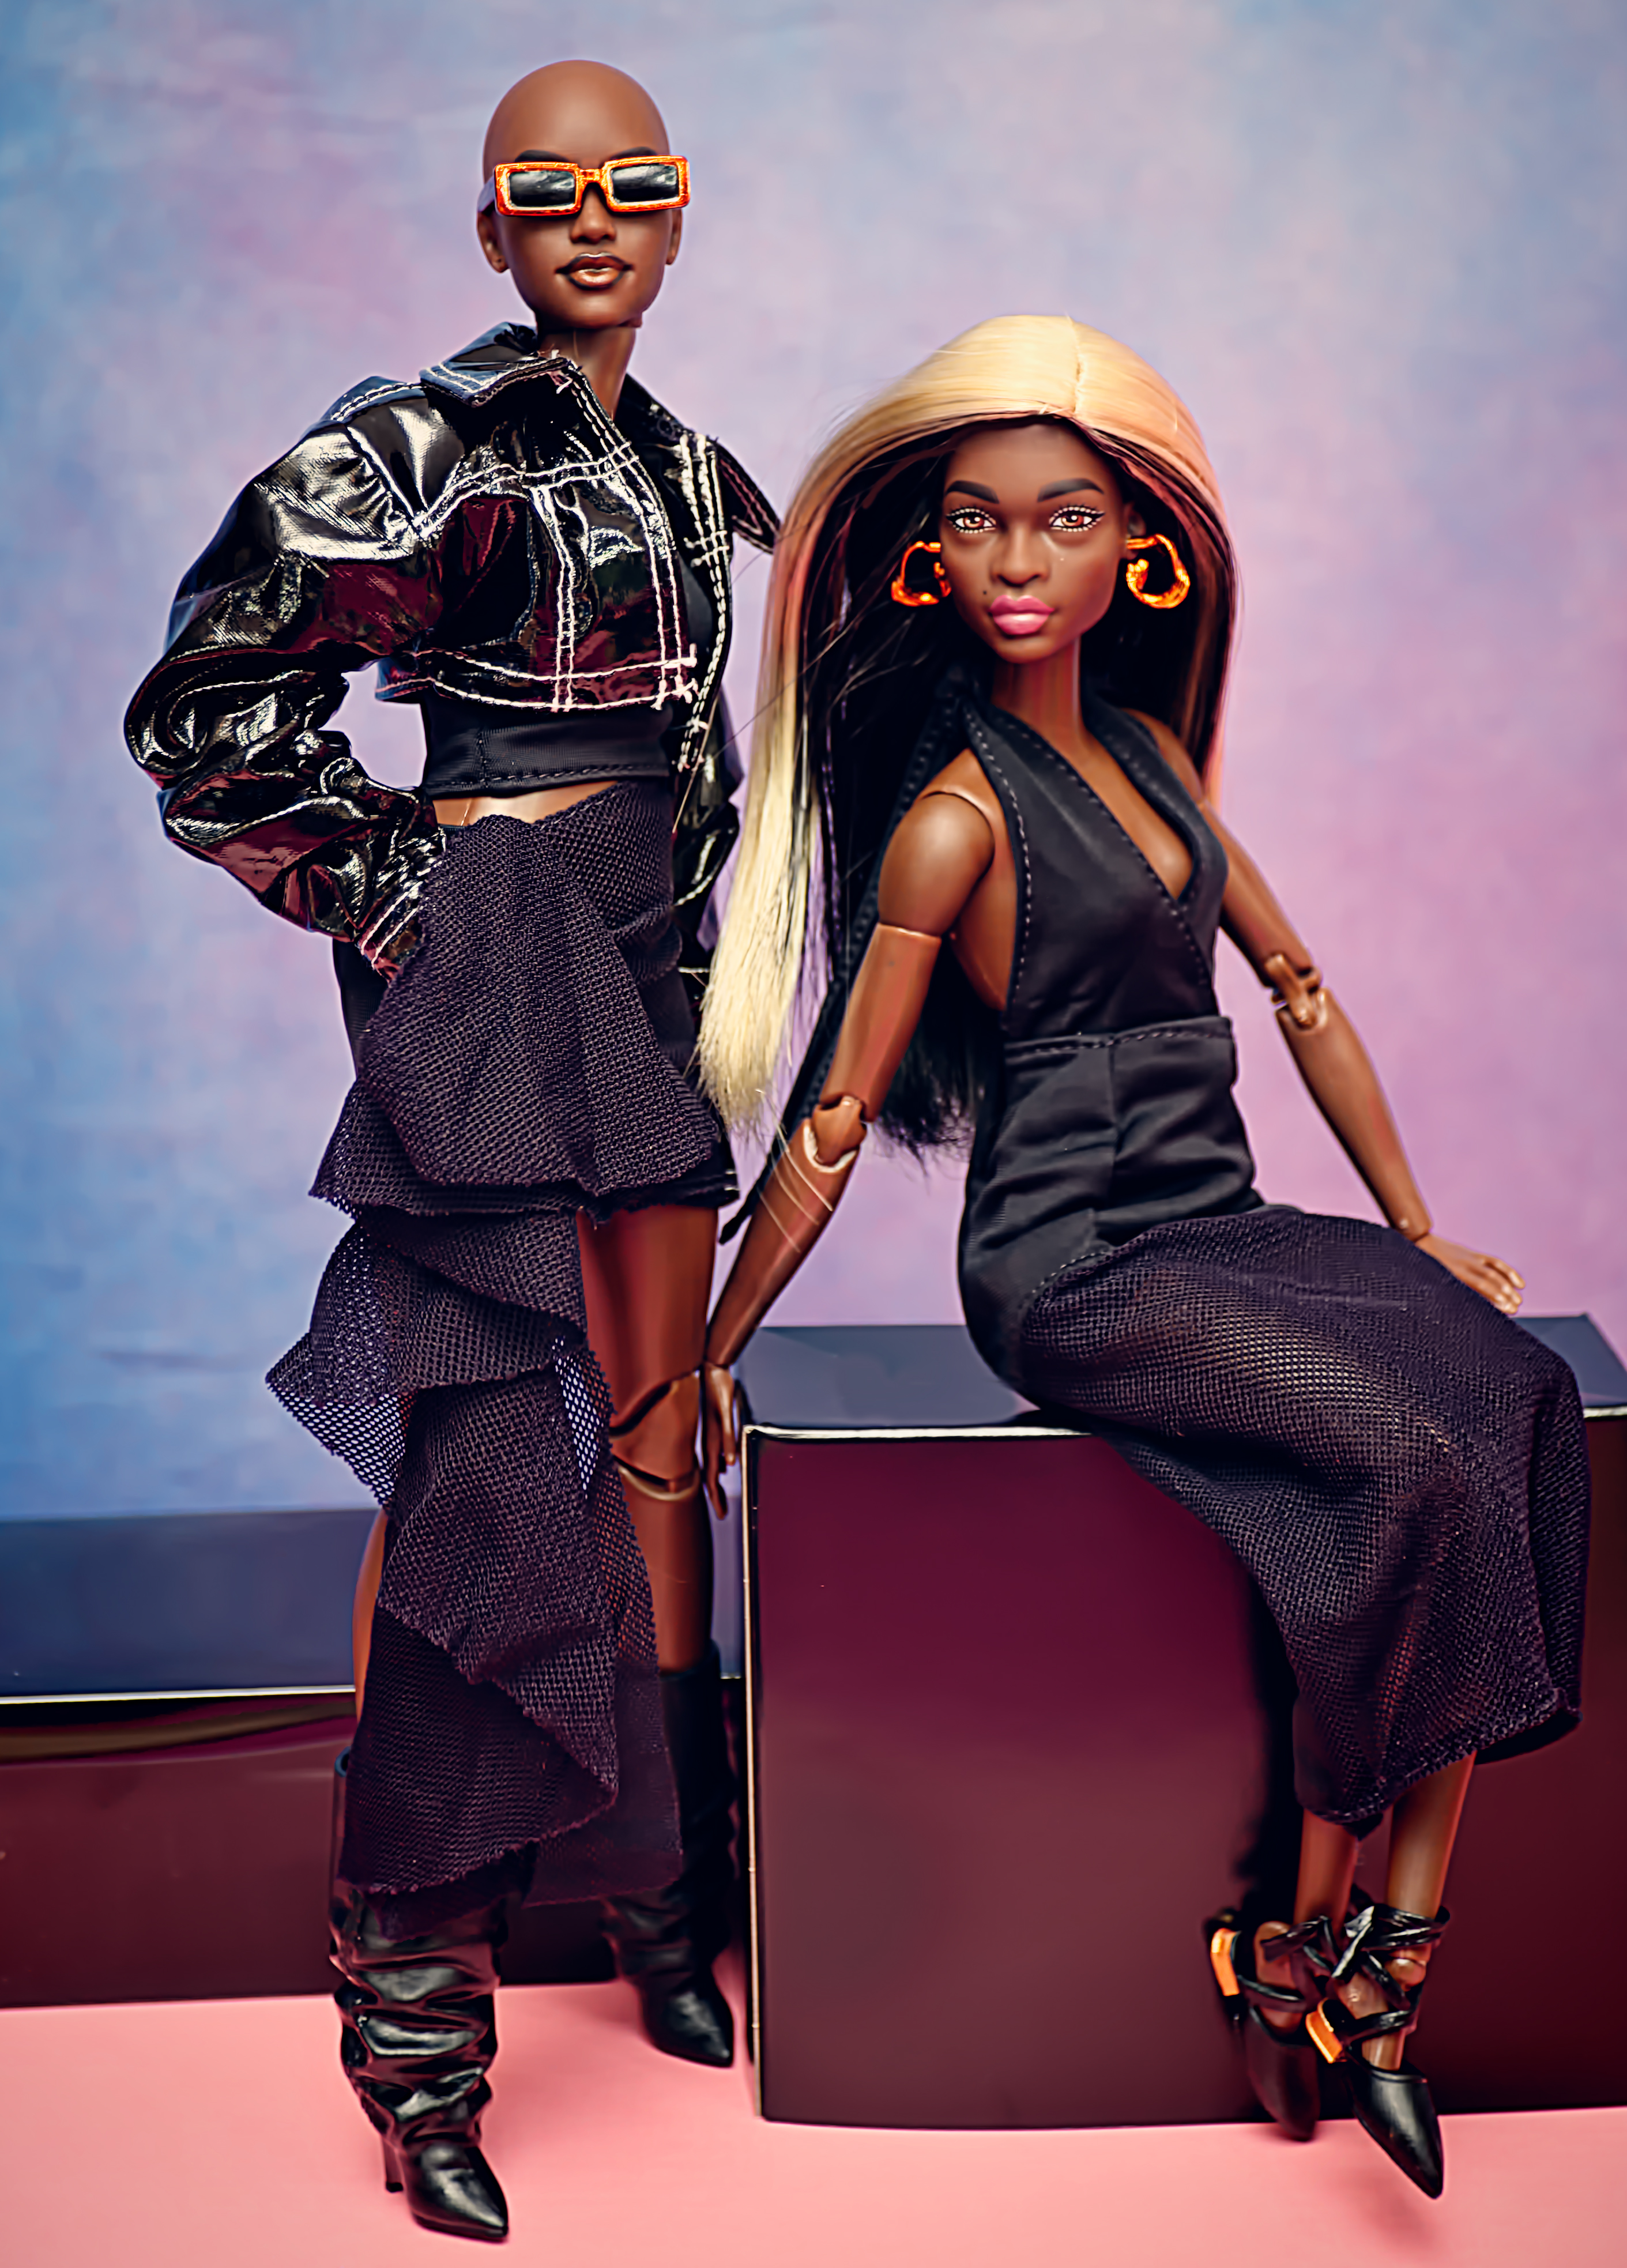
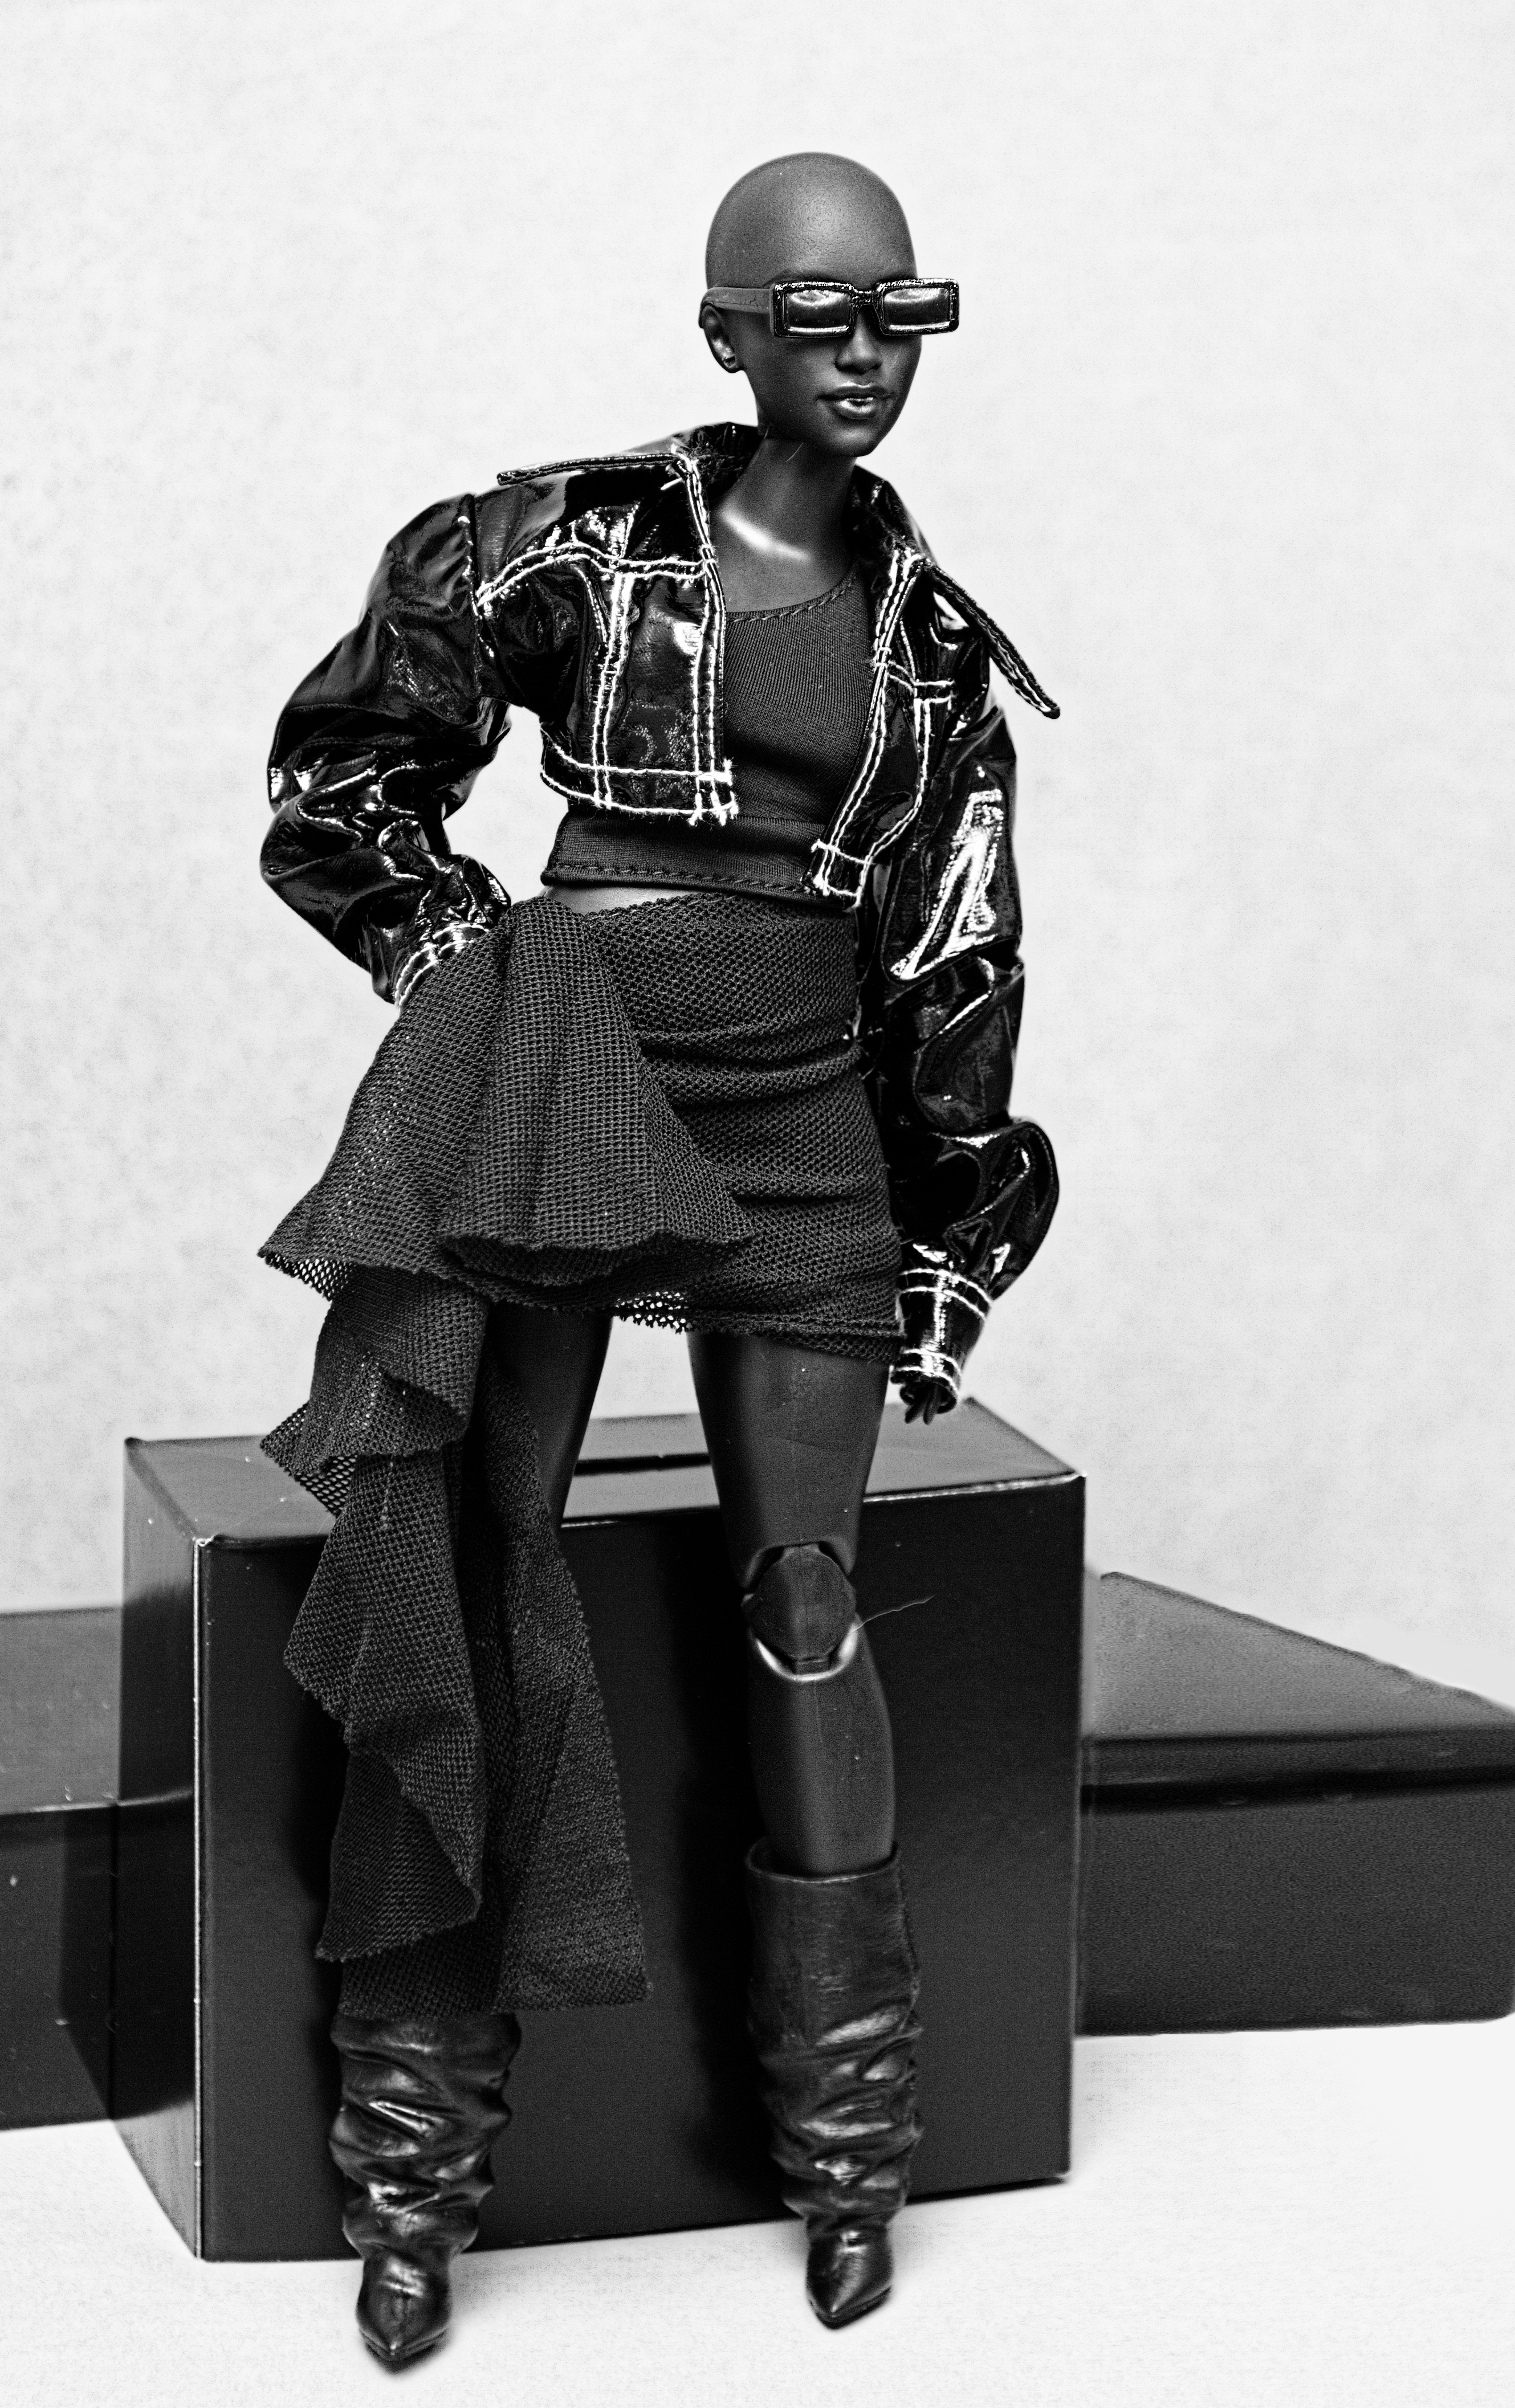
The faces in this kit are just gorgeous. I particularly love that middle mold – it’s androgynous, leaning towards masculine, and I am here for it – but there’s no way that head belongs on a petite body. I’ll be fixing that shortly. We also get a side glance with blue eyeliner, and a gorgeous neutral palette. (I know the skin tones look different in the head photo but that’s just the limits of my phone camera.) I do think they could have sprung for real eyelashes, but Mattel isn’t listening to me about such things, so we get lashes that are painted on instead. Oh well.
The bodies feel solid and I detected no loose joints with these-something that will probably change with time, but whatever. They aren’t perfect – there’s a little chip on one foot, for example, and if I really scrutinized them I could possibly find other flaws, but I am not particular about things like that so I didn’t bother. If you are one to be annoyed by flaws though, my guess is you will find some as these are still mass-produced dolls. But there were no big issues to report.
For my first assembly I went with the head and body combinations that were laid out in the containers. The clothing I just played around with until I was satisfied, but the wigs were more of an issue. For whatever reason, the Afro wig would not stay on any of the doll heads. There is a little silicone cap sewn into each wig that is impressive overall; whereas any other doll wig I’ve tried sat waaaaay up on Barbie’s head making it look almost like a hairy hat, these wigs sit close to the head and look pretty great. Wig hair won’t flow like rooted hair does, so especially with the long straight wig the hair falls a bit stiffly and flips out at the end, but I don’t think there’s any way to fix that. The hair does feel nice and full and the hairlines are not problematic at all. A little piece of double stick tape seems to keep the Afro wig from falling off, so I’m ok with it. The other two fit fine and stay put.
My main issue with the “assigned” heads is the androgynous one – that mug does not belong on a petite body. I wanted her to be on the tall doll, with the Afro wig, to give her as much height as possible. Other than that, I was neutral about which head went on which body; the heads look fine on either one. I probably should have put the blue wig on the head with the blue eyeliner, but I like the shorter style on the curvy mama. It works with the pleather jacket too. I tilted the straight wigs to the side a bit as I didn’t care for the middle part; sure, it makes one side a little longer than the other, but you can’t really tell.
As much as I like those sunglasses, I’m torn about using them. I prefer it when sunglasses are transparent so you can see a doll’s eyes; when they’re totally concealed the doll loses a lot of its appeal. I’ll probably use them on an older doll with a boring mug.
For the hell of it, I used one of the skirts as a top, just to see how interchangeable the items really were. The tall doll body is wearing the miniskirt with the flowy side train as a top. It looks pretty good that way actually, and it’s nice to have that as an option. The pointy skirt is a bit weird and probably my least favorite piece. I’m not sure it’s something anyone would really wear, but I get it – coming up with 900 unique black basics pieces for all these kits must have been a challenge, so you’re gonna get a few clunkers. It’s not bad; I just can’t help thinking it needs bells sewn onto each tip and a jester’s hat.
Overall I am really happy with this kit. As far as I’m concerned it kept its promises – the heads are much easier to take off and put on, the skin tones all match, and the wigs look great. I also like that there’s another individual doll I can buy with the same neck peg and skin tone for more customization options. The bodies are sturdy and the clothing seems to be well-made. And the presentation is nice – it was fun to open the box up and see what was in each section. Personally I think it was worth the $100 plus shipping, and I hope Mattel makes more of these kits in the future. I also loved the original Basics line and am happy to see all these LBDs back in production. So two big plastic Barbie thumbs up from me on this kit!
Dang, I have been busy with these mannequin heads, y’all:
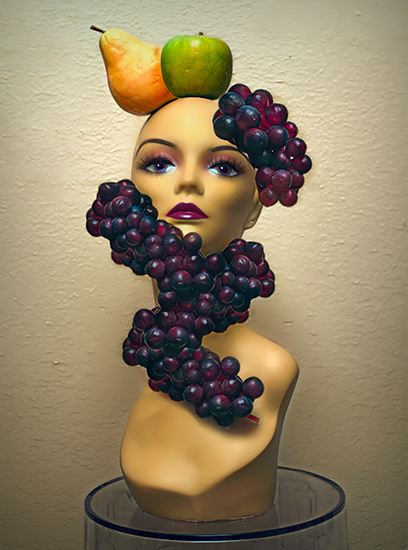
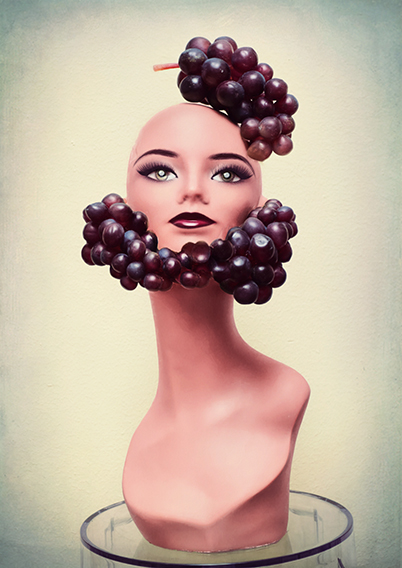
First of all, I got the idea to stick a bunch of fake fruit to one of my mannequin heads. I really don’t know why this idea came to me, but once the thought occurred to me to do it I had to give it a go.
I used double-sided tape to stick some fake fruit to the mannequin; I actually don’t have that much fake fruit – I used Photoshop to duplicate the grapes and stick’em all on there.
I call this “The Grapehawk”
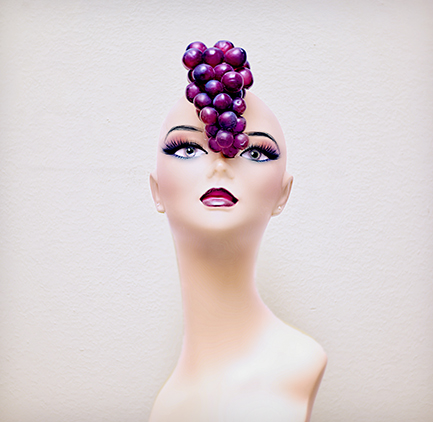
This one is my favorite of the fake fruit shots. Somehow my edits ended up making the mannequin’s face look so real, it’s almost creepy:
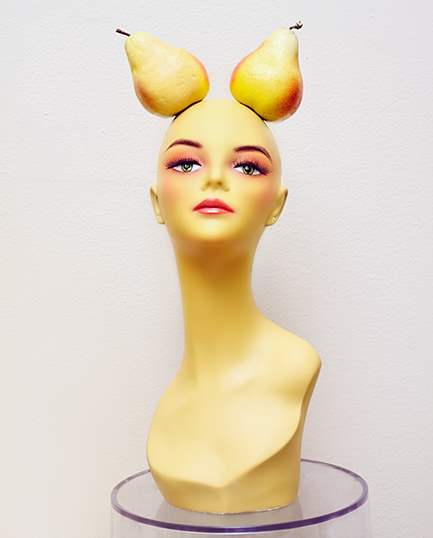
What should I call this one? The Pear Devil?
I also gave her a grape beard in one shot:
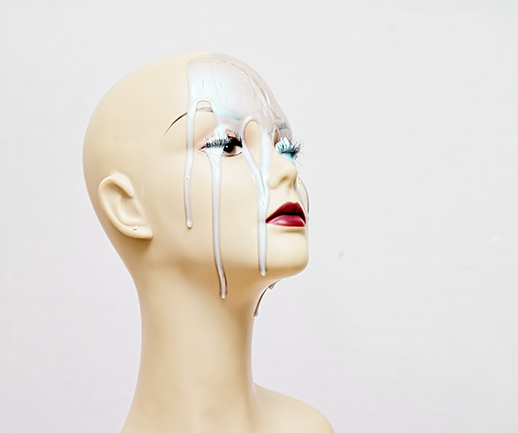
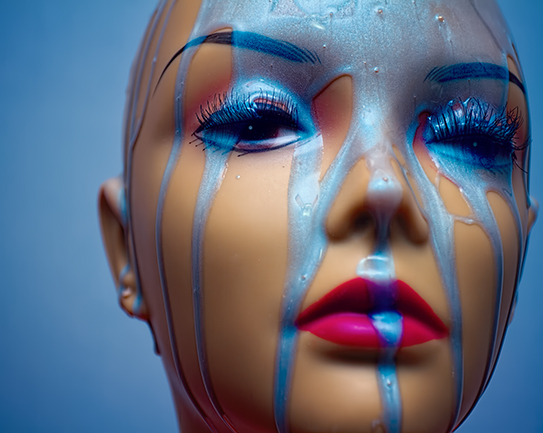
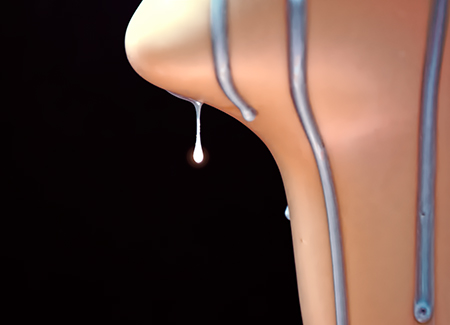
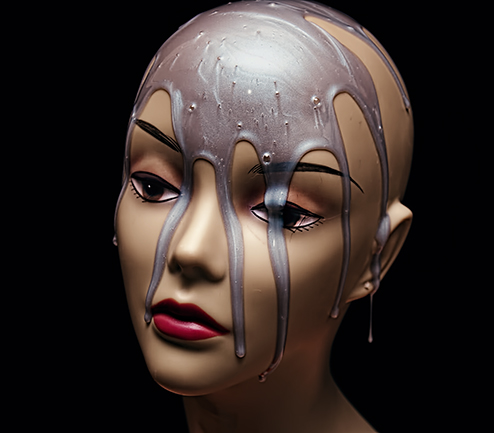
Now, some of you may remember that when I tried out all those Oribe products, I mentioned how shiny and metallic silver the Silverati shampoo is, and how much I wanted to take pics of it running down my face. That would have been pretty messy to do, but when using a mannequin as a model, it was just crazy easy:
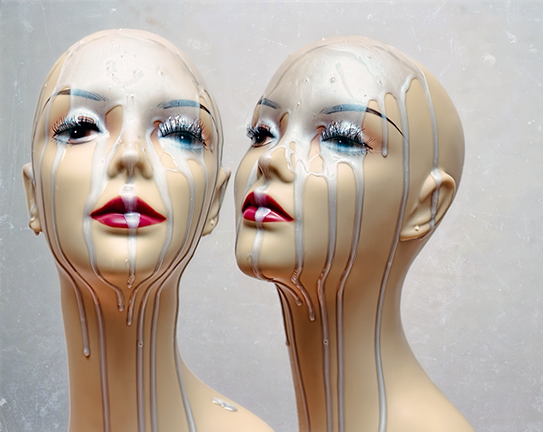
I really only took pictures of one mannequin. I composited this shot and changed the face a bit on one of the images so they didn’t look exactly the same.
These mannequin heads are so ridiculously easy to work with. The have these perfectly smooth, proportioned faces and they’re easy to manipulate as well as glue stuff to or smear crap all over. When I was done, I was able to just wash the old gal off with a rag and call it a day.
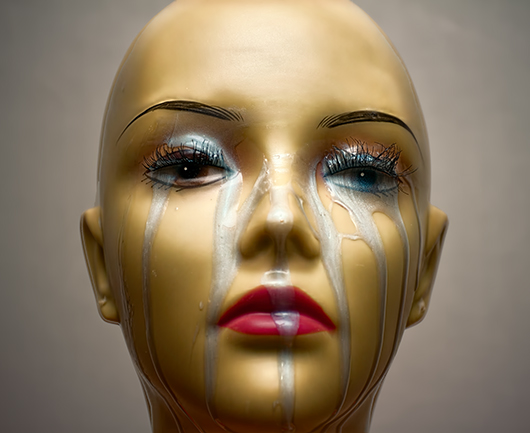
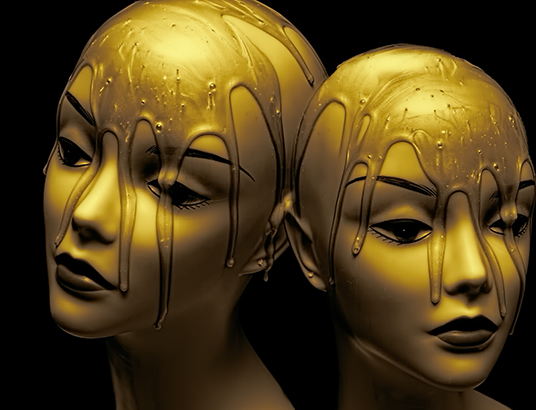
The perfect “skin” tones on these mannequins make them super-easy to overmanipulate in processing. I don’t have to worry about uneven skin tones that don’t match up – and this all led to an absolute photo-editing frenzy. I started out simple enough, but as time went on I started to really go to town with the color and shading:
See what I mean? The mannequin is such a great ‘blank’ canvas for some awesome edits and I can really cut lose in all sorts of ways I’ve never done before.
Not to mention how easy the setup and breakdown is. I managed to shoot all these photos this morning before heading out to tutor in the afternoon. Usually that’s not even remotely possible – it takes me at least an hour to put on my makeup and then after the shoot is done, I have to wash it all off again. Not to mention how much longer it takes me to shoot myself as opposed to a perfectly still doll head.
And I didn’t even need any fancy lighting, just my camera with my external flash. Heaven!
I am sure eventually I’ll get bored with these mannequins, but then again, there’s all sorts of mannequins out there with all sorts of faces, and they do whatever I want them to do without complaining. The perfect models!
I can’t believe how many photos I was able to take as well as edit today, while also eating two meals, tutoring a student, and swimming for half an hour. I’m over the moon with this new direction!
When searching eBay for more dolls to shoot, I came across a few that I had when I was a child. My mother used to buy me a Madame Alexander doll every Christmas and birthday, and my favorites were the ones created to represent different countries. As an adult, they often seem ridiculous, having the same European baby-face with little more than an eye and hair color change, but for nostalgia’s sake I picked up a few. They were pretty cheap, and in mint condition – which is a bit of a dilemma now, since my idea was to abuse them a bit for photos (dunk them in water, disassemble them and put them back together in weird ways, etc). I ended up buying a small lot of really trashed ones so I don’t have to be conflicted about destroying the pristine ones I picked up.
I don’t have the trashed dolls in yet, though, so Saturday I decided to take one of the nicer dolls and keep things simple, photographing her against a basic black background and just trying to make her levitate a bit without getting fancy. I wasn’t expecting much out of these shots aside from getting a feel for how to photograph them in a manner I would like. One of the biggest difficulties I had was getting the lighting right; I only managed it on some of the shots as I experimented, while in others things were too bright and flat. But I’m learning. Also, I had her perched on a clear plastic stool, and while it was a decent height and had a nice shiny surface for her to stand on, it required me to squat and crawl around a lot which isn’t good for my already bad knees, so I may have to work on getting something to put the dolls on that is higher and allows me to stand upright.
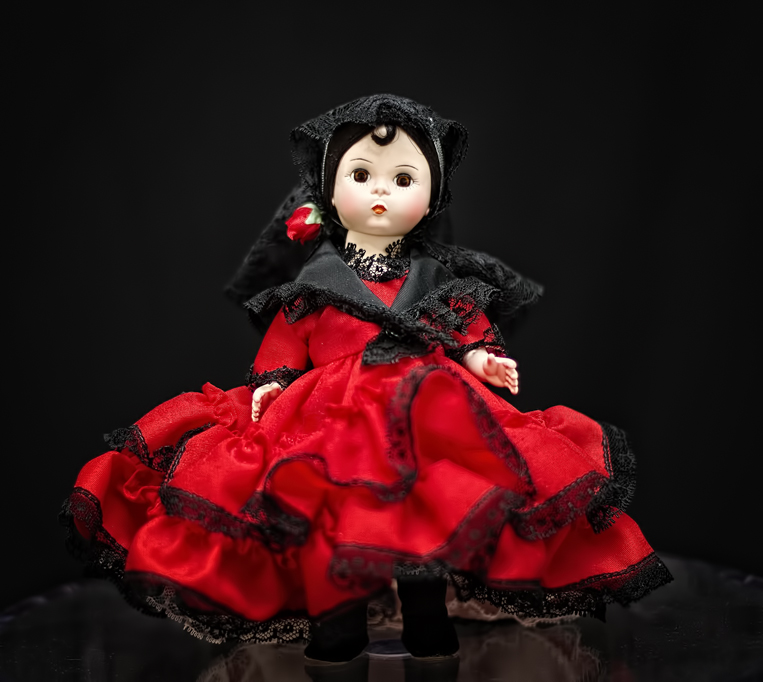
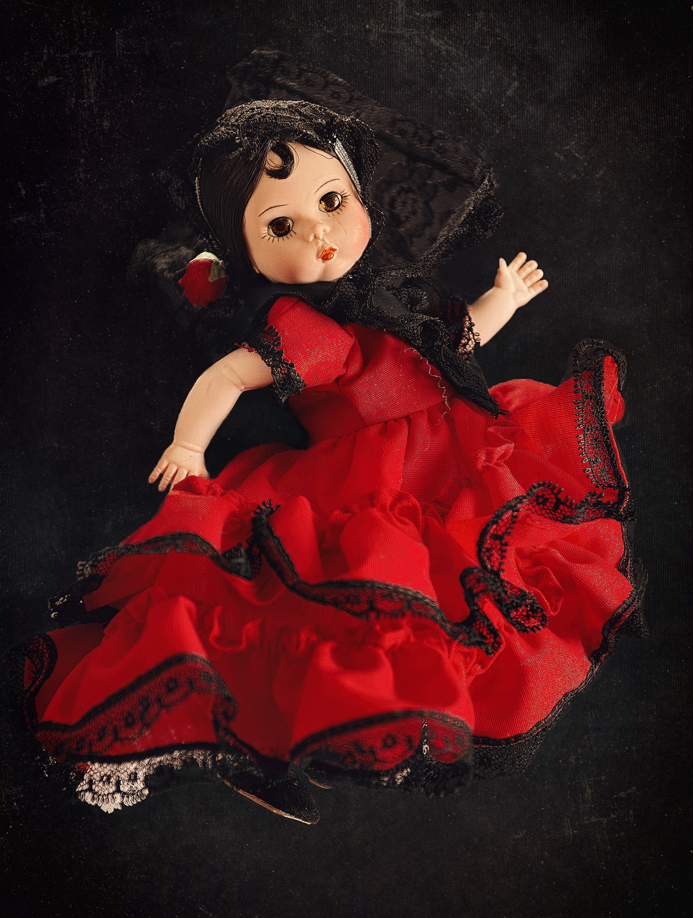
But first, let’s just check out the doll:
This is Spain, looking a little constipated for some reason
The Spain doll was always a favorite of mine; as the girliest girl who ever girled, I was gaga over all the ruffles and lace, especially the mantilla on her head. I never did much with these dolls except admire them, since that’s really all one was supposed to do. Their bodies aren’t very bendy and the fussy costumes limit movement even more – not too much of a problem when sitting them on a shelf to add to a collection, but much more so when trying to pose them in odd ways for photos. I guess that’s not what Madame Alexander had in mind for them when she designed them.
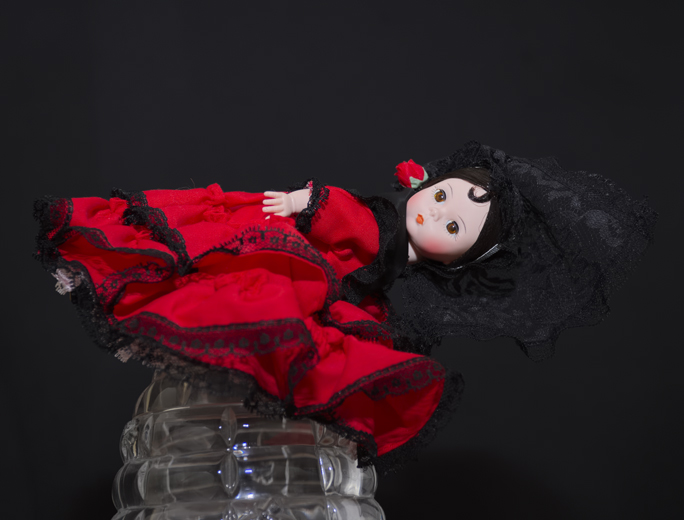
So here’s attempt number one; Miss Spain here is sitting atop a crystal honeypot because I thought it would provide good balance without scrunching up her clothes too much. The only reason I have a crystal honeypot is because when Doug and I got married apparently someone thought I might have use for such a thing (I’m sure this was someone in Doug’s family, as my non-crystal-owning relatives wouldn’t dream of purchasing something like this). Anyway, after much editing here’s the final result:
Obviously I flipped the picture, since it seemed to work better this way. I’d used an on-camera softbox for some of the shots to hit light directly to her face, since I felt the Speedlite bounced off the ceiling was creating too many shadows there, but in the end I don’t care for the result. The image is too flat, especially in the face, so in the future I’ll stick with just the Speedlite and worry less about shadows. On the plus side, I’m getting better with layer masking, and didn’t have too difficult a time cutting out the image from the original shot and layering it into a shot of the black background. I futzed around a lot in RadLab and Topaz to get the right textures and tones, and in the end added a bit of motion blur to her skirt to give a better effect of movement. Not a great shot, by any means, but since these were just practice shots anyway, it went better than expected, at least.
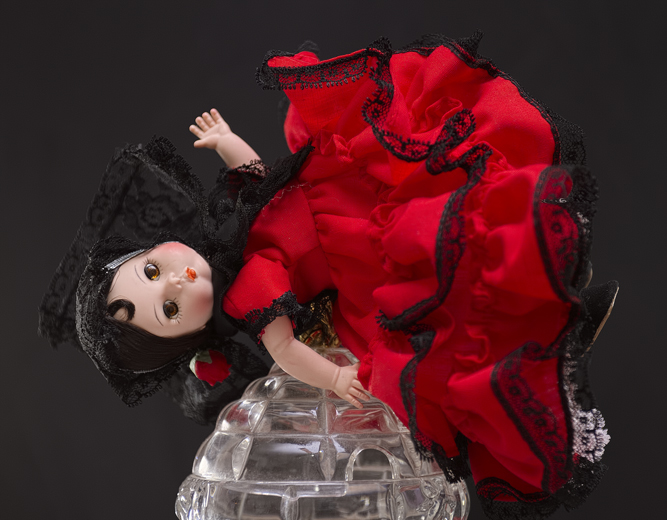
I like the next shot better – but let’s start with the original:
I’d aimed a lot of light behind her here, to help provide an outline against all that black when I had to crop her image out of the picture later, and as you can see without the softbox she has much more dimension and appears softer overall. Again I futzed and edited with RadLab and Topaz, and added texture to the background to disguise some of my sloppier cropping spots (although I really didn’t have too many glaring errors anyway), and well, here you go:
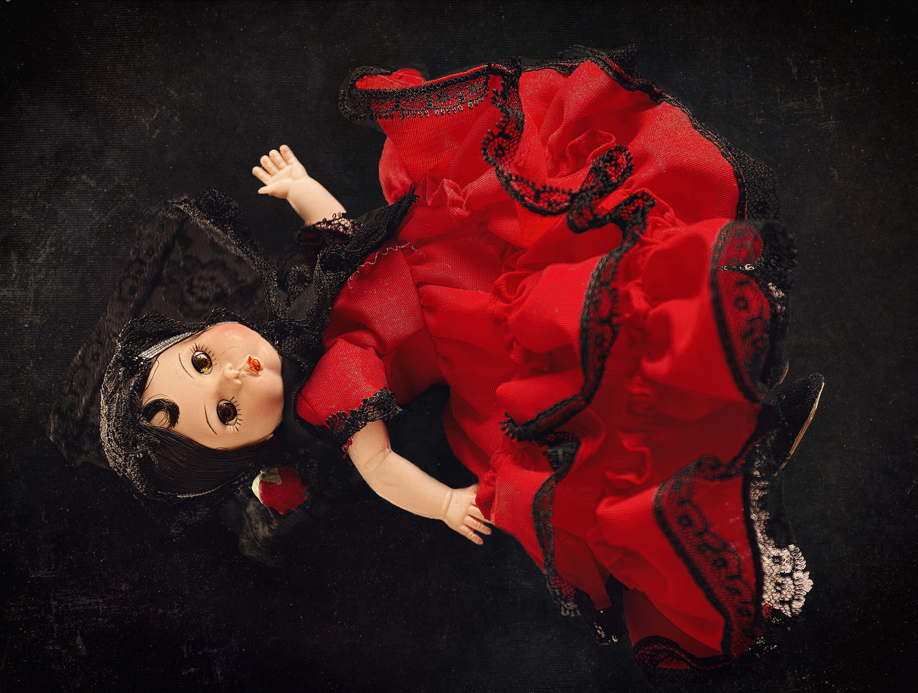
The goal was to make Miss Spain look like she was floating, obviously, but I don’t think it worked for a couple of reasons. First of all, the subject is a bit too large and takes up too much of the frame, and secondly, she’s already an inanimate object so it’s much less unusual-looking to see her hanging out this way. I hope that makes sense – even though there’s clearly nothing holding her in this position, it appears to be nothing more than a photo of a doll standing that’s been flipped on its side. Again, I think if I’d had more negative space around her body that would have helped, but still, a doll floating against a black background really isn’t that interesting, and I think for these doll shots I may need more setting or context to make them work. Something she’s floating above or in front of, for example, might have made this more effective. In the end, I punted and flipped the shot, and I think it helped a bit:
For some reason, when flipping it vertically it’s more apparent that the doll isn’t standing on anything, and it looks more like she’s floating or leaping. It bugs me a bit because I filled in all the shadows with the assumption that she’d be laying (lying?) on her back and they aren’t placed properly for this orientation, but I added enough texture to the background that I think it isn’t too noticeable. And again, much nicer without the fill flash/softbox; the doll looks much more three-dimensional here than in the previous photo.
In the end, both of these were pretty silly shots, really, and were nothing more than some experimentation to get started working with the dolls and seeing what I can do with them. I’m not sure how interesting any of these pics are going to be to anyone else, and it’s possible just a few of my followers will be willing to to go down this road with me, but it’s a subject that interests me right now, so I’m moving forward anyway. I do plan to use myself in some doll shots, too – I’m particularly excited about the Madame Alexander angel and devil dolls I got off Amazon earlier in the week – but as I’ve said many times here, taking self-portraits has gotten a bit boring, and I need something else to occupy my photography-time. Not sure I’ll stick with this long, or even at all, but if it ends up being a bust I still think it’ll lead me somewhere better in the long run. Which is how it always goes with creativity.
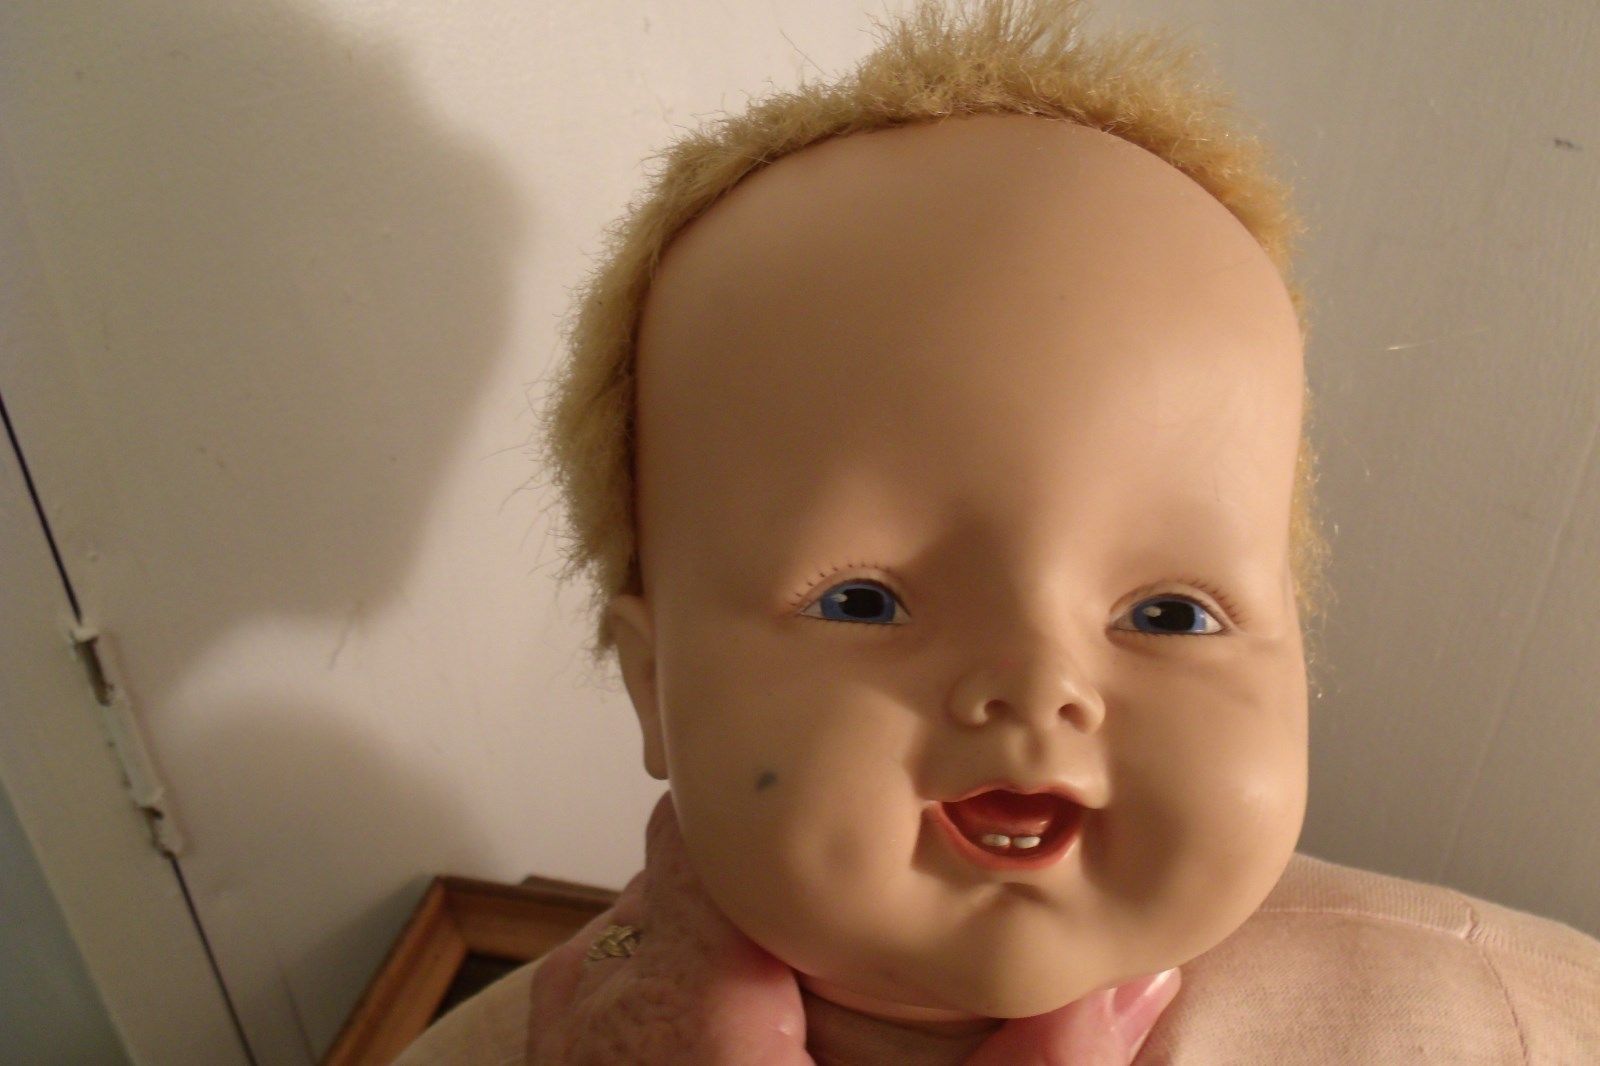
Now, allow me to close this out by leaving you with a more horrifying image in relation to my current doll obsession. In searching for MA dolls on eBay, I came across a lot of the company’s baby dolls as well. I have always found baby dolls particularly creepy (and a lot of people apparently find the regular MA ones creepy as well) and at some point got the idea to find THE CREEPIEST BABY DOLL POSSIBLE and splurge on that one, too, just to tap into everyone’s doll fears with some disturbing baby shots at some point in the future. Turns out the person who listed the auction on the doll I purchased had decided to do some of that work for me, as one of the photos of the doll in the auction was probably the scariest thing I’ve ever seen:
SOLD!
Everything about that shot is horrifying: the shadows, the weird angle, the chipped paint on the door hinge – everything. And if you look closely, you can also see that SOMEONE IS CHOKING IT. Honestly, I’m not sure I can ever re-create the horror of this shot, but be prepared to see this little guy haunting you (and me) soon. The auction says it’s a girl, but I think it’s a dude, and for some reason I’ve already named him Sherbet. But that might be sharing too much of the inner workings of my weird mind, so I’ll stop talking now.