
Dang, I have been busy with these mannequin heads, y’all:

First of all, I got the idea to stick a bunch of fake fruit to one of my mannequin heads. I really don’t know why this idea came to me, but once the thought occurred to me to do it I had to give it a go.
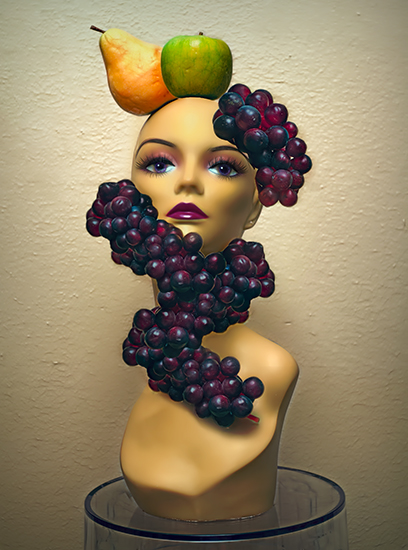
I used double-sided tape to stick some fake fruit to the mannequin; I actually don’t have that much fake fruit – I used Photoshop to duplicate the grapes and stick’em all on there.

I call this “The Grapehawk”
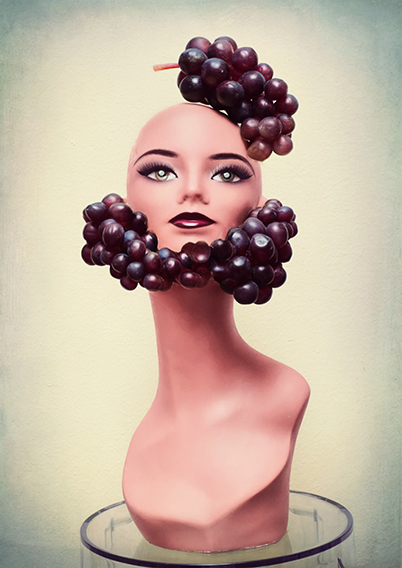
This one is my favorite of the fake fruit shots. Somehow my edits ended up making the mannequin’s face look so real, it’s almost creepy:

What should I call this one? The Pear Devil?
I also gave her a grape beard in one shot:
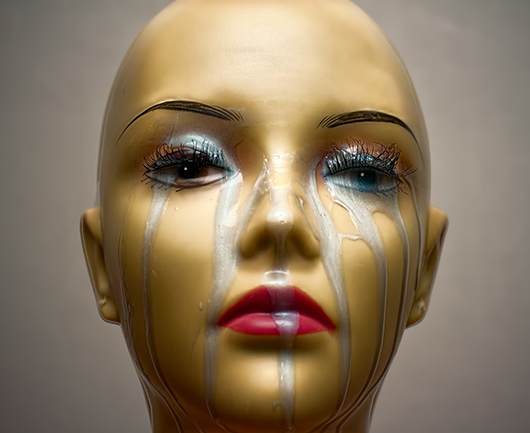
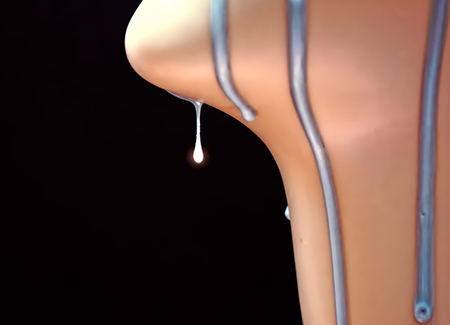
Now, some of you may remember that when I tried out all those Oribe products, I mentioned how shiny and metallic silver the Silverati shampoo is, and how much I wanted to take pics of it running down my face. That would have been pretty messy to do, but when using a mannequin as a model, it was just crazy easy:
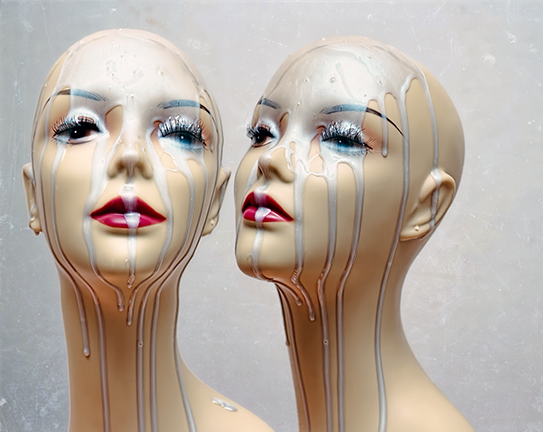
I really only took pictures of one mannequin. I composited this shot and changed the face a bit on one of the images so they didn’t look exactly the same.
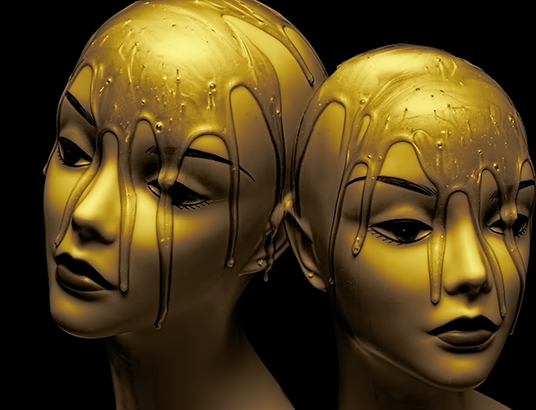
These mannequin heads are so ridiculously easy to work with. The have these perfectly smooth, proportioned faces and they’re easy to manipulate as well as glue stuff to or smear crap all over. When I was done, I was able to just wash the old gal off with a rag and call it a day.

The perfect “skin” tones on these mannequins make them super-easy to overmanipulate in processing. I don’t have to worry about uneven skin tones that don’t match up – and this all led to an absolute photo-editing frenzy. I started out simple enough, but as time went on I started to really go to town with the color and shading:
See what I mean? The mannequin is such a great ‘blank’ canvas for some awesome edits and I can really cut lose in all sorts of ways I’ve never done before.

Not to mention how easy the setup and breakdown is. I managed to shoot all these photos this morning before heading out to tutor in the afternoon. Usually that’s not even remotely possible – it takes me at least an hour to put on my makeup and then after the shoot is done, I have to wash it all off again. Not to mention how much longer it takes me to shoot myself as opposed to a perfectly still doll head.
And I didn’t even need any fancy lighting, just my camera with my external flash. Heaven!

I am sure eventually I’ll get bored with these mannequins, but then again, there’s all sorts of mannequins out there with all sorts of faces, and they do whatever I want them to do without complaining. The perfect models!
I can’t believe how many photos I was able to take as well as edit today, while also eating two meals, tutoring a student, and swimming for half an hour. I’m over the moon with this new direction!
