Prop Shop

I actually had a free day today, so I stopped by Pier 1 to get some things I could stick on my head, and otherwise use in ways for which they were not intended.

Pier4_final
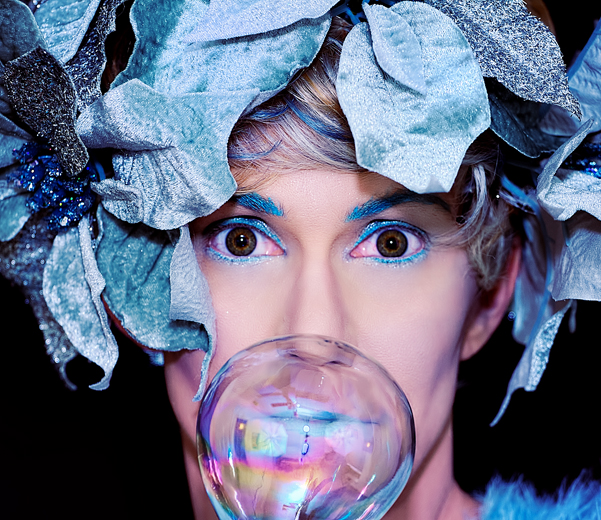
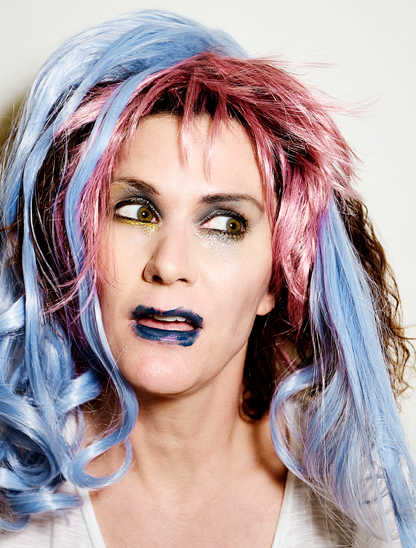
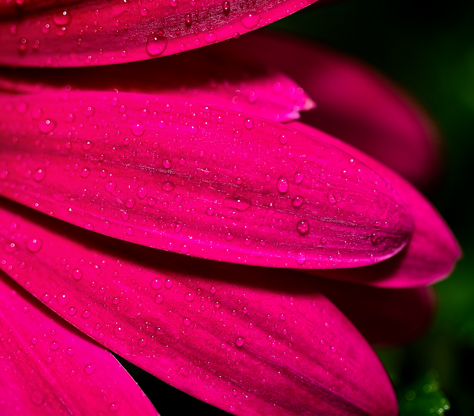
Annnnnd I found some – like this ornament, and the poinsettia leaves I pinned to my wig (you can see this shot with the pink eyes corrected here).

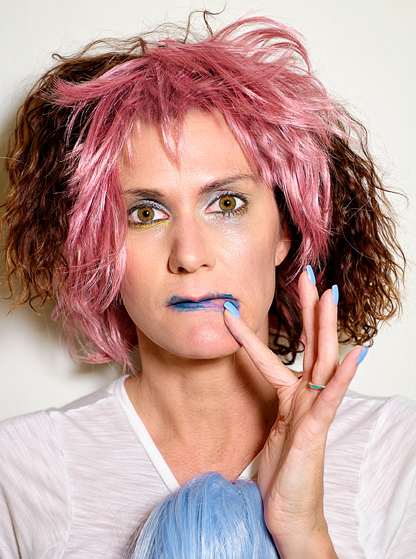
I had two separate looks for this shoot, and I’ll share the pics I’ve processed from the first look in this post. I didn’t edit too many from this section of the set, because it wasn’t my favorite look at first, but after looking at the ones I edited, I may go back and choose some more. I modeled my makeup after some ideas I got through Google searching, and the results were a little strange. I think I look more like a male with makeup on than a female, but whatever. For the second set I went back and put on some black shadow and liner and I looked a bit more normal. Not that looking abnormal is a bad thing:

Pier2_final
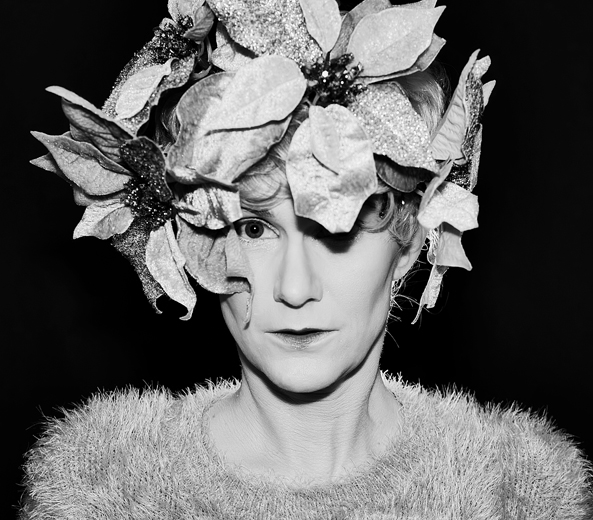
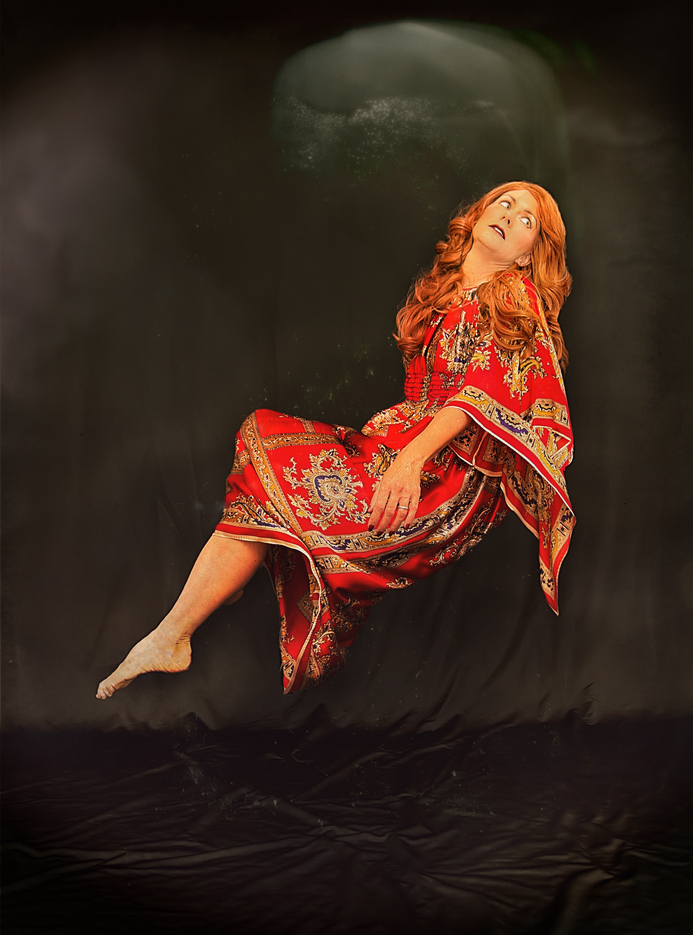
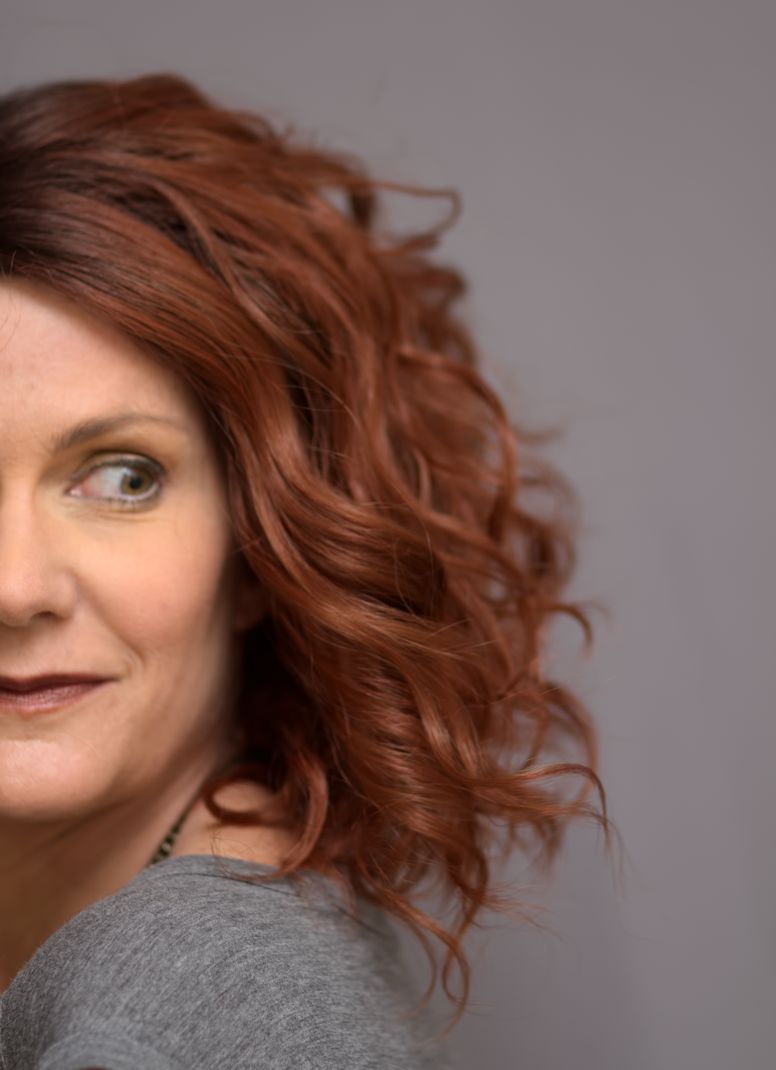
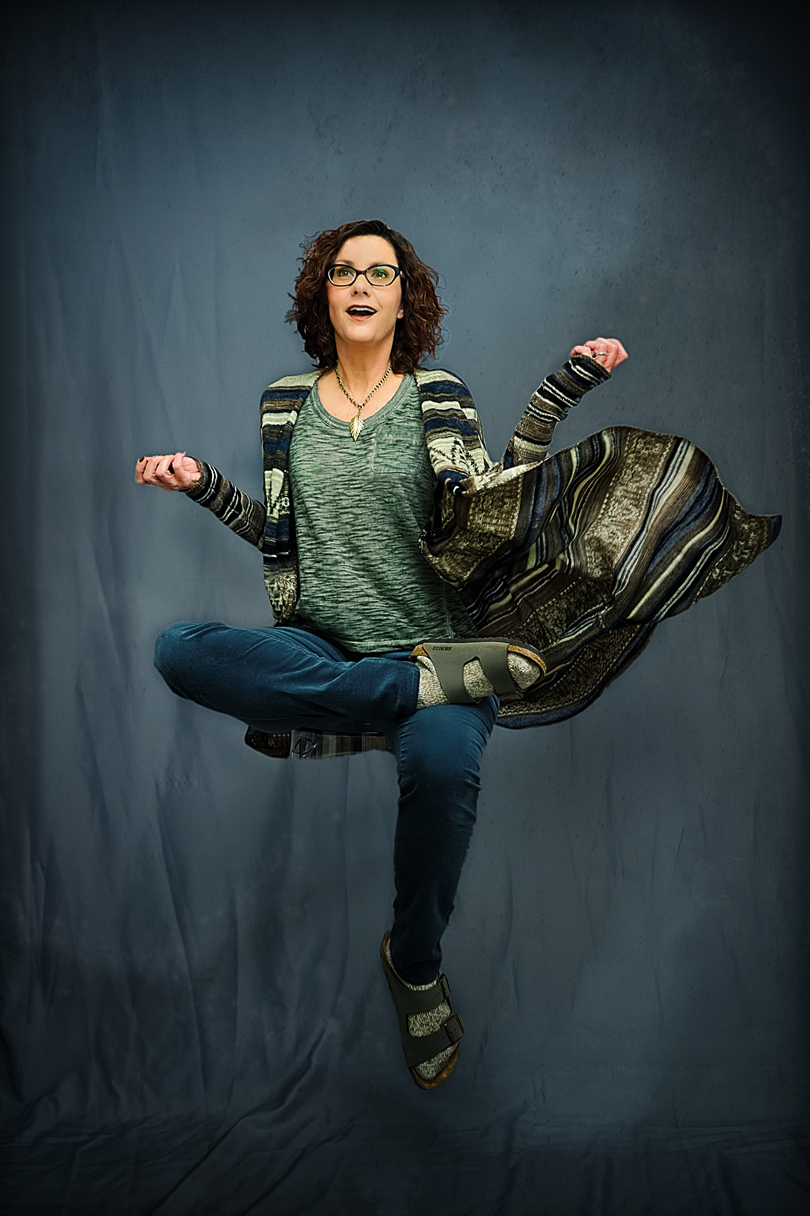
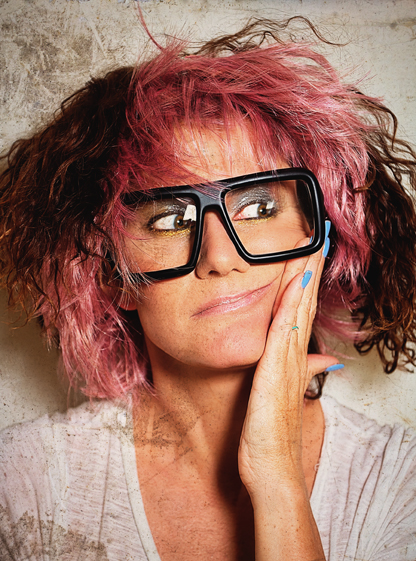
My favorite from this set so far

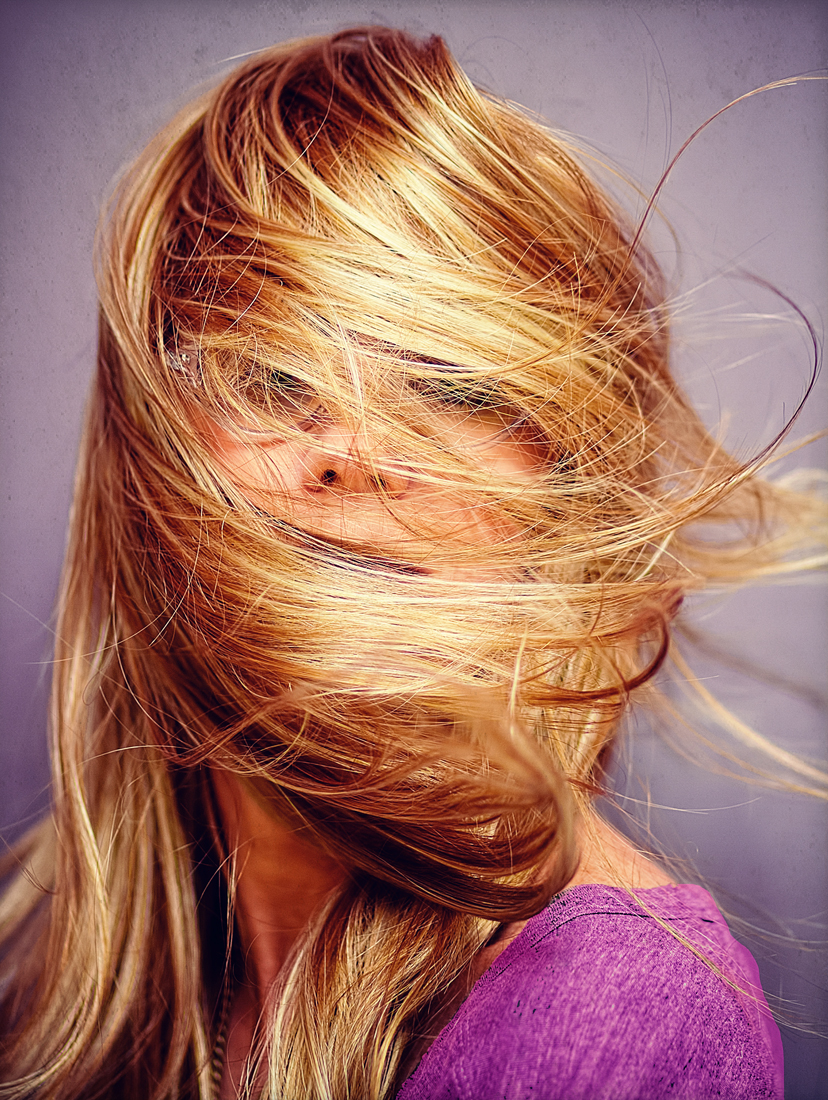
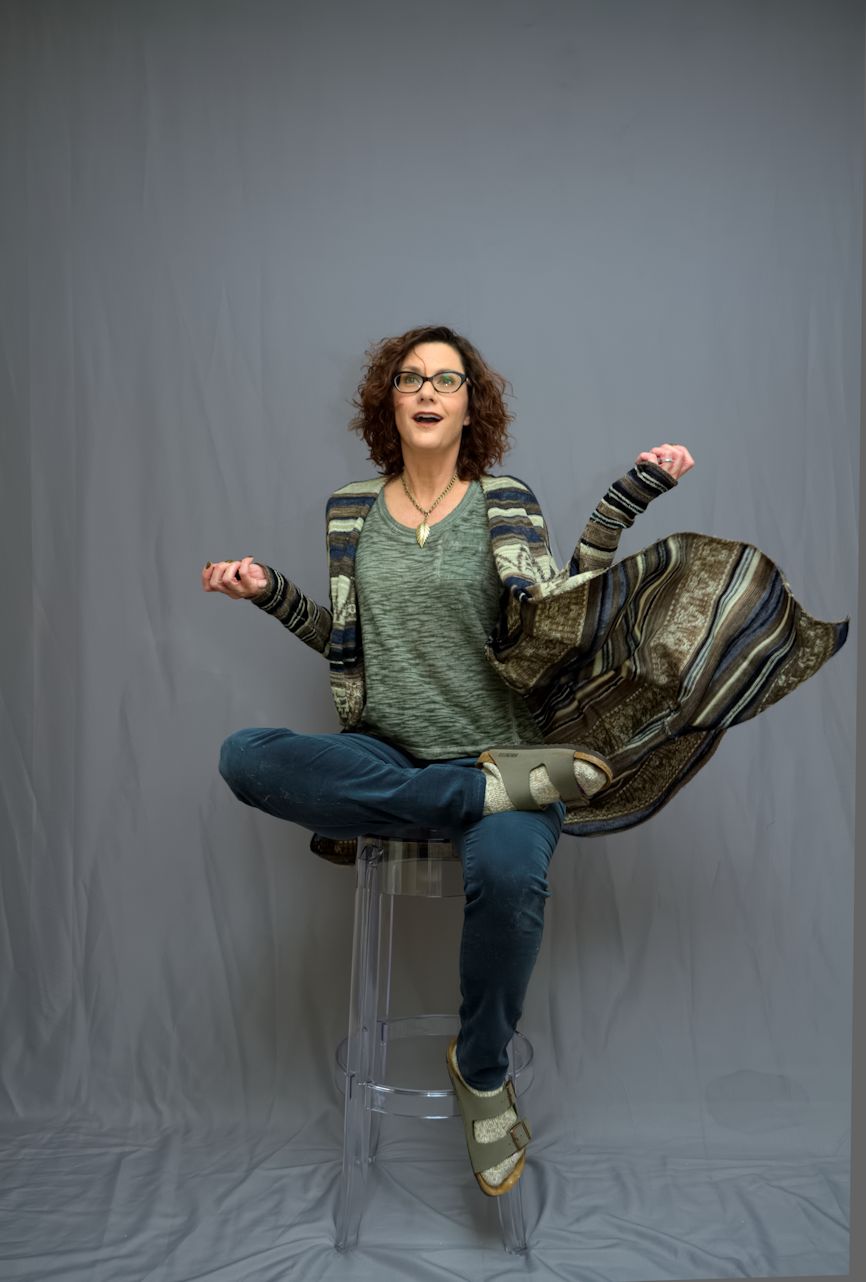
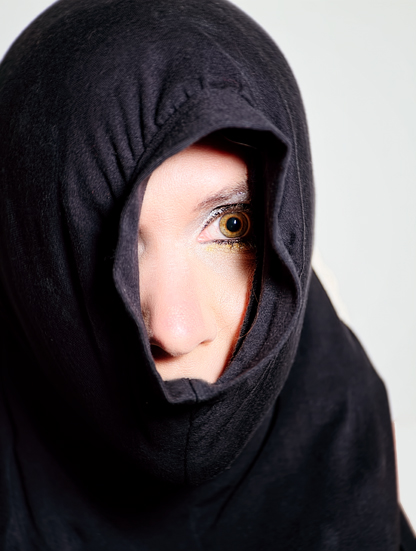
As usual, I started off the shoot pretty bored and frustrated, and not feeling like I had anything new to cough up. But I started playing around with the ring light I had set up behind me to try and outline myself against the black background, and I started to get into it a little bit. It’s been a long time since I just played around with some props to see what I could come up with, and after a slow start things really got rolling once I pulled out the sparkly garland – but I’m saving those pics for next post.

Pier3_final
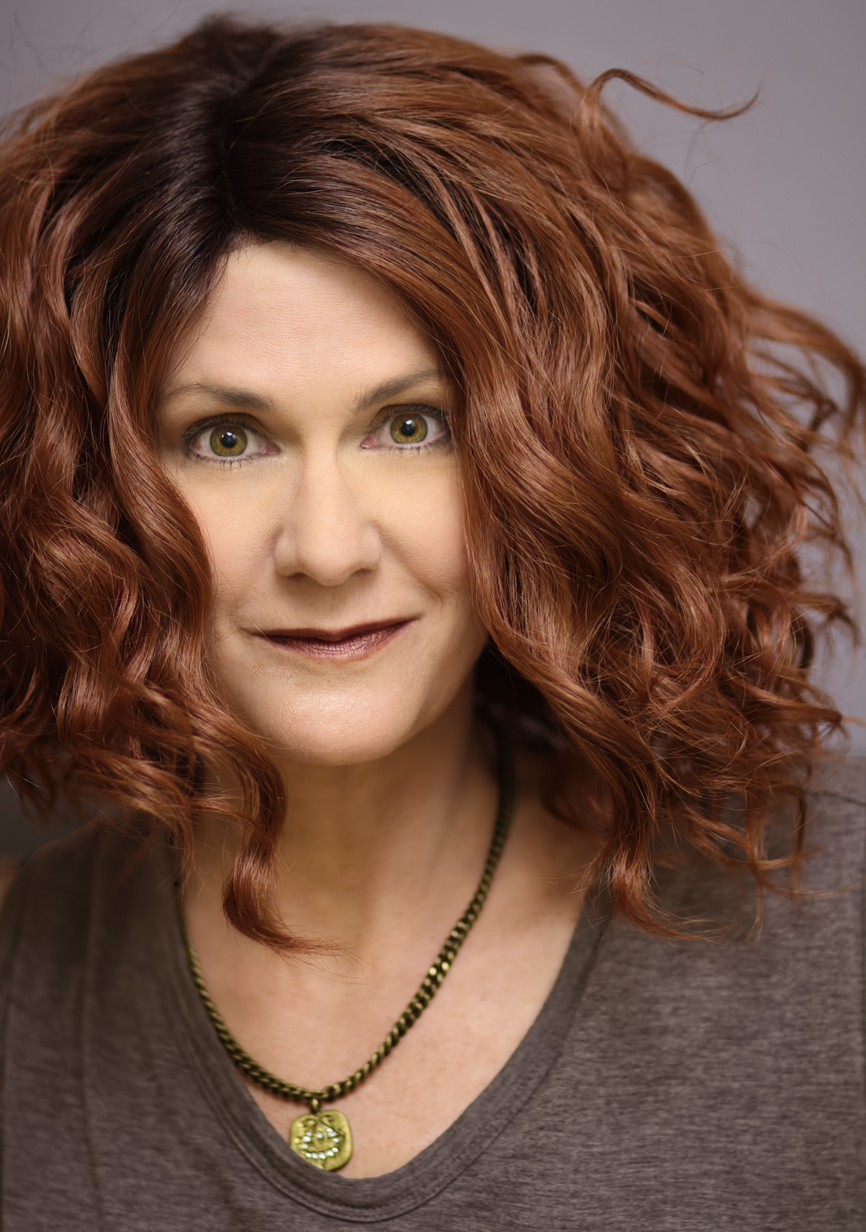
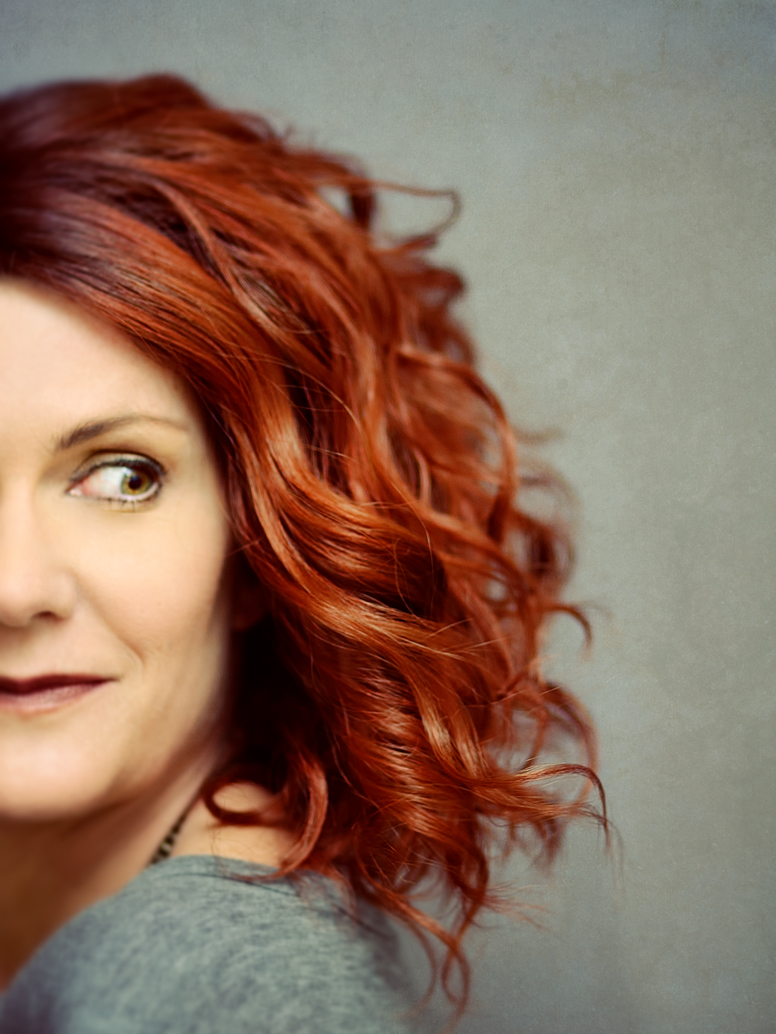
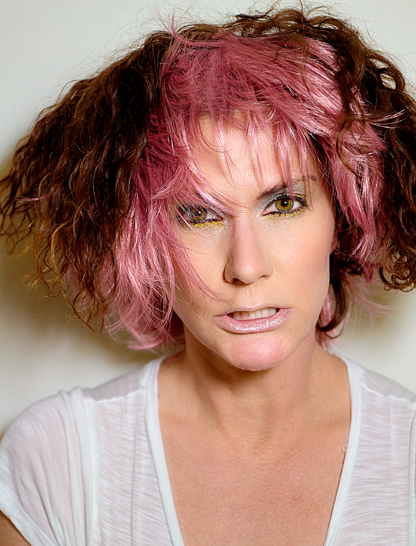
A bit of yellowness under the eyes here that I couldn’t get rid of effectively. Oh well.

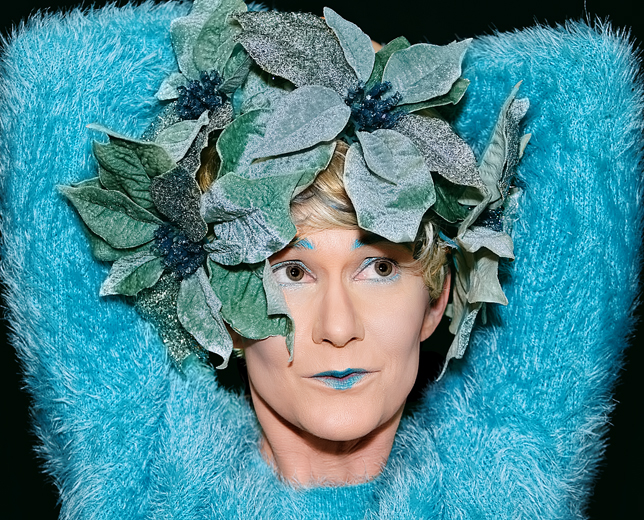
I messed around with the color a lot in post, because it was bright and all over the place, so no two shots looks the same in that regard – the poinsettias are actually a blueish-silver in reality, but they took on all sorts of tints as the processing proceeded. Also, while shopping around I picked up some Dermablend foundation to see if it would do a better job covering up my sun damage (as well as the cystic acne once again plaguing my chin – edited out of all the photos, of course), and it worked incredibly well. In fact, I went ahead and used the foundation all over for this shoot, and it is definitely effective if you need heavy, full-coverage.; my red and splotchy neck was completely covered, as well as the aforementioned blemish. The only downside was that I found it hard to wash off, even in the shower. I wouldn’t wear this stuff day-to-day, except for maybe on my neck where the damage is the worst. But it’s great for photos.

As I said, these are the only shots from the first look of the shoot I’ve had time to process, but I have a bunch more waiting in the wings for a later post – one I can write when I’m not so tired. It’s late and I need to hit the hay, but I wanted to share at least a little bit from today’s shoot. I dreaded it at first, but it ended up being fun and I got a ton of good shots to work with. More later.

Odds and Dead-Ends

I have a few more photos from the air show to share, then some stuff I tried to pull off this weekend and failed at, for various reasons. First up, the air show:

txraiders_final

Here’s another shot of the B-17; this is about as far away as I prefer to get when shooting planes, and I realize if I’m going to be happier with my shots next year I’ve got to get my hands on a longer zoom  lens. Since even used on eBay a longer zoom sells for a thousand bucks at the least, I may say to hell with it next year and just take all my pics of the planes when they’re on the ground.

And now, more Blue Angels:

BEformation2_final

BEbigplane2_Snapseed BEbigplane_final

Those last two are shots of the C-130T Hercules the Angels use as a transport plane; it’s dubbed “Fat Albert.” Again, I couldn’t slow my shutter speed enough to blur the motion of the propellers here, but I tried.

And now, for my weekend fail: Saturday afternoon I decided to try some levitation, but I needed to do it quickly, so I set up, slapped on some makeup, threw on a new costume, and got to work. The results, however, were less than impressive. It took me awhile to figure out what went wrong, but in the end I realized that I need to work on my lighting for such shots. It was too bright, and it flattened me out and made me look like a cartoon. On the plus side, I’m getting better at adding shadows, and I played around with some of the new filters I now have with my Pixlr app since I signed up and became a member. But in the end, Pixlr wasn’t enough to save the shots. An example (and yes, I made it small ,because UGH):

red2_final

This next one was the best of the bunch, I think:

red3a_final

Not bad, but nothing to write home about either (although I will blog about it, apparently). My bottom foot looks huge, but I liked the movement of the hair (I also thought that having my  face covered up would help conceal the flatness my bad lighting created on my facial features). And, I used a different layering technique here than I usually do; although it took twice as long to do, I think the end results look better.

I wish these had turned out better, but not every shoot produces good results. Switching my backdrop to black probably worked against me too, since I haven’t used it in awhile and it creates harsher light than the gray one does. I probably could have just used my Speedlight and abandoned my umbrella stands entirely for this, but I couldn’t tell the light was a problem until the shoot was already over. I actually thought I’d gotten some really good stuff, too, so processing the shots was disappointing. But at least I tried.

Another busy week ahead, so not sure when I’ll have more to share. Hope you’re all wrapping up a nice weekend and getting ready for the week ahead. I know for me, Thanksgiving break can’t get here soon enough. Two weeks to go!

No Plane, No Gain

I am continuing to scour the three thousand photos I took at Wings Over Houston last weekend for shots that might be unique from what other photographers captured. My Facebook and Twitter feeds are full of photos from the event that have been uploaded to various airshow and aviation websites, and yep, I’m still seeing a lot of “my” photos over and again, including several with the Blue Angels passing over the moon – although none of those look quite like the one I captured. As I see more and more shots from others, I get a better idea of which pictures I’d like to process, like this one:

BEannouncer_final

This was the narrator of the Blue Angels performance; I popped this shot off real quick for no good reason but ended up liking the color and composition of it. Don’t know if I would have liked it as much had he been wearing the traditional blue flight suit, because I love the bright yellow against that rather dull background.

I didn’t so much love this next shot, but I was impressed with the aircraft so I wanted to share at least one:

osprey1_final

The propellers on this thing were massive; when at rest they looked almost as big as the fuselage of the plane. They also swivel, so the aircraft can fly either as a plane or a helicopter. It was definitely an impressive thing to watch, but a damned ugly thing to photograph. I was so excited to see it fly but when looking at the photos I couldn’t work up much energy to process any of them; I had to force myself to do this one. Moving on.

three_final

I liked the color and composition of this one, but I admit to having been too lazy to look up exactly what planes these are. It’s been tricky for me, processing shots of planes where the subject is so small; I’m used to getting right up on a plane as it lands like I’ve done in the past with commercial jets, but these were much higher in the sky and farther away than the planes I capture at airport observation areas. So even though these felt tiny to me, I found other things to appreciate. Also, I wasn’t able to slow my shutter speed down enough to blur the motion of the propellers; I tried, but my camera was still stopping the blades. If I’d slowed down the shutter any more, though, everything would have been blurry, so I quit trying.

txraiders2_final

Ah yes, I do know what these warbirds are – a B-17 and a Mustang P-51 (a TF-51D, actually, but I prefer to call it a P-51 because it sounds better). I’m so bummed there were no clouds in the sky as that would have really helped to project a sense of flying here; it almost looks like a shot of planes set against a light blue background, like an ad in a paper or something. I tried to cheat and add some clouds as a layer but it looked awful, so plain boring blue non sky-like background it is.

At times, though, the planes made their own clouds:

zero_final

Again, such a small subject but at last, some texture to the sky! That’s a A6M2 Zero, by the way, a Japanese WWII fighter plane.

And now, for a few more Blue Angels shots:

BEformation2_final

This is one of those shots that’s been replicated a thousand times over, but at least mine is nice and crisp. And holy hell, how do those pilots not die doing this sort of thing? Amazing.

Now this one is a little weird:

BEsmoke_final

I actually took the shot while focusing through a chain-link fence, and if you look at it from afar you can see the fence’s diamond pattern against the shot. It’s very big and blurry, but it’s there. Because of that, I edited the hell of it, adding an HDR filter through Photoshop and intensifying the color. It’s a little odd-looking and I’m not sure I like it, but at least it’s something different from the usual.

That’s all I’ve had time this week to edit, but in other news: SANDY’S BACK! She had surgery in mid-August and was not cleared to go back to massaging until October 20th, but I haven’t had time to get to her until this week. I knew I was in for an entertaining session when she told me what sort of surgery it had been: she had part of her colon removed. YEP. And as soon as I was face-down on that table she started telling me all about it. I’ll spare you the gory details, but suffice it to say that once again while my head hung over the massage table my jaw was hitting the floor. I don’t know anyone else who can literally make my mouth hang open in an odd mix of horror and hilarity like Sandy does. After sharing with me the specifics of what came out of her right after surgery (just a hint: the word “jelly” was used), she skipped ahead to her last day in the hospital, when the doctors refused to release her until she passed gas. “And no squeakers,” Sandy elaborated. “They wanted a sonic boom!” Just imagine, she mused, the one thing you spend your whole life trying to avoid doing in front of other people and one day you have to perform it for your doctors to get your ticket home. Oh Sandy, you have been missed.

Booking It

It looks like my posts are not showing up in WordPress Reader lately, and I don’t know why, so who knows if anyone will even see this. Oh well.

A friend of mine has published a book of poetry using one of my photos! I love the way it looks and she is a wonderful poet, so if you can spare a few bucks please support her by buying a copy here.

behind

Today is obviously Halloween, and one of the advantages of being at a private school is that we get to obnoxiously celebrate whatever holidays we want. Every year the school holds a costume contest for the teachers, so everyone dresses up elaborately. I am not going for anything elaborate, because I already get up way too early in the morning just to put on my regular face, (5:15 AM) and I’m not willing to get up any earlier for costume makeup application. Plus,  I have to teach all day in whatever I wear so I want to be comfortable – so I just went with a hippie and invested in a really nice long blonde wig and some round glasses. Funny thing is, only the wig and round glasses were actually purchased specifically for the costume – the rest is my own clothes! My Birkenstocks, wide-leg jeans, and poncho are all already in regular rotation, so basically I’m going to school dressed like myself on a Saturday, just with a wig and different frames.

wigs10
Weird shot of my wig and glasses for Halloween

The air show is Saturday, so I’ll be getting up at an ungodly hour to drive out to my father’s house and carpool on over there with him. Taking the “real” camera along this time, so here’s hoping I get a ton of good pictures. The weather is supposed to be perfection with the cool front that’s moving in today, which will certainly help, so I hope to have loads to edit and process in the coming week. It’s been awhile since I’ve had anything new to work with, so wish me luck!

Fact or Wig-Tion?

I’ve tried to post this a couple of times now, but something keeps going wrong. I hope it actually works this time. When working on this post Monday afternoon I accidentally hit ‘publish’ instead of ‘save draft’ so it went live for about fifteen seconds, and some of you got an email about it only to find nothing new when you came to the blog. But now when I publish it, it’s not showing up at all. Weird.

Sunday afternoon I wanted to play around in some new wigs I’ve bought recently and haven’t had time to try on, so I decided to set up my camera and combine wig-time with photography (taking photos of yourself in new wigs is also a great way to get perspective on how they really look on you). I took about 150 shots overall, and once again did this quickly to make it work with the time I had available; I didn’t put on any drag makeup or anything, just freshened up my normal day-to-day face, and wore a simple tee-shirt as my costume. I took some straight-up pics to show the wigs for a review I may do later, but then with each wig I also did some arty-farty hair-flinging to try and come up with some interesting shots for my portfolio, such as it is. I just had my Speedlite on top of my camera and opened up the blinds for some natural light (rather than taking the time to set up my umbrellas), but I got a handful of cool shots to play around with for the week, so I am happy.

Here’s the process for the one I made my 365 for the day. Original:

wigs1

It was a cool shot right out of the camera, but of course I had to mess with it a bit. I used my RadLab editor in Photoshop to brighten things up as well as add color, change the tone a bit, and create more contrast:

wigs1a
Oh and I also changed my shirt color, too

Then I used Snapseed’s sharpening and structure tools for better clarity. This is tricky with all those hairs flying about – over-sharpen the picture and it will look a hot mess, but I think I did OK.

wigs1_Snapseed

Lastly, I used my desktop Pixlr app to cool down the color a bit more and add some slight texture to the background. Overall, not a bad Day 67:

wigs1_final

Here’s one more I managed to edit the next day – this is one of those wigs that looks great in photos, but not so much in real life. I’d never wear this one out of the house because the lace is way too dark (it’s made by an ethnic line, and those lines in general use much darker lace for their customers) and it’s just way too big for me – way too much hair. Exhibit A:

wigs3_final
I look like The Lost Judd in this

But the color is fabulous for photos as are the pretty waves, and, at $45, it’s a bargain anyway, so why not:

wigs5a

Side note: As I mentioned in my previous post, I tend to shoot in vertical or portrait mode as opposed to landscape, and another drawback to that aside from the fact that the camera is usually off-kilter is that when posing for self-portraits, I often don’t know exactly where to stand to get my entire body into the middle of the frame. So, I usually end up taking several shots of a pose, each time moving over a millimeter or two in the hopes that in at least one of them I’m fully in the shot. This is actually why so many of my portraits aren’t centered: I often like the facial expression or focus best on a shot that is off-center and use it anyway. In the case of this shot, I did not intend to be cut in half, but with the fall of the waves here I really thought it worked nicely. So yay for happy accidents.

I of course removed some of my facial lines and smoothed my skin slightly in PS, then used what has rapidly become my new favorite tool, my RadLab photo editing plug-in. I love to brighten and add contrast and color using this tool, and on occasion I’ll even go into the color filters to change things up a bit, like I did here:

wigs5b

I was a little nervous about giving my skin such a yellowish-green hue, but I really liked the effect overall and especially how it made the red hair pop, so I went for it. And yes, I did shave a few years off the old mug, so deal with it. After getting to this step, there wasn’t much more to do, but I did use Snapseed to sharpen as well selectively make the red hair a little brighter and more vibrant. Then I used my RadLab Dirty Pictures plug-in to add a slight texture to the background, and voila! The finished product:

wigs5_final
Honestly, this is a ‘favorite shot’ for me – I really love how this turned out.

Sometimes my changes are so slight, like adding that background, that I wonder if they really matter. But that was a lot of blank wall just sitting there, and although I tried to add more interesting and noticeable light leaks and bokeh effects, everything else seemed overdone, and I still wanted to add something. So subtle texture it was. I like how it makes the photo feel a little 3-D, like you could almost reach out and touch that red hair. I really can, of course, but that’s because it’s sitting in a bag in my bathroom cabinet.

That’s all for now, but hoping to have time to edit some more from this set later this week as well as review some wigs. We’ll see what all I manage to accomplish.

Levitation Break

Overall it hasn’t been a great week, but I’m not going to talk about that right now. I’d rather randomly share this ad I saw in my Facebook feed a few days ago, because it cracked me up:

pop
Why yes, the first thing one thinks when looking at this photo is WOW, NICE EYES

I actually see this sort of thing quite often around the internet when looking for tips on taking portrait photography or getting the right lighting for studio shots. Many of the tips are written by male photographers, and their example photographs are often scantily clad women. My favorite, and dammit I wish I could find it again, was a video on YouTube that featured a sloppily-dressed, fairly dumpy looking middle-aged guy firing away with his camera at a very young woman in a bikini to show how he set up his portrait lighting. It was kinda gross, but amusing as hell at the same time, in a dude, we all know you’re paying her to wear that bikini in front of you sort of way. Half the time while trying to get tips on studio shoots I end up feeling like a big old creeper because of the half-naked women I have to view over and over just to learn. But moving on.

Here’s a shot I managed to pull off Saturday wherein I, of course, am not scantily clad, but I am in a studio. I ran errands all morning, then felt like trying out this clear plastic stool I bought recently because I thought it might help with levitation shots by being easy to edit out. It was, but the shot was still hard to edit and I spent several hours on it for various reasons. For one, I always forget what process works best for these shots because currently I am doing them so infrequently, so I never remember what I did last time that worked. For another, I forgot about the rule of wearing contrasting colors to the backdrop so I can easier edit myself out of the shot and into the background one, so  the process of selecting the subject was tricky and took a good deal of time. But this picture is proof that even if I have very little time to shoot photos right now, it still can be done. I am in my regular clothes, and have on no stage makeup or fake hair – just me and a backdrop and a plastic chair. I also went along with my new strategy of going in with a plan – I knew exactly the shot I wanted, set up and posed for it, and once I had it, I quit shooting. This set? Was 32 shots – that’s it. As opposed to my usual 350. So it’s good to know I can work this way and pull it off.

Now let’s see the whole thing in action:

GHD1

That duster is fabulous and from Free People, of course. I own two because I snagged a huge hole in the first one and went and bought another. The one I’m wearing in this shot is actually the one with the hole, because I figured I’d be tossing it around a bit so might as well wear the damaged one.

GHD1a_Snapseed

Here I am, layered over a second shot of a blank background and highly filtered and edited in Photoshop. My hair in particular was a bitch here, because I realized halfway through the editing process that I’d clipped out all the little flyaway hairs the first time and it left it looking flat and fake, so I had to go back to the original, select all these little flyaways, and layer them into the composite shot. Took some time and might not have seemed like a big deal to other people, but it made huge difference to me because it gave my hair back the movement it lacked with all the flyaways cropped out. And, I am getting better at adding shadows, I think – the ones you see here were added in Photoshop by me. Final shot:

GHD1_final

I used my Pixlr desktop app for the final finessing, since I can edit TIFF files with it now. I used a “smoke” overlay to add some depth to the background, a barely visible little star overlay, and a couple of very faint borders for added pop. Unfortunately, something I did somewhere along the way with all my editing made my teeth turn kinda gray, but what can you do. It’s always something. In this case, the something is gray teeth. Still a cool shot and not a bad levitation, so I’ll take it.

Sidenote: Because I shoot in vertical or portrait orientation so often, my studio self-portraits are almost always crooked. And by almost always I mean always. I start out with the camera pretty straight, but the more I shoot and chimp my shots the more off-kilter it gets. Then I often forget to straighten it when I edit, so when you look at the floor line in my shots it’s often crooked. Hopefully most people don’t notice it, but if you go back and look at my levitation and jump shots over on Flickr, I guarantee you almost all of them involve a slightly slanted floor. Moving on.

Not much else to report at this time; I wanted to take a few more levitation photos with these cool new Minnetonka moccasin boots I bought, but I got sidetracked by it taking me 45 minutes to lace the stupid things (not even kidding) and then couldn’t get my feet into them, so that ruined my mood. Time to go return the  shoes and get ready for another week. Happy weekend everyone!


Portrait Portions

A few more photos from my recent portrait session here, but first, I have to mention the spike in traffic I saw on my blog yesterday. Keep in mind that for me, a spike in traffic means I went from about 30 views a day to almost 200, so overall I still don’t need to quit my day job or anything, but what the hell, it was still a big jump over my usual numbers. What did it was the Stitch Fix people finding my blog post from yesterday, and creating a pin on Pinterest of one of my photos (the one with the aztec cardigan). The Pin sent people to my blog to check it out, and here’s what happened to my stats:

stats

I think you can tell where the spike is (and no laughing at those sad numbers, BTW). Always interesting when something like that happens, so I thought I’d mention it. Moving on to the shots – I have three more self-portraits to share, all taken after I’d starting destroying my costumery and makeup:

done5_final

I edited the hell out of this one to reduce my skin tones and up the contrast; not sure I like the way it came out but at least it was something different.

done6_Snapseed

I like this one better, and as I mentioned in my previous post about these shots, I really liked how cutting a hole in the top of the wig and pulling my own hair through it worked. It almost does look like a dye job on my actual hair instead of a wig (or half-wig as the case may be – and yes, half-wigs do exist. They just don’t work at all like this one). The last one utilizes these great costume glasses I got off Amazon a while back – in my current Sopranos-obsessed state they reminded me of Junior Soprano:

done7_final

I Rad-Labbed and Dirty-Picture’d the hell out of this one to bring the light down and add some interest. I think it worked out well.

Speaking of glasses, I ordered new ones for my day-to-day life this afternoon and will of course take pictures of them when they come in. Oh and I’ve also discovered the joys of toeless socks, so I’ll have to write about that sometime too, won’t i? There is nothing I won’t write about here, after all, so please try not to go giddy with anticipation waiting for my yoga sock review. Happy Friday everyone!

Bored-trait

Monday afternoon I decided to shoot some portraits and did a fairly quick makeup job to get some done. But I was terribly bored by the whole process, and less than thrilled with what was coming out of the shoot. So I decided to take my frustration out on my costume and photograph the destruction.

done1_final

That’s a wig I I cut a big hole in just to play around. Why wear them like normal when you’ve taken 8,000 + photos of yourself in them that way already? I’d also already seriously messed up my makeup by the time I took that shot, which was one of the last ones I took. Here’s a shot of the makeup before I destroyed it:

done3_final

The eyeshadow was all glitter, but it was a rush job so it wasn’t all that thrilling anyway. And that’s the wig with the hole already cut in, and my real hair sticking out of the top. I actually kinda liked the way it looked when worn like this. One thing I’ve decided I don’t  like, though, is shooting portraits against a white backdrop. I think I’ve mentioned this before, but it really does a number on my lighting and makes the colors weak. If nothing else, I need to learn some better lighting techniques when working against white. Working with gray or black backgrounds is easier for the type of portraits I like to shoot; much more dramatic results with better color and contrast. I am not skilled enough to know why, that’s just my observation.

Here’s one more, taken when I decided to rip into the black top I was using and just basically mess with it as much as I could beyond wearing it like, you know, a shirt.

done2_final

That would be me sticking my head through a sleeve, or attempting to anyway. My husband walked into the office at this point in the shoot and I told him I was attempting to give birth to myself through it, which made sense at the time. I still like the description, as it does rather sum up what I was trying to do. Without getting whiny about it, I’m bored again.

Even though I found the shoot frustrating and didn’t enjoy taking them at the time, I found some nice ones to process, and in looking at them now I’m reminded a lot of the old portraits I used to do, back when my camera was incredibly old and I had no lighting or backdrops or costumes or makeup skills, and my lenses were so crappy I couldn’t take anything but portraits (full-length shots were out of the question). Back then, I’d throw on a t-shirt and a wig and grab whatever was nearby and just make it work. And I’d keep shooting until I hit on something interesting, like ripping up a wig or a shirt, and I’d just go town with that idea. Part of the problem is I’ve done it all by this time (including wearing tops the wrong way and ripping up costumes, although ripping up a wig was new) and so I get less excited about doing it again. But some of the photos actually were interesting, so it wasn’t a loss even if I felt unenthusiastic at the time.

I did sign up for an online class to learn how to create composite shots the proper way; as educational an exercise as it may be for me to take a little photoshoot trip back in time, I also need to keep moving forward, and I just can’t get there on my own. I really want to create more whimsical and fantastical stuff, which takes me beyond what I can do here in my studio. I’ve reached a point where, without knowing more, I don’t even want to try, because I don’t want to deal with the frustration of trying to figure it out on my own. So I hope these classes can help with that. In the meantime, I may do more playing around with the simple stuff like I did here. The end results weren’t that bad after all.


Flower Trip

More flower macros! Today I decided to share some comparison photos as well; the first set shows the difference the FlashPipe made on the macros when I was focusing in really tight. Without using an external flash, such shots were too dark:

lana8b

I’ve used the Speedlite on macros before, and it definitely helps, but because of all the weird angles I’m using to get the shot I want the light kind of bounces all over. With the FlashPipe I get a nice soft diffused light that’s much more even, and definitely brighter than taking the shot without any flash:

lana8a

My next set of comparisons shows how using the RadLab plugin for Photoshop helps edit a SOOC photo into something more magical. Here’s the original shot:

lana9

And here’s the shot after I adjusted the contrast and used RadLab filters to brighten and enhance color and detail:

lana9_RadLabbed

Big difference! So even if in the final shot you can’t tell how RadLab might have helped, it definitely does. Of course all this could be done without it, but for someone with limited Photoshop skills like myself the plugin sure makes things easier.

I then used Snapseed for final sharpening and to enhance color a little further, as I felt the yellow was a little blown out in the original shot (the downside of using the flash). So here’s the final version:

lana9_RadLabbed_Snapseed

This next one is a bit similar to a shot I shared in Sunday’s post; but that one was taken without the Speedlite/FlashPipe combo while the one I’m sharing today used those two additions. So as a reminder and further comparison, here’s the shot I shared Sunday:

lana6_final

And here’s the same flower (different angle though) taken with the external flash and FlashPipe (as well as water spritzing):

lana10_Snapseed

Both are nice, but the effect is totally different. Again you can see how the color gets blown out a bit by the flash, even after all my edits (this is a final version, achieved using the RadLab filters and Snapseed).

And here’s my last one for today. Definitely a favorite – final version only:

lana11_Snapseed

More flowers later, I am sure. Another busy week ahead, and then next week I must start getting back to work at least once a week to prepare for the year. Enough time to do a full self-portrait set complete with costumery still eludes me, but I’ll get to it when I can.

Mild Flower

I’ve had a chance to edit a few more flower photos, but only a few, so here we go.

lana5_final

I really struggled with the color on this one; that yellow flower in the background looked very dark and muddy and it was distracting. I ended up using Rad Lab filters to take the saturation way down, which did the trick, but it washed out the pink flower too. In the end I still liked it, and the softer tones worked, but it was much brighter in the original. The yellows worked better in this one:

lana6_final

One thing I did differently when using the macro lens this time was to place the subject, the vase of flowers, on the floor so I could sit down and crawl around while photographing it, as well as being able to stand above it easily. This helped me get good angles but more importantly, it kept me from getting tired due to all the stooping and bending into strange positions I had to do last time I used the lens, when I had the subject on a table. I also attached the 7D to a monopod to hold it steady and rest my arm a little. Both strategies helped. I took most of the 500 or so shots with manual focus, too, to control the focal point better. I think all these things helped make the shoot more successful than my last attempts at using the macro lens.

About half the shots I did were taken with my umbrella lights only; but when I tried to get really close-up they were coming out too dark, so eventually I attached this little piece of magic I purchased recently called a FlashPipe – it’s a cylinder made out of some sort of plastic which slips over an external flash to give out an even and soft diffused light. I’ve used my Speedlite when shooting macros before, but it is hard to control the light when aiming in so close or leaning in at weird angles; the FlashPipe did a beautiful job of filling in shadows where I needed it without overpowering the subject.

This next shot is one I took with the FlashPipe; I have more to come using it and I may do some comparison shots so you can see the difference it made (I also spritzed the flowers with water at this point for added interest). But for now I just have this one:

lana7_final

The nice shadows and sharpness aren’t all due to the FlashPipe there; I did use RadLab and Snapseed to add contrast and detail as well as tone down the color, which was a bit too bright initially. But still, it did a wonderful job illuminating such a close shot without blasting out the subject or creating odd shadows. And it only costs about $30. Of the three I processed today, this was definitely my favorite – I’m thrilled that I finally got some genuine macros out of that lens!

In case you missed it when I mentioned it above, yes I did take over 500 shots of these flowers that Lana sent me as well as the ones I bought from the grocery store (Lana’s were pink and yellow, the grocery store ones are blue, orange, and green). So there will be more coming as I’ve just scratched the surface here of what I took.