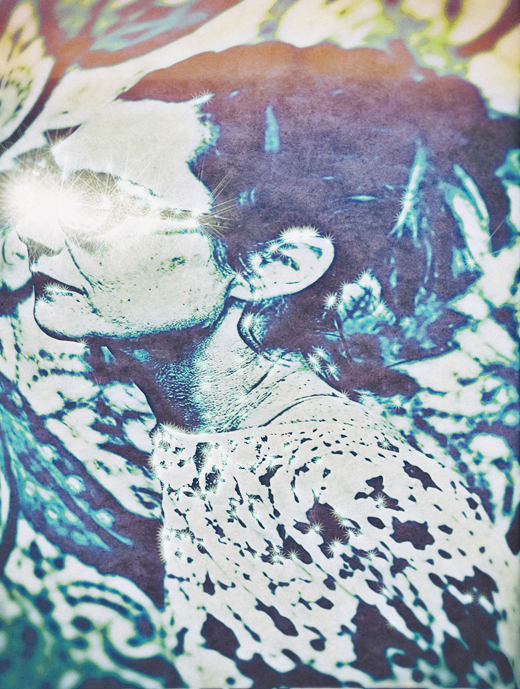
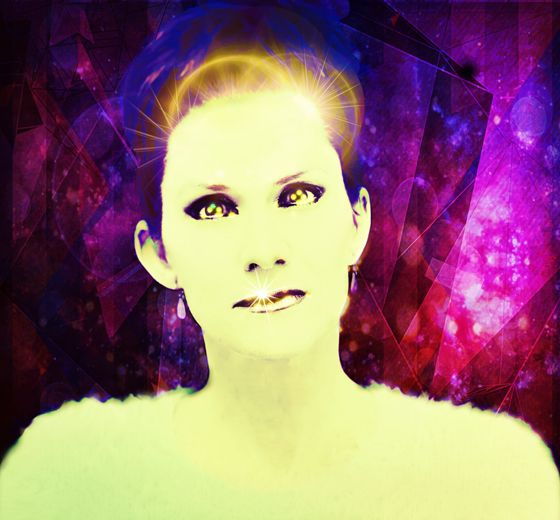
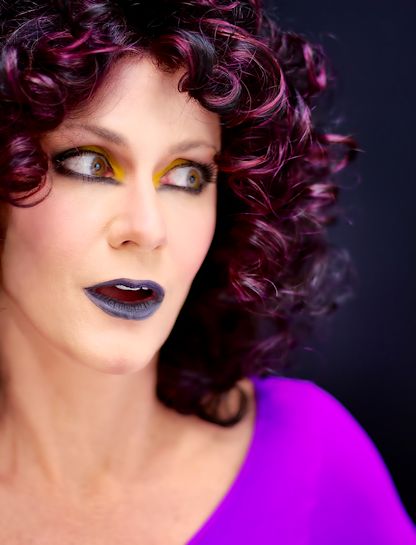
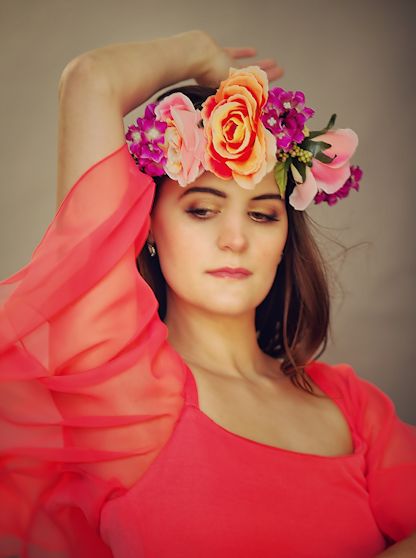
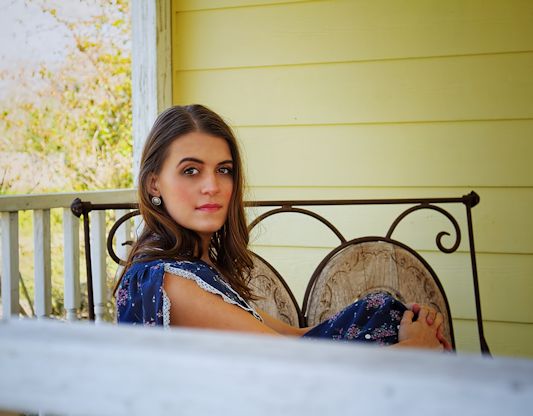
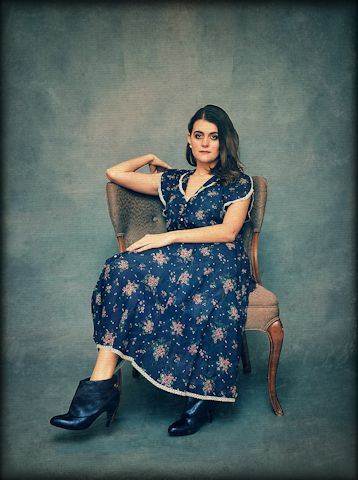
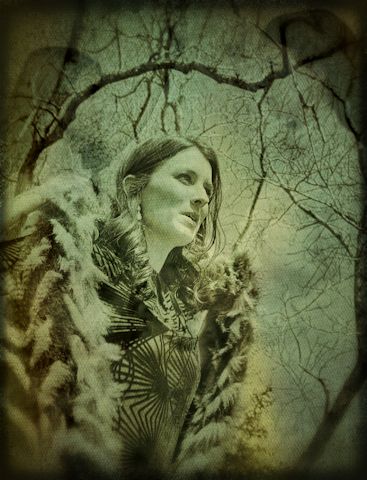
Portrait Control

A few days ago, I clicked on a link that kept showing up in my Facebook feed for some software called Portrait Pro; I don’t generally pay any attention to those links so I’m not sure what motivated me to do it this time – but as it turns out, I’m glad I did. I recently paid over $100 for another portrait program that I was just figuring out how to use; I liked it fine but it wasn’t anything thrilling, just a very good skin smoothing and softening program without any fancy bells and whistles. So, it wasn’t like I needed anything else at this point, but after spending about two seconds with the freebie trial version I realized I had to have it:

Changing face shape and other features has been part of my photo editing for awhile now, but I’ve just been doing what I could get away with in Photoshop without being able to really go for it. This software was available as PS plug-in, which made it even more appealing to me, and the controls are incredibly easy to use as well as providing sliders for just about every little thing, so I can really control the final results. I’ve only had time to edit two photos so far, and admittedly I went overboard (especially on the first one) but so far I’m pretty amazed by what this program can do.

PPro_collage2

I used Portrait Pro not only to soften skin here, obviously, but in no particular order, I also changed my face shape, change my eye color as well as add a ring light reflection, move my eyebrows down a little and trim them, plump up my lips, add eyelashes, blush and highlighter, a different lip color, change my eyeshadow color as well as the shape of my eyes, widen the distance between my eyes, lengthen and slim my nose, perfect my skin tone, shorten my chin, and add light and shadows to my face. And other stuff I probably forgot. Because I made each change on a separate layer, this took a pretty long time, but photo editing is like being a kid scribbling in coloring books to me, and I can do it for hours anyway.

PPro_collage1

I decided to work with this photo because I found it rather funny, I clearly had blinked during the shot, and something about the way I was holding my hand just made me look really tired and kind of over it, whatever “it” was. I really didn’t expect the software to improve the photo so much it was no longer goofy, but it did a hell of a job on that half-closed eye and actually turned it into a nice photo. It was harder to work with this shot since the program struggled a little to properly locate all my features, but if you watch the video I linked at the top of the post you’ll see how it works, and that you can easily move the detection points around to get them placed properly.

I can’t wait to work with the program more; my mind is reeling with the possibilities, but as I mentioned it takes a great deal of time so I can only work on about one day. Certainly you could just open up the program and edit the entire photo at once, but I don;t think you get the most realistic effects that way, so I literally just work on one portion of the face at a time and put them onto layers in PS – the eyes, then the eyeshadow, then the nose, etc. My poor old computer really grinds away at stuff like this and moves slowly, but I get it all done eventually. I’ll share more later when I have them.


Advertisement

Picture Imperfect

skintest5_rr

New Year’s Eve day (is that an oxymoron or a paradox? or neither?) I had  a few errands to run, and while I was out I popped into the local Pier 1 that is in the strip center where I was picking up some other things. They had a 50% off sale for Christmas items, and since over the years I’ve used a lot of stuff from the store in my photographs, I always stop in there when I’m nearby (while I share some photos and talk about this shoot, I’ll also work in a few other random shots for older sessions that I’ve edited while on vacation – both the one above and the one at the end of this post).

Photo Dec 31, 1 00 42 PM
See that furry little bird there? It didn’t survive the shoot – or rather, the wrath of Simon.

I had a free day New Year’s Day, since Doug and I typically don’t do much and just hang around the house, so I got all gussied up and jumped right in. I’d purchased several wigs over the past few weeks that I wanted to try out, so between those and the props from Pier 1 I figured once I got my makeup on and set up the studio I’d be good to go:

Photo Jan 01, 11 25 49 AM

Unfortunately, the photography gods were not smiling on me this day – or rather, the prop gods weren’t on my side. Neither was the god of unruly pets; my biggest issue on this day was Simon, who would not stop messing with my things. Every time I turned around he was knocking something over, trying to eat something, or making off with an item I needed so he could bat it around and play with it in a corner. I always have to keep him locked out when I am taking photos because he’s too curious and rambunctious, but on this particular day Doug wasn’t home and I felt bad just locking all the pets out of my studio for that long (silly, I know, but there you go). Normally Doug is here, and he keeps the animals occupied while I lock myself up in my office and snap away, but on this day I kept the doors open so the pets could wander in if they got lonely. In the end, I had to lock Simon out though; him knocking over an entire bottle of Coke from which I was sipping onto my makeup counter and getting everything wet was the final straw (no pun intended, but I did have a straw in the bottle since I always use one when applying my stage makeup so my lipstick doesn’t get messed up, and Simon LOVES straws which is what tempted him to knock the bottle over). Unfortunately, as I ran around I kept forgetting what doors I’d left open, and through the entire shoot I was finding him in the most disruptive places – the costume closet, for example. At one point I left the door where I had all my wigs and props laid out open since I’d just gone running in there for one item, and he not only managed to sneak in and out with a little feathered bird ornament I planned to put on my head, he then left it on the floor in the den for Sprocket to chew to pieces. Grr.

samswigs5
The bird that survived

Simon was not my only frustration this day; my props just wouldn’t work with me, either. I started out OK, but the more costume changes I tried the more frustrated I got with how  nothing was working as easily as I’d hoped it would; clips fell off of ornaments I’d planned to pin to my wigs, this adorable little crown ornament would NOT stay pinned to my head no matter how hard I tried, a few really cool ornaments I wanted to wear as earrings didn’t have any way for me to attach them to my wig (I usually can use the string that hold the ornament on the tree to bobby-pin them to my hairpiece), and then there was the aforementioned cat-stealing and dog-chewing. About halfway through the shoot, I just said to hell with it and abandoned the props entirely, choosing to spend the rest of my time simply putting on the new wigs and flinging them about in the photos, which is probably what I really wanted to do all along anyway.

samswigs2
The rare cooperative prop

Not only was all that a royal pain, but my camera was being finicky. It wouldn’t focus properly a lot of the time – a problem I also had when I went with my father to photograph airplanes right before the holidays – and I’m starting to think this 7D is in need of replacing. It’s not such a bad deal, since I knew I eventually wanted to upgraded 7D anyway, but it is a lot of money to spend for a new camera body so I was not wanting to make the purchase any sooner than I had to. The time may be coming, though.

samswigs4

Even as I was viewing the results of this shoot on my LCD screen, I was pretty frustrated with what I was seeing. Throughout the shoot I felt that I wasn’t getting many really good shots, and for most of the time I was feeling irritated and discouraged. So imagine my surprise when I went to load the images onto my computer and discovered I’d taken close to 700 photos. I haven’t taken that many in one session in a long time; I’m sure the number of new wigs had a lot to do with it, but for whatever reason it happened, I ended up with a TON of really great shots to process. Don’t I always say that? Anyway, it’s true; once I could see the images on a full-size screen I was pleased to find so many I liked. And I made many costume changes, too, which I haven’t done in awhile, and which will make it more interesting for me to work with lots of shots from the shoot since there are many different looks to choose from.

samswigs3
This was my second attempt at erasing my real eyebrows and drawing on fake ones that are much higher on the forehead – I think I did better this time but i still had to do a lot of smoothing in PS

I’ve been using my Portraiture plug-in religiously to smooth out my skin and even the tone, but I haven’t much gotten into the Retrographer with these photos since they came out nicely without all the extra processing. I’m sure I’ll play around with it more later, once I start to get bored with editing the photos straightforwardly and want to start messing around a bit. I’m still loving  both programs though; hours of fun playing around in Photoshop with them both.

skintest9PEELb
Ugh, I hate this. Didn’t come out at all like I envisioned, but I worked hard on it so I’m sharing it anyway.

More to come as always; school starts again on Tuesday and we have to report for a staff development on Monday, so one more day of relaxation and then it’s back to the grind. Hope your new year was festive and your 2016 shines bright! Let’s get to it.

Photo Finish

Work started back up last Tuesday, and quite honestly it was a welcome change. I actually started getting bored that last week off, so I wasn’t bummed out about having to go back. The first month of school is always a crazy one, so posts may be sparse for awhile, and I’ve not taken a lot of photos lately either – but I do have a few new ones to share. So let’s get to it.

flower1

This macro is from an older set – I believe I shot these back in February, or something.Yep, I’ve been digging into the older stuff again, since new photos are scarce at the moment. Still, it’s nice to go back through older sets and find a few more gems to edit. I take thousands of photos a year, so it’s good to let some older ones get some love.

stache2
The wig is Miranda by Amore, if you’re interested

I bought the mustache back in May, and just never got around to using it before now. I had ideas for using it that didn’t work out; so I basically just threw on different wigs and necklaces and made goony faces. It was a quick shoot – well, aside from the almost two hours it took me to apply makeup, that is. Speaking of which, I was pretty disappointed with my makeup in this shoot. For two hours of work, I sure didn’t turn out to look a lot different than I do in most of my photos. The goal is always to transform myself, but lately my makeup skills have plateaued, and no matter what I start out trying to achieve, the end result is coming out pretty much the same every time. Not that I’m displeased with how I look in general, but when I first started using drag makeup it was always thrilling to see how I turned out in the final shots. Now, not so much, because I pretty much know what I’m going to look like before I even start. If I were more skilled I could really use makeup to create completely different looks each time, but as I said, I think I’ve reached the limit of my skills in this area.

stache1
Hair = Angelica by Noriko

I don’t really care for this one all that much; the focus wasn’t as crisp as I would have liked and I over-softened my skin so it looks a bit phony. Plus the mustache didn’t look nearly as good as I’d hoped it would; for starters I spent so long on makeup that ended up disappointing me that I just was NOT in the mood to mess with spirit gum and take the time to apply the mustache properly, so it’s just stuck on my face with double-stick tape, which means it fell off a lot and in all my re-applying it went crooked in a lot of the shots. Aside from that, it just looks more fake than I wanted it to – too dark and those weird blunt ends look really lame. This one is a little better:

stache3
Another Angelica wig

But…it’s kinda too serious for the mustache to work. I was hoping to seriously emulate some of the lovely bearded drag queens I’ve seen, but meh. It just didn’t really work. I think if I edit any more of these, I’ll stick to the sillier ones, like the first one I shared. So far, that one’s my favorite. Oh, and I was playing around with my new pop-up backdrop I got in a few weeks ago; so now I can have a black or white background in a snap instead of having to hang something on my wall. I already had a gray one and I quite love it, so the black and white one was a good addition to my arsenal. Thinking of getting some of the mottled pop-ups, too, since they’re not terribly expensive, do not wrinkle, and are so easy to use. Not big enough to use in full-body shots, but great for portrait work!

I did go a little processing-happy with this one, but it seemed to work:

stache4

I was thinking a bit of Terry Gilliam-esque cartoonery with this shot; not sure I achieved that but it does look more like animation than a real-life shot anyway. And yeah, there’s the crooked mustache again.

I’ve been way into portraits for quite a few months now and have not done much full-body work or movement shots, but my photography pendulum is swinging back in that direction. Spending so much time on prep work for these portraits has become tiresome, and I’m running out of stuff to do when posing again. No worries, though, it’s just may be time for me to find some other way to get inspired. I’m sure something will come to me soon enough. In fact, today I decided to head out to IAH for more planespotting, since that is always a fun photography diversion for me, but in the end it was too damn hot (we did, in fact, have a heat advisory today) so I blew it off.

The kids come back this coming Thursday, then it’s off to the races for the rest of August. I’ll get back to uploading wig reviews soon enough, though, so until then, take care everyone!

Hair-itage

Ugh, terrible title, sorry. I’ve written so many posts with hair-pun titles, it’s either start to repeat them or just go for awful. I think you can see which route I chose.

newhair_1_collage

And now you can also see that I finally got my hair cut and colored into some sort of STYLE. With the exception of the roughly 4-6 months I enjoyed having a perm, I’ve not had hair I actually liked for almost 5 years now. My initial goal was to keep growing until it was at least mid-way down my back; but as it grew I began to realize that my baby-fine hair was never going to look on me like one of my Angelicas or Brandis, and that going beyond shoulder-length was not the best use of what I’ve got. Then, once I decided to bob it off, I also decided I didn’t need to keep worrying about damaging my hair with a dye job, because it’s short enough that any damaged ends can just get trimmed off without too much trouble. Getting this effect took two tries, though; because the first time the dye didn’t take and the stylist left too much length (not her fault, I originally chose a style that was a bit too long). I went back two days after the initial cut and color and we tried again – and I have been thrilled with the results so far.

newhair4a

Finally I eliminated that awful shoulder-length hair-flip I had going on, and my hair actually looks like a real style. Chopping off a few inches really gave my hair the little bit of bounce it needs (and the dye helps as it makes my hair a little more coarse) and the color, I think, is going to satisfy all my wig-friends who are constantly reminding me that even though my bio hair really is that dark, when I choose wigs that closely match it the effect isn’t the best. In other words, your natural hair color may be dark brown, but natural just doesn’t look that good on you. It was really miss Robin by Noriko that sealed the deal for me – I loved those highlights in the Chocolate Swirl so much that it was the day I got that wig when I decided to color my hair again for certain. Moving on.

heart11a

I have a few more edited photos to share, but not many – it seems that in the last full week of my summer vacation, I finally decided to get out of the house and venture out into the world, so I’ve spent this week meeting up with friends all over town and even doing a little shopping. This seriously has not happened all summer – for the most part, I’ve stayed up super-late (4 AM at most) and slept in late (getting up around 9:30) then sat around in my pajamas all day catching up on documentaries and editing photos or videos. Seriously. I’ve never done so much nothing for so long in my life, but I guess I really needed that sort of rest, because it hasn’t bothered me at all. Obviously I also filmed a TON of videos and took lots of pictures, but still – both of those things can be done in at least half of my pajamas (I may be wearing a lovely top in my wig vids, but below the waist it’s strictly sweatpants, trust me. And bare feet. With a rock plopped down on the floor between said feet, so I don’t start shifting while I’m talking and turning around to show the wig, which would move me out of focus because my camera has no autofocus. Ah, the glamour of the wig reviewer).

heart12ab

I did film reviews for my new Angelica, Seville, May, and Code Mono, so those will be uploaded soon. And I still have a Stevie by Amore that I got in the mail Monday and have not even taken out of the box – which proves I’ve been busy because usually, I will rip into those boxes as soon as they arrive. I think being happy with my real hair now is part of the reason, too, since I’m less consistently inclined to cover it up right now.

119 E
How short my hair was when I started

My birthday came and went without much fanfare, as usual, except as I pointed out to Lana I’ve been basically buying wigs with abandon all month and claiming “birthday present” with each purchase, as well as putting yet another Fendi Spy bag on layaway. And in case I forgot to mention it, another Stitch Fix came and went without so much as an iPhone photo, because I decided not to keep anything and I didn’t think I’d have enough time to take decent photos before my three-day window to ship them back passed. It was a nice enough fix with only one thing I didn’t like (a mini-dress), but with all the wig-shopping I’ve done this month I decided to just let the whole thing go. I do kind of regret the olive-green lace biker jacket I sent back though; it was really cute.

heart12abc
Modified version of an above photo – not sure why I like this weird edit, but I do

I’ll be honest, I don’t have too much more to add here and am just throwing in words as filler between photos. Thank you for reading.

heart8
This was not a leap – just Photoshop levitation trickery

Collage Barrage

I’ve been writing so many wig review posts I got behind on sharing photos, so let’s catch up! Since I had so many shots to share, I decided to save some space and use the Pixlr collage function to group things together. Here’s the first one:

candy_collage

I shared the photo on the left in my last photography post, but I wasn’t pleased with it. However, Pixlr recently came out with a new set of overlays called ‘candy minimal’ and it’s got some great pastel color washes I love, so I moved this shot over there and played around until I came up with something I liked. Now I really love this shot; I even made it my new lock screen on my phone. Loving all the pretty pinks and blues and yellows those overlays have. I’ve Pixlr’ed some other photos too, but they haven’t come out as good as this one.

Here’s another shot I shared previously that I re-worked a little:

blonde_collage

The skin was way too plastic-looking in the first shot, so I worked to maintain more depth and texture when I edited it a second time. It’s still a little flat, but that’s because of the bright flash; at least I look a bit more human in the new version.

Next up, some macro florals:

floral_collage

Last week I had to stop by the grocery store to pick up some things I forgot to get the day before, and to make the trip less irritating I decided to grab some flowers and photograph them when I got home. They were hydrangeas, and yes, they were originally these colors; I did enhance them but I did not alter the color. For some reason I eventually decided to stick a doll in there; it was my Madame Alexander angel doll, so I used her wings in that top right shot too.I took 500 shots of these flowers, so I would imagine there will be more to come from this set in the future.

Then, after filming wig videos the other day, I decided to take advantage of the fact that I already had my studio set up and some halfway-decent stage makeup on to take a few portraits in some of the new wigs. One of the wigs I haven’t reviewed yet and I’m not sure I will –  it looks pretty outrageous and the cap is a hot mess, but it’s great for photos. It’s called Stream, it’s by Ellen Wille, and the color is Hot Chocolate Lighted. The other wig in these shots is the Shari by Envy I uploaded to the Wig Videos section a few days ago.

wig_collage

For some reason, I edited all those shots with a lot of greenish and bluish tint; not sure why but it felt like the thing to do at the time.

And last but not least, some random other shots that didn’t fit into any of the previous collages:

misc_collage

That first shot up top took forever for me to edit; all that fancy eye makeup was done in Photoshop, as well as the nose contouring, so just those two things took me quite awhile. Then I went for an almost cartoon-ish effect, and that also took me time to get exactly like I wanted it. And yes, the day I took all my Stitch Fix photos, I did do some light leaping. My bum knee hurt a bit when I was done, and I definitely cannot leap with the enthusiasm I used to be able to do (but that’s totally my fault for continuing to not exercise like I’m supposed to be doing to strengthen it) but I got a few good ones in before I had to call it a day and limp away.

So many shots in the hopper to edit and play around with; one week into summer and I’ve spent most of it either shooting photos and videos or editing what I just shot. Kinda sad, but lots of fun. More wigs coming this week, including a (gasp) topper, so probably more filming at some point and uploading of new reviews. Getting the old ones uploaded will also continue. That’s right, it’s me with free time, so I’m getting all busy on the blog over here!

And by the way, my beloved Pearl did not win RuPaul’s Drag Race, but the finale was all kinds of awesome and I’m sure all the queens will make loads of money on all the singles, albums, and other various business ventures they embark on after their time on the show. Pearl has actually come out with a perfume called “Flazeda,” and I bought it even though it probably smells like every other perfume on the celeb market and costs too much at $125. Still – FLAZEDA everyone!

Photo Friday

I know it’s Saturday, but I took photos Friday so hence the title. I have’t processed many yet, but I took over 500 so who knows how long this will go on. It was a really fun shoot that was also productive; I was pleased with a lot of the shots. Here’s my favorite so far:

space1

I really liked the lighting in this set; a fluorescent light behind me really works to outline the subject, especially the hair. And there’s the $10 ModCloth dress that keeps on giving. It worked great with the purple wig (which I had to discard after because I killed it) and with some added saturation the color was great. I took a lot in this dress that I like so there will definitely be more of these later.

sweater1a

I took these close-ups right at the beginning of the shoot, because I wanted to capture the makeup job before it started to get messed up. I followed one of Miss Fame’s makeup tutorials, and I haven’t followed a YouTube tutorial from start to finish in a long time. The results were worth it – I finally got my nose contoured right, which was my biggest success, and I didn’t even have a hard time getting the lashes on. I hated to take it all off later, because it took me about an hour to do.

namaste1

I may a little over-softened here, but I do love this pose. The wig moved nicely and again, I like the effect of the light behind me when working against a black background. The t-shirt is a project started by a friend of mine, and this part of the shoot was really to just get a good photograph of it, but of course I took plenty just playing around with the wig also. Turned out to be difficult to get the entire slogan into a shot too, because the words fall off to either side (It says: “THUGMASTE – the badass in me recognizes the badass in you,” LOL) but I did manage to get one that I’ll share later.

That’s all I have for now! Going to see my mother today; she’s struggling a bit and quite honestly I think my dad is hovering over her too much and making her a little crazy. I’m going to go out there to see if I can help. Still have Monday off so going to enjoy the long weekend.

Picture Perfect

valentine9a

I haven’t had much to say this week. but perhaps that’s because things are clicking along smoothly. My father-in-law has managed to stay out of the hospital for almost two months now, which is great, and work is humming along without much trouble also. I need to do exercises for my knee, but it appears there’s no serious injury there, which is good (and of course I’ve yet to start the exercises; I have read the instructions though, so that’s a start). I don’t have much to say here but I do want to share some photos I’ve worked on this week, so let’s get started and I’ll try to say a few things that are interesting.

First of all, the photo up top comes courtesy of Pixlr; they sent out a new batch of overlays to members with a lot of geometric/graphic things going on, so I took one of my makeup test shots from my last shoot and worked it over using their program. Not my usual style, but I do like the results, and I am continuing to get a feel for their layer masking so I can utilize it better.

valentine8

I’ve been quite pleased with how many good shots I got during last weekend’s shoot; I’m not sure what I did that generated so many interesting images, but there are a lot I’d like to edit eventually. Perhaps it’s just that I hadn’t done a full shoot in quite a while so it didn’t feel too repetitive, or something with the makeup or lighting that made things work.Whatever it was, I’m loving the results so far, and rather than allow myself to get bored after processing three or four I really want to commit to creating a full set of photos from this shoot. I always feel people will get bored after seeing two or three shots from the same set, but when I think about it, I know loads of people on Flickr who work on photos with the same theme for weeks at a time, and I never get bored of looking at them. In fact, I like the unity it creates, so I want to try that out for myself instead of moving on too quickly. We’ll see if I actually accomplish this or abandon it as soon as something new comes along. I still don’t have a ton of time for shoots right now, so something new might not come along in time to throw me off anyway. Moving on.

valentine7

This is one of my many “happy accident” shots. Something you may not know about me is that I am completely challenged kinesthetically; an instruction as simple as “raise your right hand” actually takes me several seconds to process (you should have seen me getting my knee x-rayed earlier this week, the poor lab tech finally just started grabbing me and placing every body part exactly where she wanted it to go, as if I were a mannequin). This is why you almost never see me in self-portraits where the camera is in any position other than dead-on; even turning the camera into vertical mode screws me up and half my shots end up cut off somehow. Well, in this shot, I’d actually raised the camera up higher than right at face-level, then aimed it down a little, just for something slightly different. And as usual when I try something like this, well, I could not get myself placed properly into the shot. It’s actually a little frustrating how difficult it is for me to figure out where to place myself (hard enough for me to do when the camera is in the usual position, believe it or not) but at this point I am used to my complete inability to navigate my body through space effectively, so I just settle for a lot of off-centered pictures and make the most of it. Even though the intention here was to get my entire face in the shot, I actually like how this turned out, so we’ll all just pretend like I intended it to be framed this way and move on.

valentine10a

This was another makeup test shot; I always find a few I like to process, and I thought I looked very unlike myself in this one, which is why I decided to work with it. It was kinda boring though, so I added a wet plate filter using my Nik software and lots of light and texture to give it some interest. Looking at these shots reinforces for me, once again, how transformative false eyelashes are to a person’s face; I wish like hell they didn’t make me insane and I could wear them every day. But every time I decide to use them in photos, it’s a major ordeal. I decide to use them, open up a pair, steel myself for the application process, attempt to put one side on, screw it up, get the lashes stuck to my fingers, peel them off, re-apply glue, screw up the application again, then yank them off and throw them back into the box and stomp off angrily, refusing to ever even attempt false eyelashes again. Then 30 seconds later, come back and try the other eye, barely get it applied, spend a good minute mashing it into place and settling for however weird it looks and/or feels as long as it actually doesn’t fall off. Then do the same with the other eye. Then, realize how awesome they look and feel sad that there’s no way i could go through this hell on a daily basis (I’m lucky to make it in to work with my foundation and lipstick on; I apply a quick coat or two of mascara and some eyeliner once I get there). I do not know HOW Carol Brady wore these things every day while dealing with six kids. And I sure don’t have Alice around to help me.

Valentine11

While we’re talking about the prep process for my shoots, I’ll share this part as well: without fail, every time I finally finishing applying all my makeup (false lashes or not), two things will happen almost immediately and simultaneously: my dogs will need to go outside to pee, and I will realize I am hungry. Eating is not something you want to do right after spending an hour putting on stage makeup, so I usually end up ignoring it (I don’t even like to drink anything while shooting no matter how thirsty I get, because lipstick). The dogs I can take care of, but depending on the weather standing outside in my newly-painted face isn’t all that great either. And last time, right after applying all this makeup, I took the dogs out as I always have to do and immediately stepped in a pile of Penny’s poop (she is weird, and sometimes chooses to poop in odd places we don’t expect, like the deck). So there I was all gussied up washing poo off of a shoe in the backyard…good times.

Valentine12

Another thing that always, always seems to happen is whatever wig I’ve decided to wear for the shoot cannot be found, and I have to literally dump out every bucket full o’wigs I have in the house to find it – where it will always be at the very bottom of the last bin I dump on the floor. Every time this happens, I kick myself for not planning ahead and finding the wig sooner, when I am not already face-prepped for shooting, but every time I forget. It can actually turn into quite a crisis if I really start to feel like I won’t be able to find the wig and have already planned an entire shoot around it (this does happen; so many costume wigs come through my door that I often think I have wigs which I long ago sold or gave away). Bottom line is, after all my prep work and the stress that comes with it just by nature of me being, well, me, by the time I am actually fully costumed and ready to go I’ve already decided at least twice to blow the whole thing off because it’s too much trouble, and am almost ready to do so again. Plus, I’m hungry and can’t eat. In fact, I start almost every shoot from a place of frustration for all the things that have already gone wrong, and trepidation that I won’t actually get anything decent out of the set, in part because of all the things that have gone wrong. So, every shoot begins with a bad attitude and a general sense of being pissed off at the world. See, doesn’t it all sound like fun? This is why I choose to work alone.

BAwhatever2
This picture was taken in November, but the sky is from January. There were no clouds on Airshow day, which is death to a plane photo, so I stole the sky from one of my IAH plane shots and Photoshopped it into this one. Voila! 

One other thing I’d like to mention regarding photography is this: I’ve definitely noticed a difference in how certain photos are received on different social media platforms. For example, on Flickr it’s my self portraits that get the biggest response, but when I upload that stuff to Twitter, no one much cares. However, if I post a plane photo I get a ton of love. I’ve gotten more re-tweets and new followers off one plane photo than I’ve ever gotten off any selfie over there; it does seem that loads of aviation geeks are hanging out on Twitter so perhaps it’s just a larger pool of people to access there than on Flickr. For whatever reason, it’s clear the Twitterverse prefers me to share plane photos, so I’ve been doing that and getting connected with a whole new group of people, and that’s kinda cool. I’m hoping maybe some of them can eventually give me tips on how to get shots from places other than the observation areas – something I’m not brave enough to try yet but will have to do soon; the  few observation areas I go to always create the same shots since I’m always standing in the same place (albeit with different planes). Anyway, it’s nice to know that all of my shots can get love from somewhere, even if it’s not always at the same place.

Loose Change

N409UA

I’m posting this photo again because, of all the plane shots I’ve processed and shared so far from my shoot last month, this one has gotten the most positive response anywhere I’ve shared it – Twitter mostly, where a simple hashtag (#unitedairlines, #airbusintheUS) can connect a photo to the proper audience almost immediately. United Airlines, IAH, Hobby Airport, Airbus, and Airbus US have all re-tweeted it and sent me compliments, as well as several aviation and photography lovers who have since become followers. I find that interesting because I really felt I’d over-processed this one; most of the planespotters I follow stick to accurate representations of the planes and don’t appear interested in adding effects or filters. But I really haven’t done much more than skim the surface of the entire culture, so perhaps I’m wrong about that. At any rate, I’ve been pleased with the response to this one and it encourages me to experiment more, especially since it’s the part of the photography process I enjoy most.

Most of the new experimentation comes courtesy of the Topaz photo processing software I purchased over Christmas break thanks to a review by my blogger friend Beth Byrnes; as I get to know the software better I branch out more and try new things, and it’s amazing how a simple purchase of the right product can so enhance and even alter a creative process. It’s true that even without cool tools one can create art, be it painting or photography or poetry, but man are all the cool tools helpful.

And so, as I edit the 300 or so costume portraits I took Saturday, I’ve begun to experiment with them as well. I have a pretty set style at this point when it comes to portraiture – I like clarity and realism but I also want to look as good as possible, and there are lots of tricks I’ve learned to make that happen. Controversial or no, I do use Photoshop to edit out my under-eye wrinkles and even up/smooth my skin tone; I’ve learned to use stage makeup to great effect and eliminate the need for some of that sort of processing, but at 45 years of age it’s still necessary for me to get the effect I want – I’m not pretending that this is how I really look anyway since I’m always in costume, so whatever. Moving on.

After wrinkle removing and skin smoothing, I pull up RadLab to brighten, add contrast, pop color, and add light to the subject, as well as occasionally mess with filters to change tone. I don’t like too much contrast in a portrait, but I do like clarity, and I always, always put as much light on the face as possible without blasting out the skin and losing color or facial features. All that light is great to conceal any makeup errors I might make; even though it doesn’t show in the final shots, my makeup skills are still mediocre. I can follow a YouTube tutorial and put all the colors in the right space, but my blending skills are sub-par, especially when it comes to contouring the nose and adding lip liner. I am also a disaster at applying false lashes, so whenever I do apply them they are usually done poorly and practically falling off the entire shoot. All of these things can be concealed with enough light on the face; I already aim a lot at me during the shoot because I’ve learned it’s best to get as much right in the original shot as possible, but I always end up adding more, more, more.

Some examples from my latest shoot:

valentine1 valentine2

Brightening the whites of the eyes is always helpful, as well, and can be done using the dodge tool set to about 15% midtones. Really makes the eyes pop, or, if you’re into that sort of thing, it can make you look completely insane by making them too bright. Your call. My point in all of this (and I do have one) is that after processing these first two shots, I started playing around with the Topaz software more and experimenting with different approaches to editing them. This was not done intentionally, but came about as I clicked around in different filter programs just to see how each one changed the look of the photos. The first one to get a slightly different approach was this one:

valentine3

First of all, that fabric is a vintage dress I was wearing; I got the idea to yank the skirt up over my head and use it as a prop (it’s ideas like this that confirm my need to shoot only indoors and alone). And I was only using the Speedlite on my camera and no extra lighting for these shots; I’ve gotten to the point where I know how to manipulate that flash effectively enough so that the umbrella lights I used to always use are not needed as often. But, in some shots I got a bit too close to the flash and had just a bit too much light on my face; this photo was one of those. So, as I was processing I came across a filter that actually darkened my skin quite a bit and decided to go with it. I still think I came out a little orange, but it looks much better than it did when there was this bright white face staring out amidst all that vibrant fabric. It may not seem like such a big deal to anyone else, but believe me I agonized over that darkened skin tone; I knew it was the better choice but MAN it bugged the hell outta me. Moving on.

valentine5ab

I think the experiment here is obvious: to someone who is obsessive about clarity, working with an unfocused shot is a nightmare. But I loved the movement of the sleeves and the composition was pretty great with my face dead-on into the camera, so I decided to make a go of it and see what I could do. There are some fantastic Flickr photographers who work beautifully with blur (kokorage, who I learned of from the Pixlr blog, is probably one of the best) so I knew it could be done; I just wasn’t sure I could do it. With no real roadmap to follow, this literally took over four hours, and more filters and overlays than you could possibly imagine (I ended up using Pixlr for a lot of it, a program that hasn’t gotten a lot of love from me lately; mostly because of my fascination with Topaz, but also because my desktop  version crashes on occasion AND I still find the masking feature awkward to use). In the end I do like the result, but it was so hard to know when this one was finished, as opposed to my usual portraits where the stopping point is clear.

Now for this one, I really went to town:
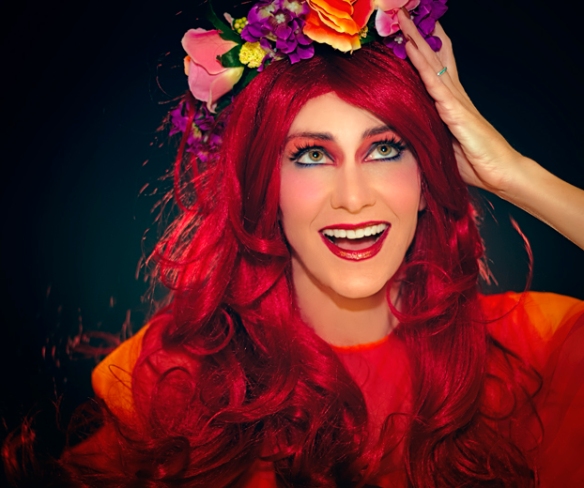
valentine6ab

I went for something highly stylized, much like my plane photo at the top of this post. I envisioned a low-key look although I didn’t actually use any low-key filters to get that effect; I just wanted something cartoon-like to match the silliness of the expression. As I worked with it I kept thinking of print ads from the 1950’s – that overly-painted/colorized/watercolor effect they seemed to have. But it was HARD, y’all. First of all, none of my little tricks were available to me to help conceal my makeup flaws, so I had to use Photoshop to correct blending errors, something I’ve never had to do before and hope not to have to do again because it took forever. The blush on my left cheek? Totally edited; that side of my face showed very little color in comparison to the ride side which was nice and rosy, so I used a brush to add it – something that is much harder to do effectively than it sounds! And the wig had random flyaway hairs everywhere that I had to edit out; doing that was not too hard, but it left discolorations all over my skin that were enhanced once I began to add color rather than lightening it like I normally do – that took me ages to figure out how to do properly too. And then there was my nose. Remember how I said I am not the best at contouring noses? Well my contouring for this shoot was particularly bad; I had to lighten it in all my shots but it wasn’t a big deal; when making my skin darker and more colorful for this one, oh man was it hard to correct. But I eventually figured it all out, and I am pleased with the result, even though once again it was hard to know when it was finished and all the editing was done.

Since I love those comparison shots, let me show you the before of this one, so you can see how much work I had to do to get rid of all that wig hair and fix that terrible nose job (click to see it larger):

val_collage

I think you can tell in the before shot how much more blush was showing up on the right side than on the left, and in case I haven’t made the point clear enough let me repeat that getting rid of all that stray wig hair was really tricky. The editing left dark smudges on my forehead and neck, and it took some time to get the skin tone even as a result. And getting the shot to those exact colors took so many different filters I couldn’t recall them all if I tried, but I am obsessive about such details and will spend 20 minutes to choose an effect I end up reducing to 5% opacity, so that didn’t help. This is another one I spent about 4 hours getting right, so needless to say I only edited two that day.

I’ll close with the last one I’ve edited so far. I threw on a short wig and took some quick shots against a different backdrop towards the end of the shoot. I’ve taken to using up two walls in my office for backdrops instead of just one – the big blank wall holds a large, full-body backdrop, while against an adjacent wall I’ve stuck a shower curtain I bought years ago for just this purpose but that can only be used for portraits as it’s not very big. So for variety I wanted some shots against the other backdrop, but as often happens towards the end of a shoot my energy and creativity were low and I was anxious to upload the photos to my computer and start editing, so these shots weren’t all that thrilling. Still, there’s a few from this bit that I like, and this was one of them – nice close-up of the makeup I worked so hard on if nothing else (and yes, I did go through the torture of applying false lashes this time, even though they almost always make me cry and I end up with my real lashes all glued together):

valentine4

Continuing with the theme of editing photos differently, I obviously used a much softer effect here than I would normally do. The photo on its own and straight-up edited just wasn’t very interesting to me, so I played around with light leaks to give it some added appeal, even though it washed out the previously vibrant color quite a bit and the haze reduced the clarity. I still think it’s a decent shot, and the softness seemed to work OK, so I left it alone after adding the light leaks and called it a day (and in looking at this shot in particular, holy cow can I see the weight loss in my face. Losing ten pounds is no joke; even my head looks different and of course I’ve had to buy a bunch of new clothes. But I digress). Oh, and I love that wig – I believe it cost me a whopping $20 and it is awesome. Short wigs really are a great way to get short hair for a day, and overall they are much easier to deal with than long ones. But I digress again.

I’m finishing up Day 3 of my 5-day minibreak, with absolutely nothing to do on Monday, so I may take some Stitch Fix pics for my blog and some purse pics to share with friends on the Purse Forum where I am now a member (there’s no interest or hobby in which I indulge that I cannot find a message board somewhere to join. Trust me on this one). So who knows, a shopping post might be to follow, as well as loads more airplanes I have yet to edit! Suddenly I’ve gone from no photos to way too many.

Speaking of which, one of the things I’ve realized during this little break is that it’s not so much that I’ve grown tired of my portraits as it is that I’ve just not had time to do them properly. Every time I’ve had more than one day free on weekends since the start of the school year, though, I’ve gotten right back into the swing of things, so I think it’s mostly a time issue, and we can all rest easy that the selfies aren’t going anywhere anytime soon – they just get put on hold until I have some breathing room. One of the nice perks about being a teacher though (especially at a private school) is that time off is always worked into the schedule somewhere (except for the start of the school year, where there’s a pretty long stretch from August to November without any decent break). When I only get one day off on a regular weekend though (if I even get that), I don’t feel free enough to do a full shoot it seems. So this may be the last one I do until Spring Break next month, but with over 300 shots in the can that shouldn’t translate into a lack of portraits.

Enjoy your President’s Day!
Selfie-ish

It’s been a weird week; things started out slow but sped up as the days went by. By the end of the week I felt rushed and slightly behind on things. There’s strange drama going on at work that I barely understand and can’t really discuss; but a lot is unknown and many people are on edge. Not me so much, but people I know are, so I get it secondhand. Anyway.

I’ve also been up to my eyeballs with two different, but related, sets of reading material: the first one is the true-crime book “Deliver Us: Three Decades of Murder and Redemption in the Infamous 1-45/Texas Killing Fields,” by Kathryn Casey. Why would I be reading such a thing, you might ask? Because these murders all took place in the area of Houston where I grew up and lived until my late twenties. I vivdly remember some of these murders, especially the girl who went to my high school (although she was killed in the 70’s, well before I was a student there) and the murder of Shelley Sikes, whose parents kept her case in the news by embarking on a massive advertising campaign that finally brought their daughter’s killers to justice. I remember driving down to Galveston with my friends and seeing the huge billboard with her picture, and while reading the book I remember hanging out at all the same locations where the murders took place or bodies were found. These all happened on my old stomping grounds, so it’s surreal to read about them in this context all these years later.

m8606005
The picture of Shelley Sikes you saw on billboards as you drove to and from Galveston in the late 80’s

My other reading material comes courtesy of the South Belt Digital History Archive, where the owner of the blog has recently uploaded and compiled a massive amount of information about the Brio Refinery disaster that eventually resulted in the destruction of an entire neighborhood where many of my friends lived. My neighborhood was nearby, and I spent my entire childhood hanging out with friends in the area that was eventually razed due to ground contamination. This came, of course, after decades of false reports and denial by the company as well as the EPA that anything was amiss on their property – this in spite of the huge pockets of tar that would spring up on the baseball fields where my friends played as kids, and in spite of the alarmingly high rates of birth defects and cancers occurring among residents of the community.

brio-featured-2
Yes, they built houses right next to THAT. But the government swore it was safe as, well, houses.

Reading these two collections of childhood tragedies affecting the people and places where I grew up has been fascinating, but also quite sad and disturbing. I can’t really describe how overwhelmed I get seeing the photos of what happened to the South Bend neighborhood that I remember so vivdly as a normal, supposedly safe suburban community, and well, topping that off with stories about murders that took place right up the street from places where I partied and worked as a teenager culminates in a particular sort of funk that is difficult to overcome. I keep feeling struck by how disposable we all were back then, even though we certainly didn’t know it, and how my childhood is too; it’s beyond bizarre when it really sinks in that an entire neighborhood where I spent my time back then literally no longer exists. It’s been obliterated entirely, and all that remains of it is a few creaky concrete streets and a lot of NO TRESPASSING signs tacked to chain-link fences. It represents to me, I guess, that we really were much smaller and more unimportant than we thought we were, and we were really never safe, even for an instant. And of course, we’re no safer now, none of us are – but I’m an adult now, so I expect it. It just sucks to have no place to hide my childhood memories from that ugly reality, but there it is. Moving on.

leaderpics_0025c-640x442
Early protesters of the Brio refinery. Our little local newspaper, the South Belt Leader, eventually won accolades and awards for its dogged reporting of the controversy surrounding the plant, even when threatened with lawsuits (or worse) from the refinery

IMG_9534
What the main entrance to the once-bustling neighborhood looks like today

Needless to say by Friday night I was pretty frazzled, between weird work stresses, busy nights, and depressing stories about old neighborhoods destroyed by greedy chemical companies, but I was not quite ready to go to bed, and at some point in the evening I hit upon the idea to take some older self-portraits and use them to illustrate my inner state. Since I was feeling frazzled and sad, could I take a portrait and communicate that by messing around with the processing? Well, I’ll let the results speak for themselves:

big ugly

After editing this one, I realized it looked amazingly like how a migraine feels, which is why I titled it “Migraine City” when I uploaded it to Flickr. (Sidenote: since July, I have had three episodes of migraine aura without headache – something I used to have quite often in my late 20’s and early 30’s but went almost ten years without experiencing at all. Because there’s a slightly higher risk of stroke in women who have migraine aura, I’ll have to get in touch with my ob-gyn and change my birth control subscription to a progestogen-only pill. I’ve had to do it in the past and it’s not too much of a problem, but I still prefer the one I’m on now and am a little bummed. Oh well).

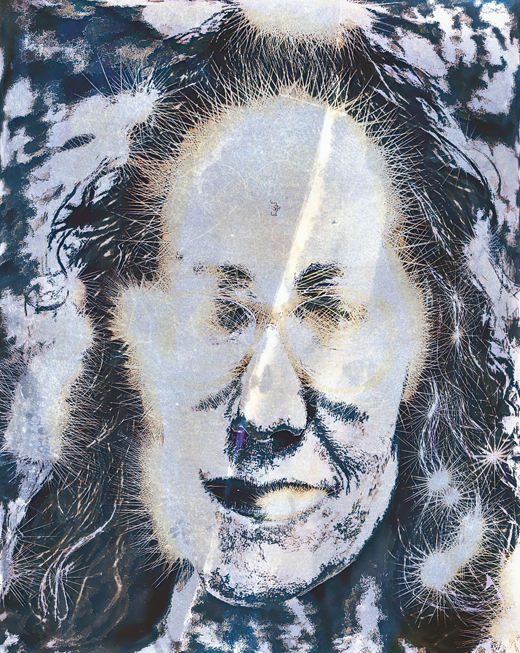
I edited the hell out of this one using Nik Lab’s photo plate filter and Topaz’s motion filter, among other things I can’t remember:

the truth

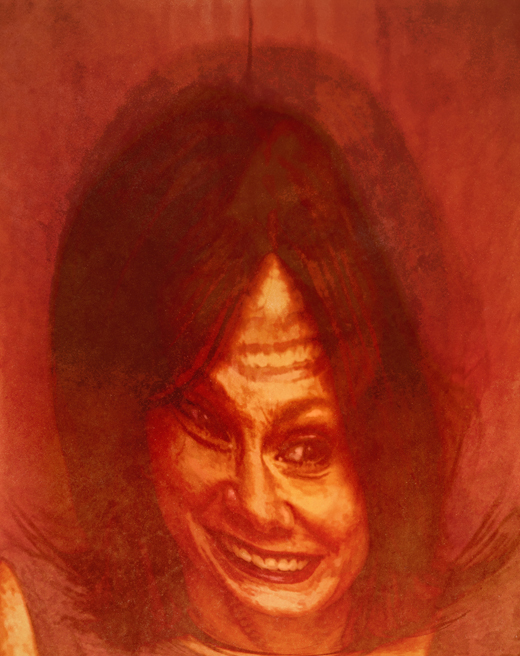
After working with that one, I decided what the hell – usually I spend my time trying to make myself look as presentable as possible in my photos; what if I tried to make myself look as terrible as I could instead? This was depressingly easy to do (prepare yourself, this one’s kinda creepy):

the joke
This reminds me of Ralph Steadman’s illustrations for Hunter S. Thompson

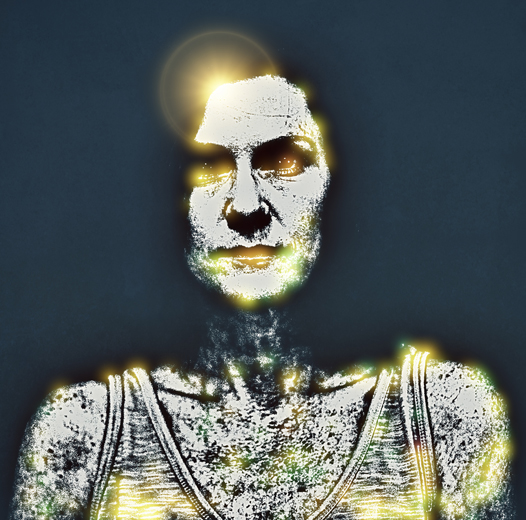
I kept going with the ugly-myself-up strategy until I hit on something kind of cool: I maxed out the detail on this shot to emphasize every wrinkle and freckle and sun damage spot (why, I don’t know) and at some point in all the editing I was doing, I pulled up the Topaz star filter tool and came up with something rather cool:

don't be fooled

There was some robotic and spacey about this one that I liked, so I started incorporating the star filter into everything I did from this point forward. I never got as much of an effect from it with any other photo than this one, but I did still get some interesting results:

just what you wanted
I also used the warp tool here as I did in the creepy red one

I did all of the previous ones Friday night, then got up Saturday to work on another. Unlike the shots I played around with Friday, I was actually meticulous and careful with this one – I really threw them together without much attention to detail the night before as I was just goofing around. This one took several hours, and utilized Photoshop, Topaz and Nik software filters as well as RadLab, and a bunch of Pixlr filters for the background effects. I really liked it, but it took a hell of a long time to do:

ugly truth a

I don’t even know how many Pixlr overlays are in that background; I bet there’s over 10 going on back there. Before I wrapped things up to edit a few more plane photos (to be shared in a separate post), I decided to play around with one more doll:

angel2
Creepy enough for ya?

So there you go – some very different self-portraits from the last ones I shared. In the end, what started out as an attempt to represent my inner distress in an outward manner turned into just more having fun with photos, so I guess that’s a good thing. And as the weekend progressed, the pictures got a bit prettier, so perhaps the process helped to lighten my mood. But – I just learned of a recently-published book titled “Friendswood,” loosely based on the Brio refinery catastrophe, so perhaps more mild depression is on my horizon…actually, it’s rather nice to see the whole thing finally generating some interest, as I remember at the time that outside our little neighborhood no one much seemed to care. So I’ll consider it a good thing and move on.

As I said, I have loads more plane photos to share, but as my week got busy I ran out of time to process them, so they’ll have to get edited later. Today of course is Super Bowl Sunday, which means nothing to me except going to the grocery store late and enjoying being the only one there, but if you’re into all that crap, enjoy it I guess.

Blue-Over

In keeping with my plan to tax my arm less, I only worked on a few photos today from my latest shoot. Since a lot of my work was focused on fixing some color errors in the photos I posted yesterday, I only have one new one to share today. But first – I went to lunch with a friend today (hi Mel!) and we stopped in at, of course, the one other Free People store that’s in the city. It was a really tiny little shop, but they had this one pair of shoes on display that for some inexplicable reason I thought were amazing – I say inexplicable because this is in no way a shoe I would typically wear. I say one pair because it was literally the ONLY pair in the entire store, and it just happened to be in my size. So here they are – they’re so ugly they’re rather awesome (I have a feeling a LOT of you are going to disagree with me on the awesome part though):

Photo Jun 29, 2 03 08 PM

Anyway, once the shoes were purchased and food was consumed, I got to work fixing the overly yellow tone to the photos I posted yesterday. What can I say, I got too involved in using the RadLab plugins and lost my head. After I posted here around midnight Sunday morning, I went straight to Flickr for my one upload of the day, and as soon as the photo hit my stream I realized I looked like some Victorian Oompah-Loompah – it was just way too much with the gold tones. So, I took that shot down and uploaded one that I felt wasn’t overdone, although it’s still a little yellow. Anyway, fixing this was a bit of a bitch, but on the plus side I did take some time to watch YouTube tutorials and learn how to correct white balance in Photoshop, something I did not know how to do previously. Still took some time with these shots, but I managed as best I could. Here’s the first one I fixed, original first and then the new edit:

victorian3_RadLab_DP

This was the one I first shared on Flickr then took down when I got a look at it lined up against other portraits on my stream. I had to see it in that context to realize how much I looked like an antique Cheeto here. After playing with white balance and some cool filters in Photoshop, here’s the updated version (I changed the texture on this one too, as the one I used above was also very golden):

victorian3_Snapseed_levels_DP

Soooooo much better, yes? The texture is really light here; I was torn about using any at all but I did want the vintage element it could add. I was unsure because I think the lighting on my face here is so nice, and I didn’t want the texture to muck it up. I ended up erasing most of it off my face, just leaving a little light mark here and there for consistency with the rest of the photo. You can mostly see the texture in the mirror and in the lower left-hand corner. It might actually be useless, but what can I say, I was nervous about going overboard with the filters again so I went really easy on them this time.

Here’s the other photo I shared yesterday that I also felt was too yellow, followed by the edit:

victorian2_final

victorian2_final2

It may have been because of the fairly weird lighting here, but I couldn’t use PS’s white balance tool to decent effect, and had to add a lot of blue filters in RadLab to cool the warmth down instead (hence my title, get it?). The lighting is so flash-y because I leaned forward pretty far in this shot, without thinking about how close it was getting me to the camera’s flash; even though I had it bounced off the ceiling my face got too close and blasted out a little by the light. I kind of like the effect that can have on occasion, and I think it works OK here, but it sure  made the shot a bear to edit properly, at least for me. I used the same texture on the edited shot this time, because I think the lightness of it worked well with the brightness of the shot and unified the lighting, in a way. I also added some shadows to my face, especially the eyes, so that it didn’t look as flat as it did in the first version.

Part of the reason I only had time to do one new one today is because this one was also a bear to pull off and took a load of time. I liked my face in this one shot, but as you can see, there was a framed picture hanging on the wall opposite the piano that was showing in the mirror, and the placement of the vase that rests on top of it was weird. So even though I liked my expression as I felt it was a little austere and unusual (which was in keeping with what I was doing in the shoot), it wasn’t going to work unless I got creative.

victorian6

Great expression, terrible background. However, I took a second shot like this after I took that picture off the wall and moved the vase, so my very next shot was much better. Except that I didn’t like my expression as much. There was nothing wrong with it, it just wasn’t as interesting.

victorian5

So hey, I thought, I know a thing or two about a thing or two, maybe I could take my head from photo one and create a composite with photo two to get the right face into the shot with the right background. This is where YouTube came in handy again, because one thing that’s eternally tricky about composite shots is that each shot you take will have a slightly different color balance, and if you are going to take your head off one shot and try to paste it onto another body, your skin tones damn well better match exactly or it’s going to look weird. Which rarely happens right out of the camera, and often causes problems for me. In truth I have to abandon a lot of composite shots because I can’t get the colors to match perfectly, and where I’ve layered one shot over another even the slightest color imbalance will show and screw it up. But when watching the tutorial about adjusting color balance, the video went on to show how you can take the color balancing you just did to one photo, save it as a color profile, then open up another photo from the same shoot and apply that same color profile to it for a pretty close match, if not an exact one. I knew this was possible, but had never bothered to learn it before – it worked well here, and although it did not provide a total match, it got me close enough. So here’s the final composite shot, with the face of shot one and the rest from shot two, as well as some blue filters to cool it down a bit and a little texture added:

victorian5-6_final

I think the shot’s a little crooked, actually, so I may go in and fix that, but other than that I quite like this one. And by the way, I never noticed before that I have Stephen Colbert ears (one sticking out far more than the other). Ah well. I don’t know how many more of these I can edit since this is pretty much the gist of the shoot at this point – me looking austere sitting in a chair or in front of a piano. There’s only so far I can go with that…but I like what’s come out of it so far, and the things I’ve learned while working with these. I certainly got more mileage out of this shoot than I thought I would.