Space Dress

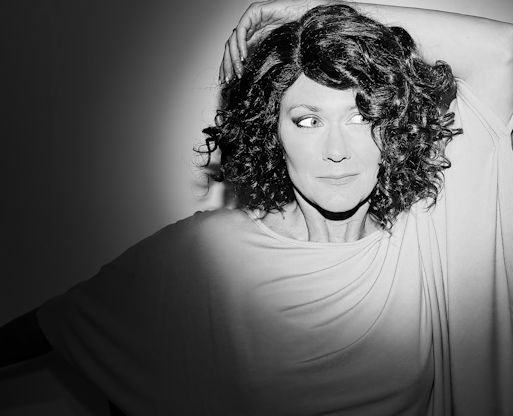
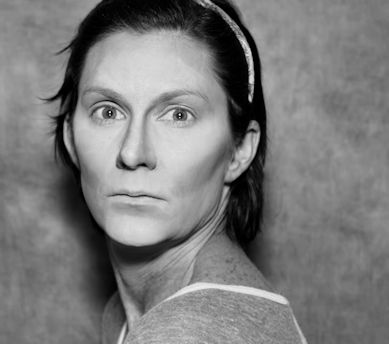
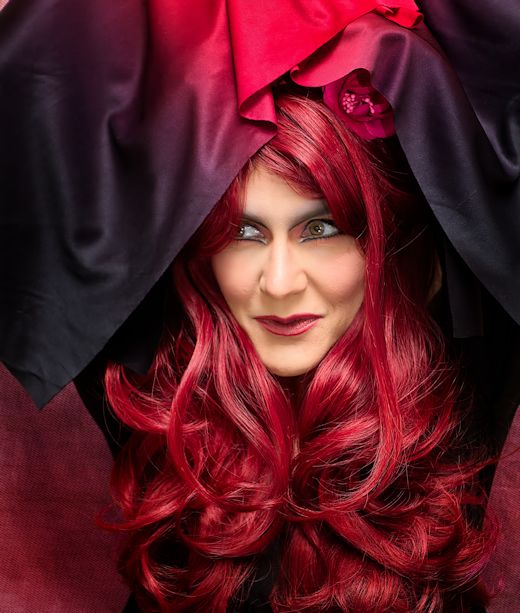
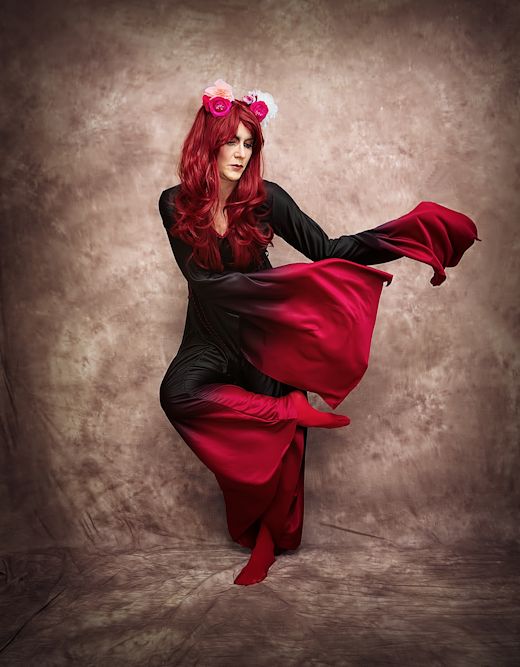
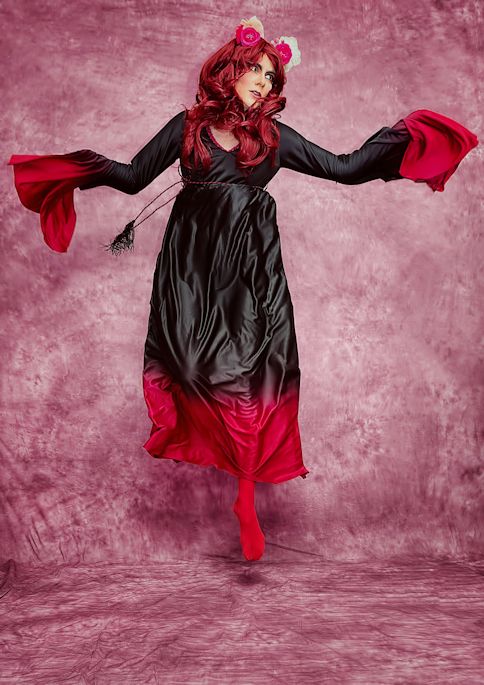
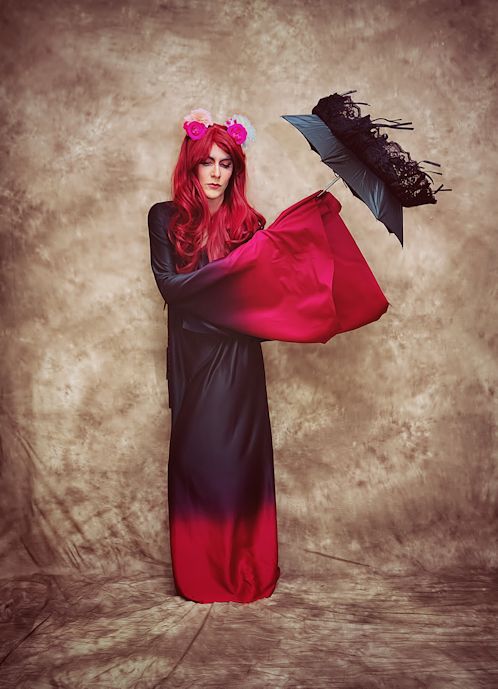
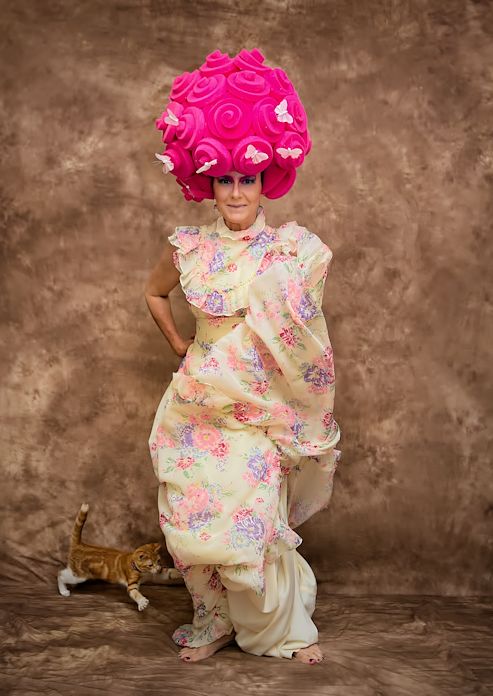
I decided to play in clothes again today; reading everyone’s comments on my previous post about taking such photos inspired me to do what I want and worry less about how I might be interpreted by others, especially since I’m enjoying shooting outfits from my closet right now – usually I pose in costumes and vintage pieces, but these are all (with a few exceptions – one you’ll see in this post) things I actually wear in my day to day life, which is kinda fun to photograph and share.

I managed to get a few outfits shot outside with my lovely but temperamental 85mm before I lost light (didn’t start shooting until around 4 PM) and had to move it indoors, but that was OK by me as I wanted to experiment with putting different pieces together and that gets frustrating while trying to also shoot outside. I tend to save outfits I already know “work” on me for the outdoors stuff so I can throw the clothes on and get to it; if I want to mess about in my closet and try lots of things on in different combinations, it’s much easier to stay in the same place for the photos once I decide what the look is going to be.

space4_Snapseed_pxr
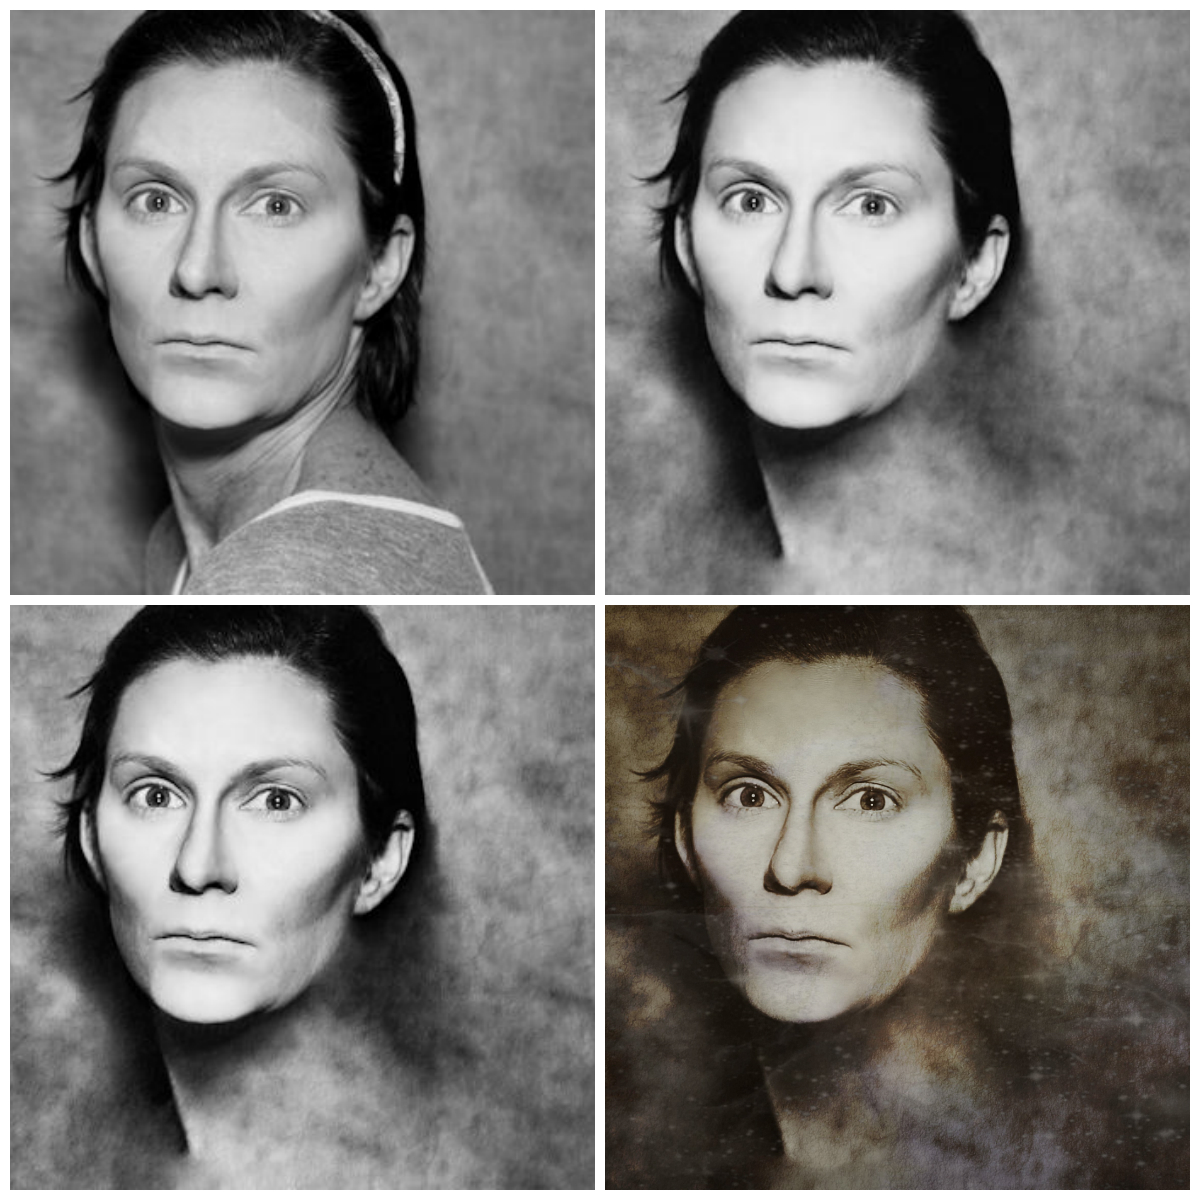
Brought to you by Pixlr, as usual

By the end of the day I had another 500 shots or so, and that’s on top of last week’s approximately 500 shots of which I’ve barely scratched the surface. I know I say this all the time, but I am really going to have to hold off on shooting more stuff for awhile so I can plow through all of these. They aren’t as time-consuming to process as I keep things simple in the final edit, but I have so damn many I want to work with and share that I’ll need at least another weekend to catch up. It’s just that I haven’t quite gotten off the shopping treadmill I jumped on over the holidays, so I keep adding more things to my closet that I’d like to photograph. For example,  I have a few more things coming in the mail this week from ModCloth, so I know I’m going to want to shoot those next Saturday in spite of the backlog.

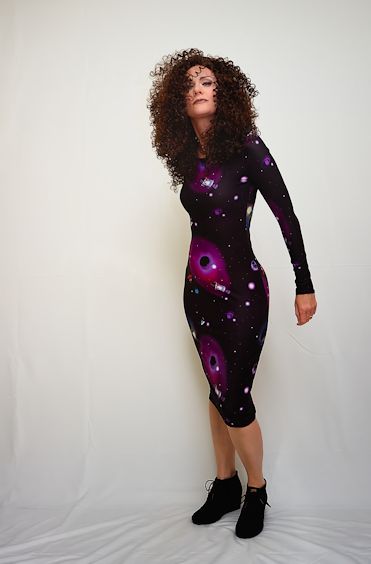
Speaking of which, the first dress I’d like to share is from ModCloth, of course, and it’s an absolute stunner. It was on clearance for $16.99, and although there is no way in hell I’d ever wear this thing out of the house, I thought it would do a bang-up job in photographs, and I was not mistaken.

space5_Snapseed
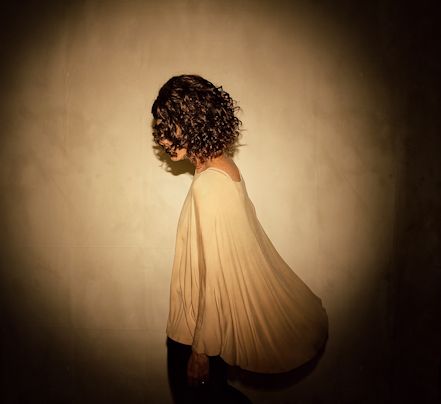
My favorite shot from the set

Most of the reviews for this dress said that it was clingy but looked fabulous, which isn’t untrue, but this is way too tight for me to feel comfortable wearing it out and about. That said, the material is nice and thick so it does a decent job of containing and concealing the body’s imperfections; my main issue with it is how I look when not standing in perfect lighting while perfectly posed (which isn’t great). That said, I’d like to add that in none of these photos did I edit my body in the slightest, it’s all me although there were certainly plenty of photos that did not present me in the most appealing light. I edited the shots in my usual manner – color edits, clarifying/sharpening detail, smoothing skin, removing undereye wrinkles, etc. – but I didn’t slim down the curve of my thighs or smooth out lumpy bits like I usually need to do when wearing something this clingy in a photo (which isn’t often).

space1_Snapseed
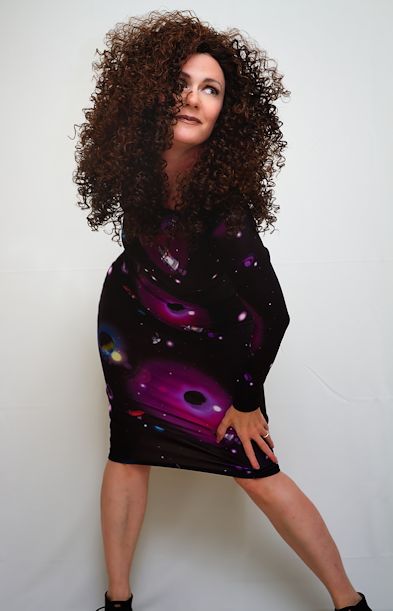
Oh, and Spanx. All the reviewers mentioned the necessity of Spanx, and I followed their advice.

I get why people would like this dress in spite of it’s clinginess, though; as I mentioned it’s sturdy enough to hold everything in place a bit, and the dark fabric helps to further conceal imperfections.

space2_Snapseed
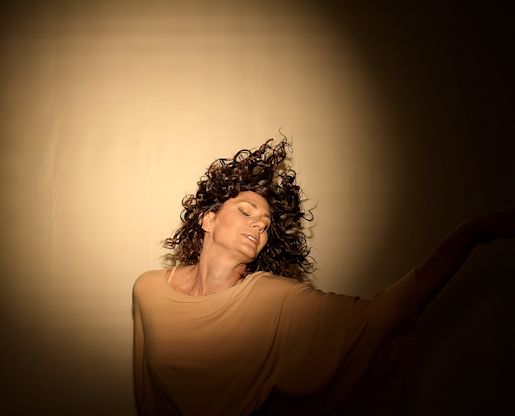
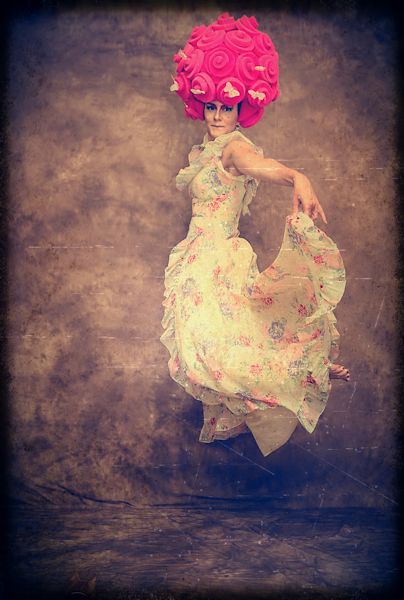
It was not, however, a good jumping dress. Doesn’t move at all plus the print gets crumpled. 

As you are about to figure out, I edited a lot more of the shots in this dress than I usually do for one look. It’s not just that it makes my bod look pretty great, it’s that amazing print. That’s what really drew me to the dress in the first place; the colors are lovely and the idea of it is unique but not totally crazy – when you first see it, you think wow, that’s a bizarre print for dress, but then right on the heels of that you think, no wait, it’s the perfect print for one. The length is a little awkward, but other than that it’s terrific. So, I processed a LOT of shots of me wearing it.

space3_Snapseed
Yep, I’m still wearing it.

It’s not often I can wear something this tight and not look badly proportioned; maybe it’s the long sleeves balancing out my small upper half with my ample lower half. I almost wish I was brave enough to wear this out somewhere, but before you start trying to talk me into it, don’t think I won’t show you a few of the bad shots of me in this thing to change your mind. Because I have plenty.

space6_Snapseed
This, however, isn’t one of them

On a completely superficial note, it’s still funny to me to hear women say they wish they had my shape, my lower half in particular. I spent decades of my life hating my butt and my thighs, and then somewhere in the 00’s big rear ends became desirable which helped me to accept my shape. Whether that’s good or bad, I don’t know; I suppose I should  have been able to get past it on my own, but that’s not how it went down for me and it’s too late anyway. I just needed society to validate me, is all. Moving on. Not only that but friends of mine say they’re jealous of the junk in my trunk; that never happened to me when I younger and my junk was less, well, junky. I’m not going to get into my body issues in this post, but I could talk at length about my thighs and how much I was tormented by them when I was a teenager (my mother would poke at them and say “Can’t you DO anything about this?” on a regular basis). Bottom line is (pun intended), I am not tormented by any part of my body anymore. It is what it is.

space7_Snapseed
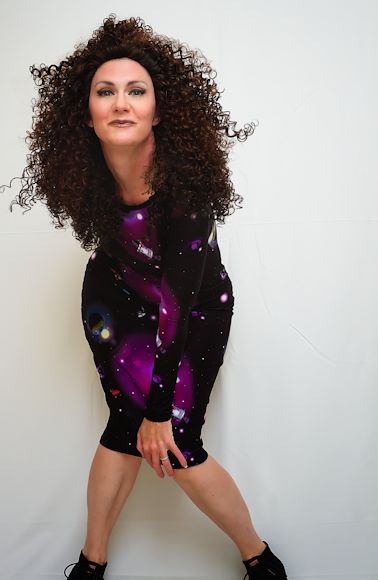
And what it is at the moment is wrapped in a seriously fabulous dress. Oh, and Spanx. Lots of Spanx.

And in case you’re wondering how  I manage to pose myself so I don’t need Photoshop to make me look curvy in all the right places, here’s my secret – I always stand with my upper body leaning slightly forward while pushing my hips back to de-emphasize them. You will never see me sticking my hips forward in a photo; I’m always leaning slightly forward with my upper body to emphasize the part of me that’s smaller. Go back and look at all the photos in this post, or any post, and you’ll see the same basic stance every time – upper body forward, lower body shifting back. Too bad I can’t walk around like that as it’s how my body looks best, but I haven’t figured out a way to walk while leaning forward and sticking my butt out. Yet.

Oh and if you’re wondering – I have one arm  behind my back in so many photos because I was holding the remote with that hand. You’re welcome.

Phoga

Phoga = Photography + Yoga. Lame but I tried.

In uploading a few more pics from this weekend’s shoot, I wanted to comment on how much my yoga practice is helping me with my jumps and movement. It’s not that I am necessarily getting shots I couldn’t have gotten before, but that in doing the amount of leaping and moving I must do to get them I am feeling more free and loose. Usually after a shoot of any length I’m sore for a day or two, and on occasion my back (where I have a tendency to get really tight) will be extremely tender. But lately that hasn’t been an issue. And as I am moving and leaping it requires less effort, I’m less tired, and my joints and muscles feel more flexible. The entire experience has a more effortless quality to it than it had previously.

I think this shot best sums it up – again, it’s not that I couldn’t have pulled this off without yoga practice, but I actually got a lot more of these shots this time, as well as having an easier time pulling this stuff off. It’s as if my body is one long spring that used to be tightly coiled, and now it’s loosened so there’s more space between the coils with which to move.

greenskirt1_Snapseed

I’ve found that the important little details like keeping the feet pointed and the hands looking graceful are getting easier too (one of my yoga DVDs actually has exercises for fingers and toes).

skirt3_Snapseed

And most of all there’s improvement in my back. As someone who spends a ridiculous amount of time sitting at a computer typing blog posts and processing photos, my sciatic nerve can get really tight, especially in my lower back. My neck and shoulders feel it, too, to the point that I always now have to wear an arm brace when I’m on the computer; it’s more like tennis elbow than carpal tunnel, but it’s pretty much a bitch. Not that it’s going to stop me from my online endeavors though, so I just learn to deal with it. But, my lower back is definitely the biggest issue; many yoga moves I’ve been doing deal with slight backbends and spine twists that help to loosen those muscles up. This next photo isn’t anything close to backbend, of course, but I guarantee you I could not have pulled even this off a month ago (I’ve been doing some sort of yoga, even if it’s as little as 20 minutes, at least 5 nights a week since I started).

skirt2_Snapseed

Sure, I possibly could have gotten that much arch in my back,  but not while keeping myself on my toes and the rest of my body in alignment so the move looked graceful. And I probably would have been grimacing. Even as I was taking this shot, I was noticing the difference in how it felt to move this way. And, I not only pulled this off once, I did it about five times – again, without strain or struggle. This one just looked best.

So far, I’ve been cautious with the yoga and am just now starting to push myself with difficult moves. But I’m enjoying it immensely. It’s a very peaceful way to work out. I can’t say I’m seeing any improvement in muscle tone or definition at this point – something that after a month of regular weight workouts I would be seeing – but whatever. I’m enjoying this too much right now to care about that. Maybe later I’ll need to incorporate some of the free weight work I’ve done in the past and had gotten so bored with, but perhaps as the workouts get more challenging I’ll start to see some of my old body come back without that stuff, as I just burned out on it entirely. Or maybe I won’t care about that and can just enjoy being fit even if it doesn’t result in cut abs like I used to have. I haven’t had those in a few years now anyway, so I’ve started to get used to being a little softer. My husband certainly doesn’t care, and I still look good in my clothes and am wearing the same sizes, so it’s not like I need to go around built like Madonna. Overall I just need to get healthy again, and this is a good start to that.

More Christmas Pics

Some more shots from Christmas Eve – I’m finally getting back to them.

Eve7
My dad

Eve4
My niece Chana and nephew Ben

Eve6
My brother Scott and my sister Kim

duckfacecollage
The Christmas Ducklips Contest – not sure who won

In many of my shots, the color was rather washed out and boring, so that’s why some of them are black and white. If the color wasn’t vibrant I found the shot looked better that way.

I have a few more to share, but I want to show their editing process, so I’ll save those for later.

Spot Blogging

Today I stumbled across a little Rogue spotlight I bought about a year ago to attach to my Speedlite; I’d only tried it out once before forgetting about it. At the time I wasn’t very interested in what it could do as I’d also bought a small softbox and got way more into using that than this little thing. So after coming across it again, I decided it was time to play around with it and commit more to learning how to use it.

spot 1a_Snapseed
Spotted!

The detachable spotlight also came with a sample gel filter to put over the spot for color effects; it was an orange one, but I’d definitely like to get more colors at some point. I stuck the gel on the spot and ended up doing the bulk of the shots with it in. The results were interesting – I actually used the orange gel on the shot above, but edited a black and white version also to show the spot effect without any color distractions. Here’s the actual shot using the orange filter:

spot 1_Snapseed
Pretty damn warm – believe it or not, I actually REDUCED the color in this shot when editing. That’s some serious orange.

Apparently this came with three different grids to create tighter or wider spotlighting, but I could only find two. Figures. Of the two, I much prefer the wider spot to the tighter one, so it’s the main one I used.

spot 2_Snapseed
The spot/gel combo didn’t do much to wash out the wrinkles in the backdrop, so I added a texture to the photo in an attempt to camouflage them

I thought that shot might be lacking a little, so I added some more filters to it in Snapseed, just for the hell of it:

spot 2a_Snapseed
Totally cancels the effect of the orange filter, but I thought it gave the shot a spooky vibe

But I still felt the shot was missing something, so of course I ventured over to Pixlr to play with it further. I discovered recently that if you access the “adjustment” tool in their Express editor, there’s an “upload image” option which allows you to superimpose another picture over the one you’re editing (more hours of fun on the way, as is the norm any time I discover something new) so I gave that a go by uploading the same image over it, enlarging it a bit and reducing its opacity, then throwing in some light leak, smoke, border and texture filters to finish it up:

spot 2a_Snapseed_pxr
Even spookier!

I really like the movement in this last one, and in spite of my itchy photoediting fingers I forced myself to keep the adjustments to a minimum (so hard for me to do):

spotshot_Snapseed

I’m sure you could get this entire effect using software after the fact, but it’s great fun to experiment with vignetting effects and filters right in the shot. Taking thousands of photos a month using one’s self as the subject does get boring (believe it or not, yep) so any time I run across something new that makes the actual taking of the photos more interesting (taking the photos is never my favorite part) I’m all for it. Plus, I do believe the more you ‘get right’ in the actual shot, the better – it just feels better in the final result.

Seriously considering zipping right over to Amazon and buying those other filters. Loads of colors for $30 and totally worth it. But it’s way past my bedtime and I have a busy day ahead, so the sooner I get off this computer and force myself to get sleepy the better. And I know I still need to share pics from as far back as a week ago (Christmas Eve) but I get so excited about my newest shots that ones I took previously and failed to upload right away sometimes get lost. I’ll get them all shared soon though; once work starts up again I won’t have so much time to take photos and get backlogged.

Evolution of a photograph – makeup test shot

I’ve mentioned this here before, but I always take test shots as I am applying my makeup to be sure it’s going to appear as I want it once I start shooting. Sometimes I luck out and get an interesting photo out of those shots; in fact, I often discover that some of my expressions in those one-off shots are more interesting than my posed ones, and I regret that the makeup and outfit wasn’t complete when I took it. Sometimes I can still get a decent shot out them though, like this one:

0060_Snapseed
Edited, of course

Anyway, I discovered one such shot Wednesday evening and played around with it a bit, so I thought I’d share its evolution. This is as close to an original as I have, but it was not shot in black and white originally:

test shot1
Same headband as in the first photo – it’s the one always I use when applying makeup for shoots

Obviously my makeup was not complete here, nor was it well-blended, as I discovered after taking the photo. But the extreme highlighting and contouring did make for an interesting look in its own right. However, one of my regretful side-effects of getting older is the sun damage that is starting to show itself on my skin, my neck in particular. I admit it is getting more and more difficult to disguise it in shots without it being obvious, and at some point I’m just going to have to embrace it or quit taking photos of myself (which isn’t likely). I doubt anyone notices, but it does bother me (more in photos than in day to day life, when it isn’t as noticeable but is slowly getting more so). The sides of my neck as well as my decollete are both getting red and splotchy; I used to try to cover it with makeup but just ended up with a red, splotchy neck AND a foundation-stained shirt, so I don’t bother anymore. But in this photo, the hyperpigmentation showing on my neck, as well as the crappy pajama t-shirt, were really bugging me, so I decided to try something new instead of just my usual softening and lightening:

test shot2
Problem solved

With my nominal Photoshop skills, I used the patch tool to blend the background into my skin and hair; I also blended out some of the harsher contouring around my hairline and softened the skin to conceal the fairly sloppy powder-blending job I’d done right before taking the shot (I also got rid of the headband I was wearing).Then I pulled the photo into Snapseed to sharpen and define it:

test shot3

To blend in some of the rougher edges where I’d blended the background in, I also added a texture to the background, keeping it very faint so as not to overwhelm the nice clean lines of the face (I did this in Paint Shop Pro, since I don’t yet know how to do it Photoshop). This was nice enough as is, but it was tempting me to give it a little Pixlr treatment to make it extra-special, so off we went:

test shot4
I also liked how my cheekbones started to look like mutton-chop sideburns somewhere during all of this

I added a vintage effect to add contrast, a space overlay for a ghostly feel, a tie-dye overlay for a little color, and an ink border for depth and visual interest. I still like the plain old black and white version too – but this one is probably going to get my top vote, ultimately.

I may look through my test shots and find a few more to work over this way. Blending the background into the subject in a portrait is something new for me, and I had fun giving it a go. As always, problem-solving when editing leads to new and creative processes and solutions. At least, that’s how it works for me.

Here’s a collage of the work in progess:

collage_testshots

Pink Outtakes

I only have two outtakes from Saturday’s shoot, but they are pretty good ones.

This first one is deceptive – I actually know what was going on here; I was getting pissed that my Speedlite was overheating so early in the shoot and was intermittently not working. So I was staring at it trying to determine if it was going to work at all, dammit – and that’s when this shot went off (and yes, the Speedlite worked for this one). Why it looks like I am so happy as to have gone brain-dead is beyond me (unless it captured my moment of joy at seeing the flash start working again).All I do know is that I look like I just got goosed, or spotted the world’s most amazing firework display:

pink7

Somewhere during all my photo editing, I decided to deal with the white balance problem by using a high key filter on these shots. Yes it makes me look monochromatic, but at least I’m not yellow anymore.

My  next one was taken when I was trying to blow a lock of hair out of my face. I thought this would look cute on camera. It’s not cute, exactly, but it is, well, something:

pink6

I honestly can’t decide if that is the best or the worst photo I’ve ever  taken. Part of me wants to make it my new profile picture on Facebook, and part of me wants to burn it.

Those are the only two amusing outtakes I have, but I will add this one, which is from the other set of photos I shot Saturday. I used this amazing new dress I got from ModCloth (one of my favorite stores) that just felt like it needed to be danced in, and one of my custom gray wigs from Amore. I took these shots not by dancing, as I have learned that such shots only come out looking good when one is an actual dancer (with a normal, non-dancing person, dancing shots come out looking like grand mal seizures). I took them instead by looking up photos of real dancers on Google images and trying my best to imitate those shots. I pretty much failed, but I did get some interesting pics out of it.

These are the only two of this set I’ve processed so far (and yeah, I added a texture to the background of the first once, couldn’t help myself):

dance1

dance2
No dancers were harmed during the shooting of these photos. Trust me.

I think next I’ll post Part 2 of my headband wig review, plus I have two new headband wigs I photographed Sunday that I need to type up reviews for. So much hair, so little time!

Sunday Photoshoot

I ended up with a full day Sunday to take photos, so I went all out with the drag makeup, which took an hour to apply (here’s a link to the tutorial I attempted to copy; obviously I failed at replicating her look but it at least got me somewhere interesting).

December2
Using the softbox for this shot; lots of light on the face and sharp shadows. Also, I wore some different foundation for this shoot, and the results were a little splotchy, IMHO. I can tell on the neck more than anywhere. 

I’ve ordered a new backdrop but didn’t have it in time for this session, so I was using the same brown background I’ve used for over a month. Quite honestly, I’m completely bored with it, so I wanted to be able to at least change its color while processing – something that isn’t as easy to do as you might think. The mottled background means it blends too easily with my skin and other clothing tones, so I knew I’d need to wear something that would completely contrast with it or editing would get too messy. I also needed to cover as much of my skin as possible to avoid it blending into the background, too (I wasn’t able to change the background color of the photo above, by the way – too much of my skin matching up with the backdrop).

December4
No softbox here, using a Speedlite mounted on the camera and bounced off the ceiling. Much softer light, but more shadows. I aimed a ring light at my face to help eliminate some of the peskier shadows this lighting tends to create. 

I decided on a costume gown I got for 75% off at the grocery store right after Halloween – it isn’t exactly season-appropriate, but it was a good contrast for my backdrop, and it was surprisingly appealing when moving to boot. An interesting ombre effect on the skirt and sleeves, and an awesome overlong bell-shape to the sleeve all created interesting images when flinging the cloth around. I was very pleased with both the color and movement of this thing when I saw the photos (you can tell I was able to change the backdrop color on these easier, too):

December1
By the way, I never use a softbox on full-length shots. Only portraits. Just the Speedlite camera-mounted and bounced off the ceiling, and two umbrella lights at 45-degree angles to the subject. 

December8
Not happy with that one foot, but whatever.

As you can tell in the shots above, I got bored with the short red wig (since it doesn’t incorporate any movement into the shot), so I switched to one called “Cool Kitten” from Gothic Lolita Wigs (it’s now discontinued). As a kitty wig, this thing sucked; the little cat ears were just some wig hair wound around two little styrofoam triangles, and didn’t stay put at all. But when thinking about what hair to wear with the dress I remembered this wig, and thought it might work to use the styrofoam ears as a base for some flowers and give the whole outfit something a little more Renaissance-faire and less Gothic-bride. Worked out great.

December6
My skin tone is really all over the place in these photos.

I also played around with my two Speedlites a bit to create some cool shadows. White balance on these shots was a bitch though, and I came out a little green, so I just decided to go with it and added a vintage filter to exaggerate the effect. Not as pleased with these as the others, but it’s something different.

December3

December5
It’s not easy being…well, you know.

And of course, there was jumping:

December7

December9
I may have oversharpened this one.

In looking over all these photos, I fear they may have suffered from the I-must-edit-every-shot-I-like-now syndrome that takes me over at times. I edited pics from 4 PM to midnight, and at some point in all that work I got sloppy, as I always do. When will I ever learn? Oh well. There are loads more from this shoot I can process more slowly and meticulously throughout the week.

Including photos with props, like this one!

December10

A few more shots

Just a few more from Sunday’s shoot that I’ve had time to process. As I mentioned earlier, I forgot to alter my lighting setup when I switched from portraits to full-length shots, so these suffered a little from that error. They weren’t nearly as crisp as I like them to be, and the light was blown out a little – so I used Pixlr to disguise these flaws a bit. Plus, I’m getting bored of the beige backdrop now – it wasn’t nearly as easy to transform into another color as I thought it would be, and was next to impossible to do in these full-length shots (you need a lot of contrast between the subject and the background – which is why people use greenscreens so often – and that mottled beige background did NOT contrast with what I was wearing at all) so without some Pixlr-ing they weren’t all that exciting to me. At first I wasn’t excited by them even after giving them the Pixlr treatment, but they’re starting to grow on me.

morepink7
Can anyone spot the kitten in this photo? I purposely left him in the shot.

I always try to go easy with the Pixlr effects, because it’s a very popular free program and I don’t want my shots to scream that I used it. I don’t know why this matters to me; I guess I just want the edits to blend well into the shot and not have any one particular filter or effect stand out to people.

morepink6
Clearly though, I like the scratchy textures Pixlr offers.

morepink8
Love the movement of the skirt in this one.

morepink9
I used some interesting overlays here – one was a space filter, and fire was another. I kept them subtle so you wouldn’t be able to recognize what they are; I think the end result looks rather ghostly.

Evolution of a photograph

I thought I’d show the evolution one of my photos from Sunday’s shoot went through, because I personally found the process interesting. This photo didn’t end up at all where I thought it would, but I do like the results.

When choosing which shots to process, I decided to play around with this one in spite of its flaws, because I found the pose and facial expression to be compelling (if it’s not snobby to say something like that about myself; I don’t consider me “me” when editing my shots anyway, I’m just the subject of them).

morepink3

I wasn’t sure I’d be able to do anything with this because of the makeup problem here – it was not applied THAT badly, but at this point in the shoot it had gotten a bit smudged, and that combined with the lighting I was using accentuated it. In this shot, I wasn’t using the softbox I normally use for portraits, because I’d already taken it off the flash and wasn’t interested in putting it back on (this was taken right at the end of the shoot). Without the softbox, I get a much softer light on the face, which is a prettier effect for portraits, but it creates its own problems – especially on a middle-aged face. For example, when looking in the mirror I do not see dark circles or major wrinkles under my eyes, but with the external flash attached to my camera and bounced off the ceiling, they are definitely accentuated (the bounced flash also creates a lot of shadows on the face, which on one hand adds a lot of interest, but can also highlight wrinkles and flaws, unless you’re a spring chicken, which I am not). So, when I choose to use the bounced flash, I almost always end up needing to use Photoshop to get rid of things it accentuates that are not appealing. This is why I normally choose to go with the softbox, as it hits my face with a lot of light, which erases lines and shadows, but it’s filtered enough that I don’t get that awful “hey I used a flash in this shot” light blowout that occurs with an in-camera flash.

Bit of a digression here, but this example to compare the two. This first one is using the softbox on my external flash (I shared this shot yesterday as well):

pinkie5

The softbox allows me to aim the flash right at my face – great for eliminating those dark eye circles and other wrinkles, but it’s definitely a “look.” I consider it a high-fashion look, but that’s just my little name for it. While the softbox won’t create too many shadows on the face, it does create a lot of background shadows that are very sharp and dramatic, which can work well, but it isn’t always what I want.

Now here’s another shot from the same shoot, taken without a softbox and with the external flash bounced off the ceiling:

morepink5

TOTALLY different look. The overall effect is softer and more dimensional, I think, than the one using the softbox – but I did have to do more editing to my face to get rid of the dark circles that magically appear when using this lighting.

Anyway, back to the original shot. The bounced flash created a bit of a mess around my eyes, so I managed to use PS to edit most of that out. The end result was this:

morepink1
I also got rid of the freckles on my arms, I don’t care one whit about them in real life, but in photos I find them distracting.

Much better, but still a bit of a problem. I pulled the shot over into Snapseed and gave it a go; I was pretty sure I’d need to go black and white with it, since all that color around the eyes and the smudged makeup on the nose was going to be bitch to even out without it looking weird, but on its own the B&W wasn’t appealing to me – it still needed more oomph to work. So I ended up using a red B&W filter on it, which gave it a crazy glow, then added a “Grunge” filter with texture to give it an antique-y feel, and well, here’s the end result.

morepink2

Now I really love it. I don’t think I’ve ever used a red B&W filter before as it makes everything overly bright and glowy, and I’ve never known what to do with that. But it worked here to eliminate the problems of the shot as well as contribute to the tense mood I felt the expression created. It looks nothing like the original, but it fixes the flaws of that one while really ‘coming into its own,’ so to speak.

I don’t think I’ll ever get bored with editing photos and playing around with filters. It’s the same freedom and magic to me that coloring held when I was a kid. Now if only I didn’t get so absorbed in it that the kitchen stays dirty for hours and I get to bed way too late. But one thing at a time, I reckon.

A few more shots to share tomorrow!

Right on Target

Got up about 7 AM Sunday morning, enjoyed a leisurely cup of tea, then got to work on taking photos with the pink Target wig my friend Chadwick sent me from Chicago. Setting up the studio took about 30 minutes, including breaking down the office and converting it into a studio space, then setting up the camera and lighting, then it took an hour so to apply the makeup. All in all, I was ready to shoot by 9:30 and completely done by 11:00 AM, which may be a new record for me. I’m sure the extra hour from ending daylight savings time helped (and am I the only one who does not get up in arms over the whole daylight savings thing? To me, it indicates the start of a new season, so I enjoy it both coming and going), plus I’m not including the reassembly of the office into all of this. I didn’t clean up until late afternoon as I immediately got absorbed in editing the shots, as I always do.

Overall I am pleased with this set. I really went on a marathon today trying to process as many shots as possible, but as usual I couldn’t get them all done. The portrait shots came out better than the jumping and movement ones, because I forgot to change the lighting setup when I switched from close-ups to full-body shots, and as a result the lighting is off on those (too bright and the focus isn’t very crisp). But when I spend as much time on the makeup as I did with this set, and the portraits don’t come out nicely, that’s a real pisser – so I’m happy enough to have gotten some great shots that accentuate the work I put into my face.

pinkie2

I’m going to share with you a little secret about posing for portraits that I picked up from an online member of a wig message board awhile back: before taking close-up shots with bright lighting like this, I shave my face. I do this because I have a lot of peach fuzz (getting more as I get older, too – thanks nature) and with the amount of bright light that I aim at my face, it all shows in close-ups. It’s always bugged me and I’ve done my best to edit it out, but when she mentioned the face-shaving thing I decided to try it, and I love the results. The woman who shared that she did this lives in Japan, where apparently this is a common practice for all women – peach fuzz apparently is a much bigger deal there than it is here, and is considered very unappealing. I got online and read up on the subject, and it turns out you can go to an aesthetician and pay a hundred bucks or more for a service called dermaplaning, which isn’t much more than a straight-edge razor shave. I use what’s called an eyebrow razor and my husband’s shaving cream, and do it myself (this actually is also great for shaping eyebrows, which is how it’s marketed). It makes the face smoother and the makeup blend and stay put – it looks so much better in photos and is actually the secret of many a supermodel. I don’t believe for a second that it makes the facial hair grow back any darker or more coarse, so no worries about it on my end (I’ve been shaving my little lady-mustache for years anyway; creams burn my skin and to go for waxing constantly is too much maintenance. Never had a problem with it). If you ever want to try it, don’t be afraid of those old wives’ tales about facial growing back darker if you shave it off. It’s baloney. And a good face shave is better than a scratchy old exfoliant anyway – that’s why men always look so fresh-faced after shaving. .

But enough about my face shaving:

pinkie3

Not totally pleased with this shot, but I edited it anyway because you can really see the eye makeup. My eyebrows have gotten sparse over the years, but they are still dark, so I actually used a long-wearing Lime Crime coral red lipstick called Suedeberry on them, then blended the pink eyeshadow into that. I got those false lashes on sale after Halloween at the grocery store, and as you can see they didn’t stay put too well. One of them is popping off there, but hopefully it’s not too noticeable. I can also see on my chin where either my skin was dry or my face powder wasn’t blended very well – that’s how harsh the lights I use can be. Makeup really does need to be flawless, because every little error will show. Not that anyone else would notice when looking at the photo. But I do.

pinkie7

A bit of a weird shot, but I couldn’t resist that shadow on my face that frames one eye. You can also see that I played with layers in this set – all of the shots were taken in front of my beige backdrop, but I changed the color of it to work better with the bright colors of the subject. Also, I got those paper butterflies at Party City over the summer, and finally found a use for them. Unfortunately the butterfly at the very top fell out at some point during the shoot, and I didn’t realize it until I caught it in Simon’s mouth after shooting was done. So I have loads of pics with one less butterfly (More about Simon later – this was his first time experiencing photo day and he was quite interested in what was going on).

pinkie4

Now this shot makes me happy. At some point I applied a bit of talcum powder on my face because it kept appearing shiny and I wanted my skin to look a bit lighter. I think that worked well here, and this is one of the shots I did not end up editing much, as tempted as I was to jack with it like I do most of my shots. I thought it worked as is, and just made a few adjustments. Oh and the butterfly isn’t actually balancing on my nose – kinda gross, but the butterflies were stuck to very thin, long pieces of wire that I was able to stick into the wig to get them to stay – here, well, I have the wire shoved up my nose. Just keeping it classy, people!

pinkie5

I admit to having run out of good ideas for portrait poses at this point, so I often end up reverting to some old standby stances and faces to get some variety. This is a goofy, half-surprised look I seem to enjoy making (probably in life as much as in photos). Sometimes I move the camera around to shoot my face from different angles, but from the sides in this wig you could see too much of the wig cap and my natural hair. These wigs are cool as hell, but not exactly easy to wear. In fact, most of the problems I had with this shoot were due to that wig – once I managed to get it on my head properly, I could not in any way shape or form put my glasses back on, so I had to focus the camera without seeing what I was doing at all, which is less than ideal. It also kept banging into doorways and lighting umbrellas and was just generally a nuisance for self-portraits. But it looks great. It had also, after about two minutes of wearing it, worn off all the makeup on my forehead.

pinkie1
Simon, however, had no such issues.

Speaking of Simon, as I mentioned earlier he was fairly curious about what was going on during this shoot. His main fascination was with my little remote, since I toss that to the ground after pressing the button for each shot. To him, that was a clear indication the item was there for his enjoyment, and he kept grabbing it in his little mouth and scampering away with it. He also got into swiping and biting at my skirt a bit, but not nearly as much as he got into pouncing on the remote.

Although clearly he got into pouncing on the skirt a bit too – as evidenced in this next gem, which was not intentional on my part in any way, shape, or form; in fact, I had no idea what Simon was up to until I saw the shot. I’m sure I felt him landing on my skirt and starting a little kitty-war with it, but at the time I had no idea I’d managed to capture his little ambush on camera:

pinkie6
Eyes on the prize, Simon!

My makeup also didn’t translate well to the full-body shots and I should have slapped on some lipstick for them. So overall, not too pleased with the full-length photos in this set, but that one was too good to pass up. Also, in this shot my right arm actually was in the photo originally, but the angle the camera caught it at was just plain weird, my elbow looked huge and distorted, and overall I found that arm to be a huge distraction. So I just edited it on out of there and figured I’d pretend my arm was behind my back or something. Much better this way.

More later!