Random shots

Had to take our 15 year old cat, Ramone, to the vet this weekend to get his monthly steriod shot. He’s lost a lot of weight the last six months and was having a hard time keeping his food down, but the shots seem to help. Ramone’s a pretty good cat when being hauled to the vet, but like any cat he’s less than thrilled about the whole experience. So of course I took pictures while we were there.

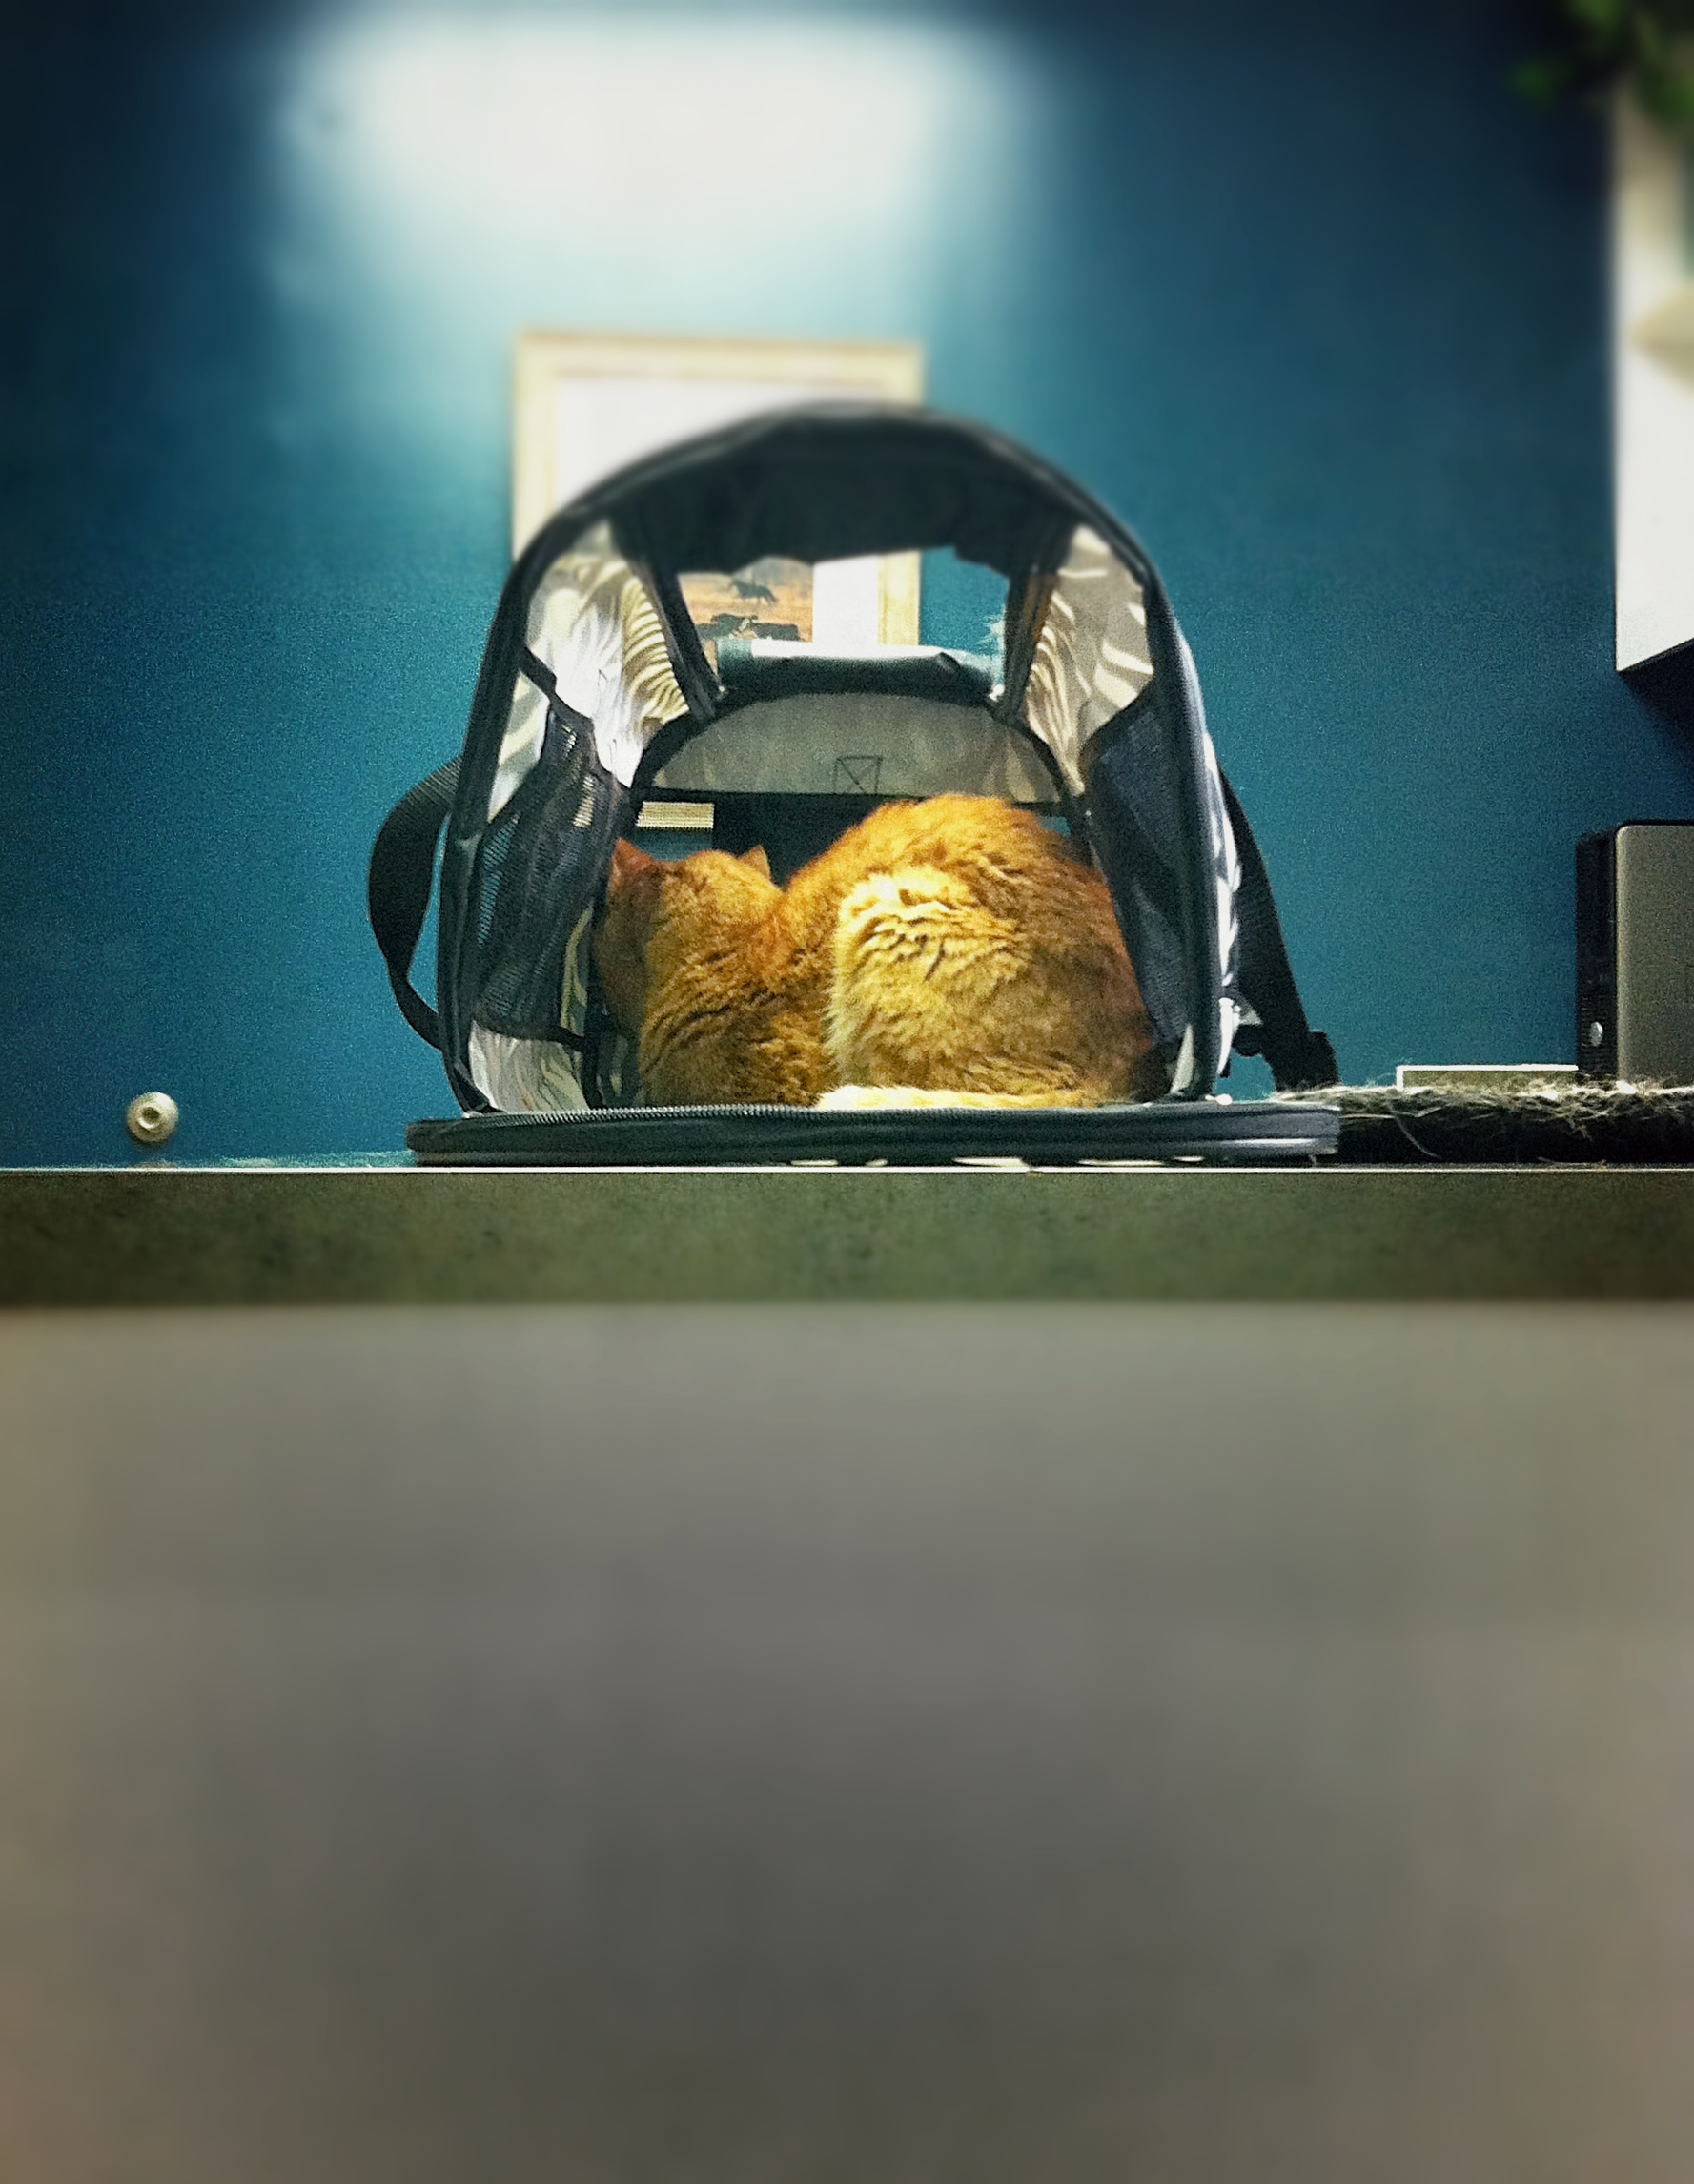
This first one makes it look like his carrier is really tiny, but I promise it isn’t. It’s just very floppy and was a little caved in, plus he squishes himself as far back into the corner as he can when when anyone tries to take him out of it at the vet’s office (and also when I’m trying to take pictures):

kitty3
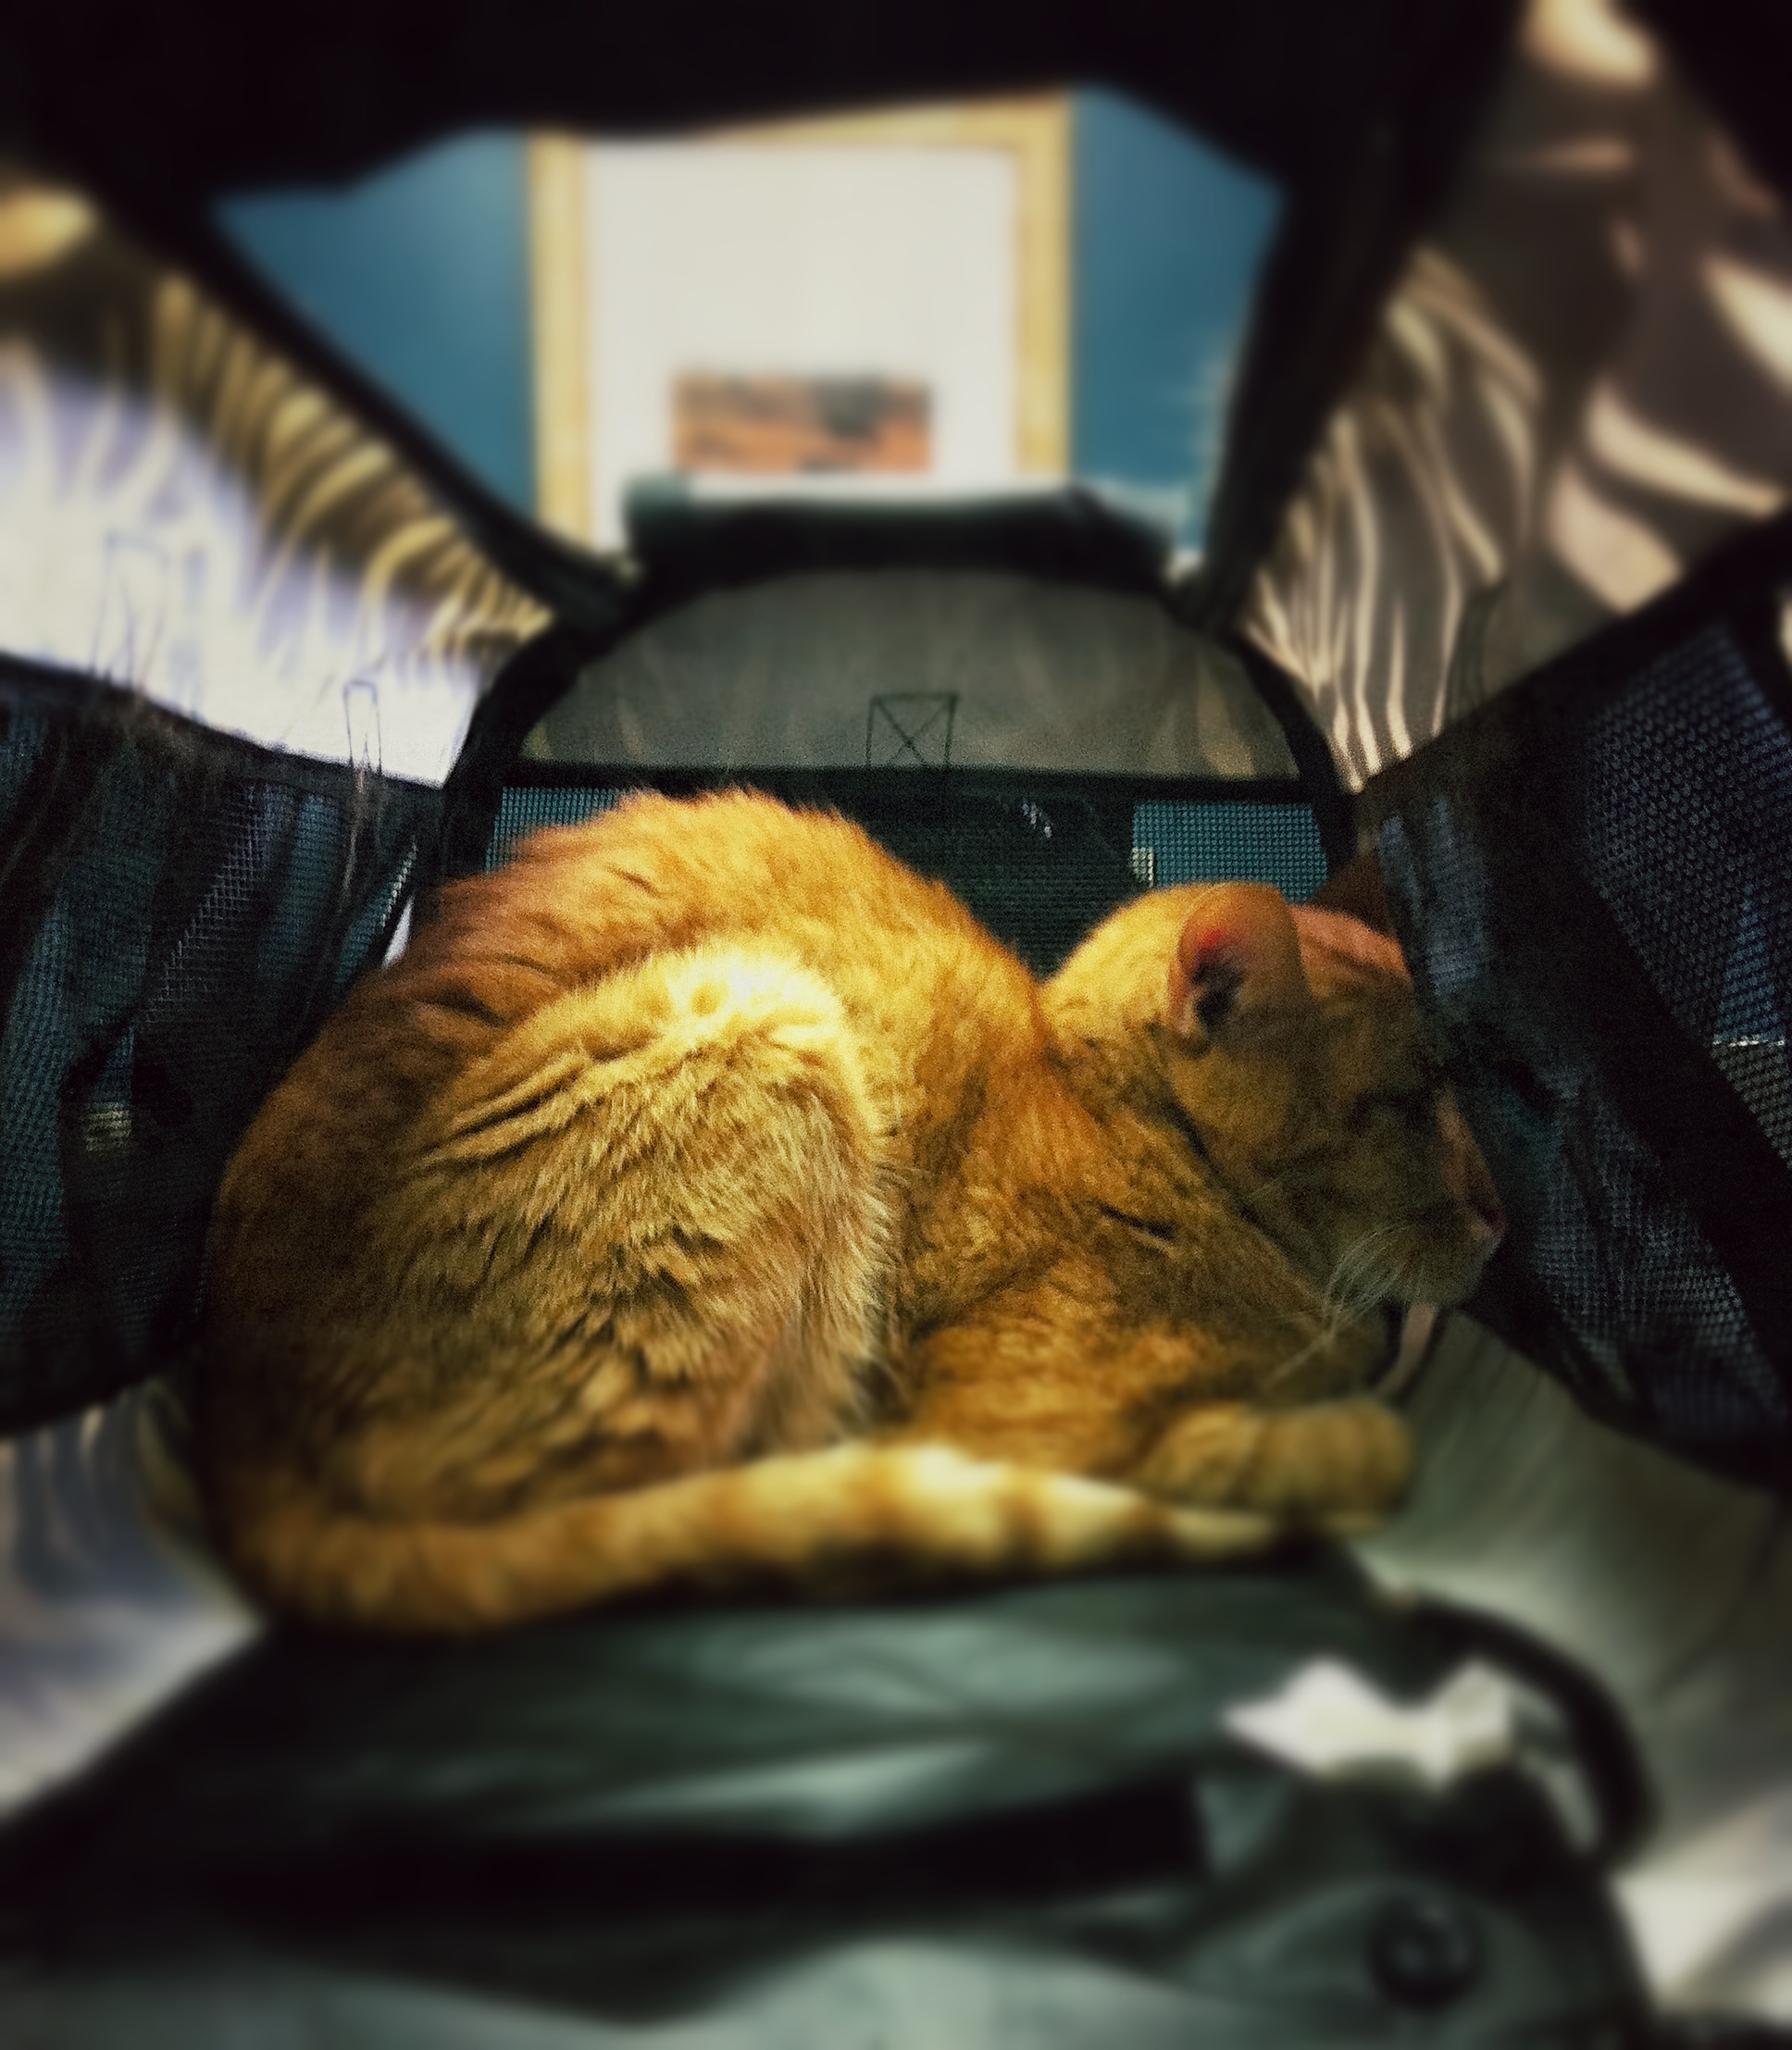
Is this bugging you? I’m not touching you…

I don’t really have anything to say  about this one, except that once again it may make him look more miserable than he really was. In actuality he was bumping his face up against the mesh so I could scratch his head.

kitty2

And, because there was not much to photograph in the vet’s office, here’s another shot of Ramone in his carrier.

kitty1

And for something completely different, the principal where I work has a daughter who teaches some film classes there, and she is a huge animal lover – to the extent that she regularly brings her pets up to the school. I don’t think anyone else could get away with this, but being the boss’s daughter she’s allowed. She recently acquired a puppy, and I have to admit that as generally weird as I find the idea of teaching every day with a puppy leash attached to one’s belt loop, I find this little guy adorable and tend to rush over to him every chance I get to give him a quick cuddle. Maybe I should use him in counseling sessions to speed things along with the students; cuddling a sweet baby dog is pretty healing.

kitty4
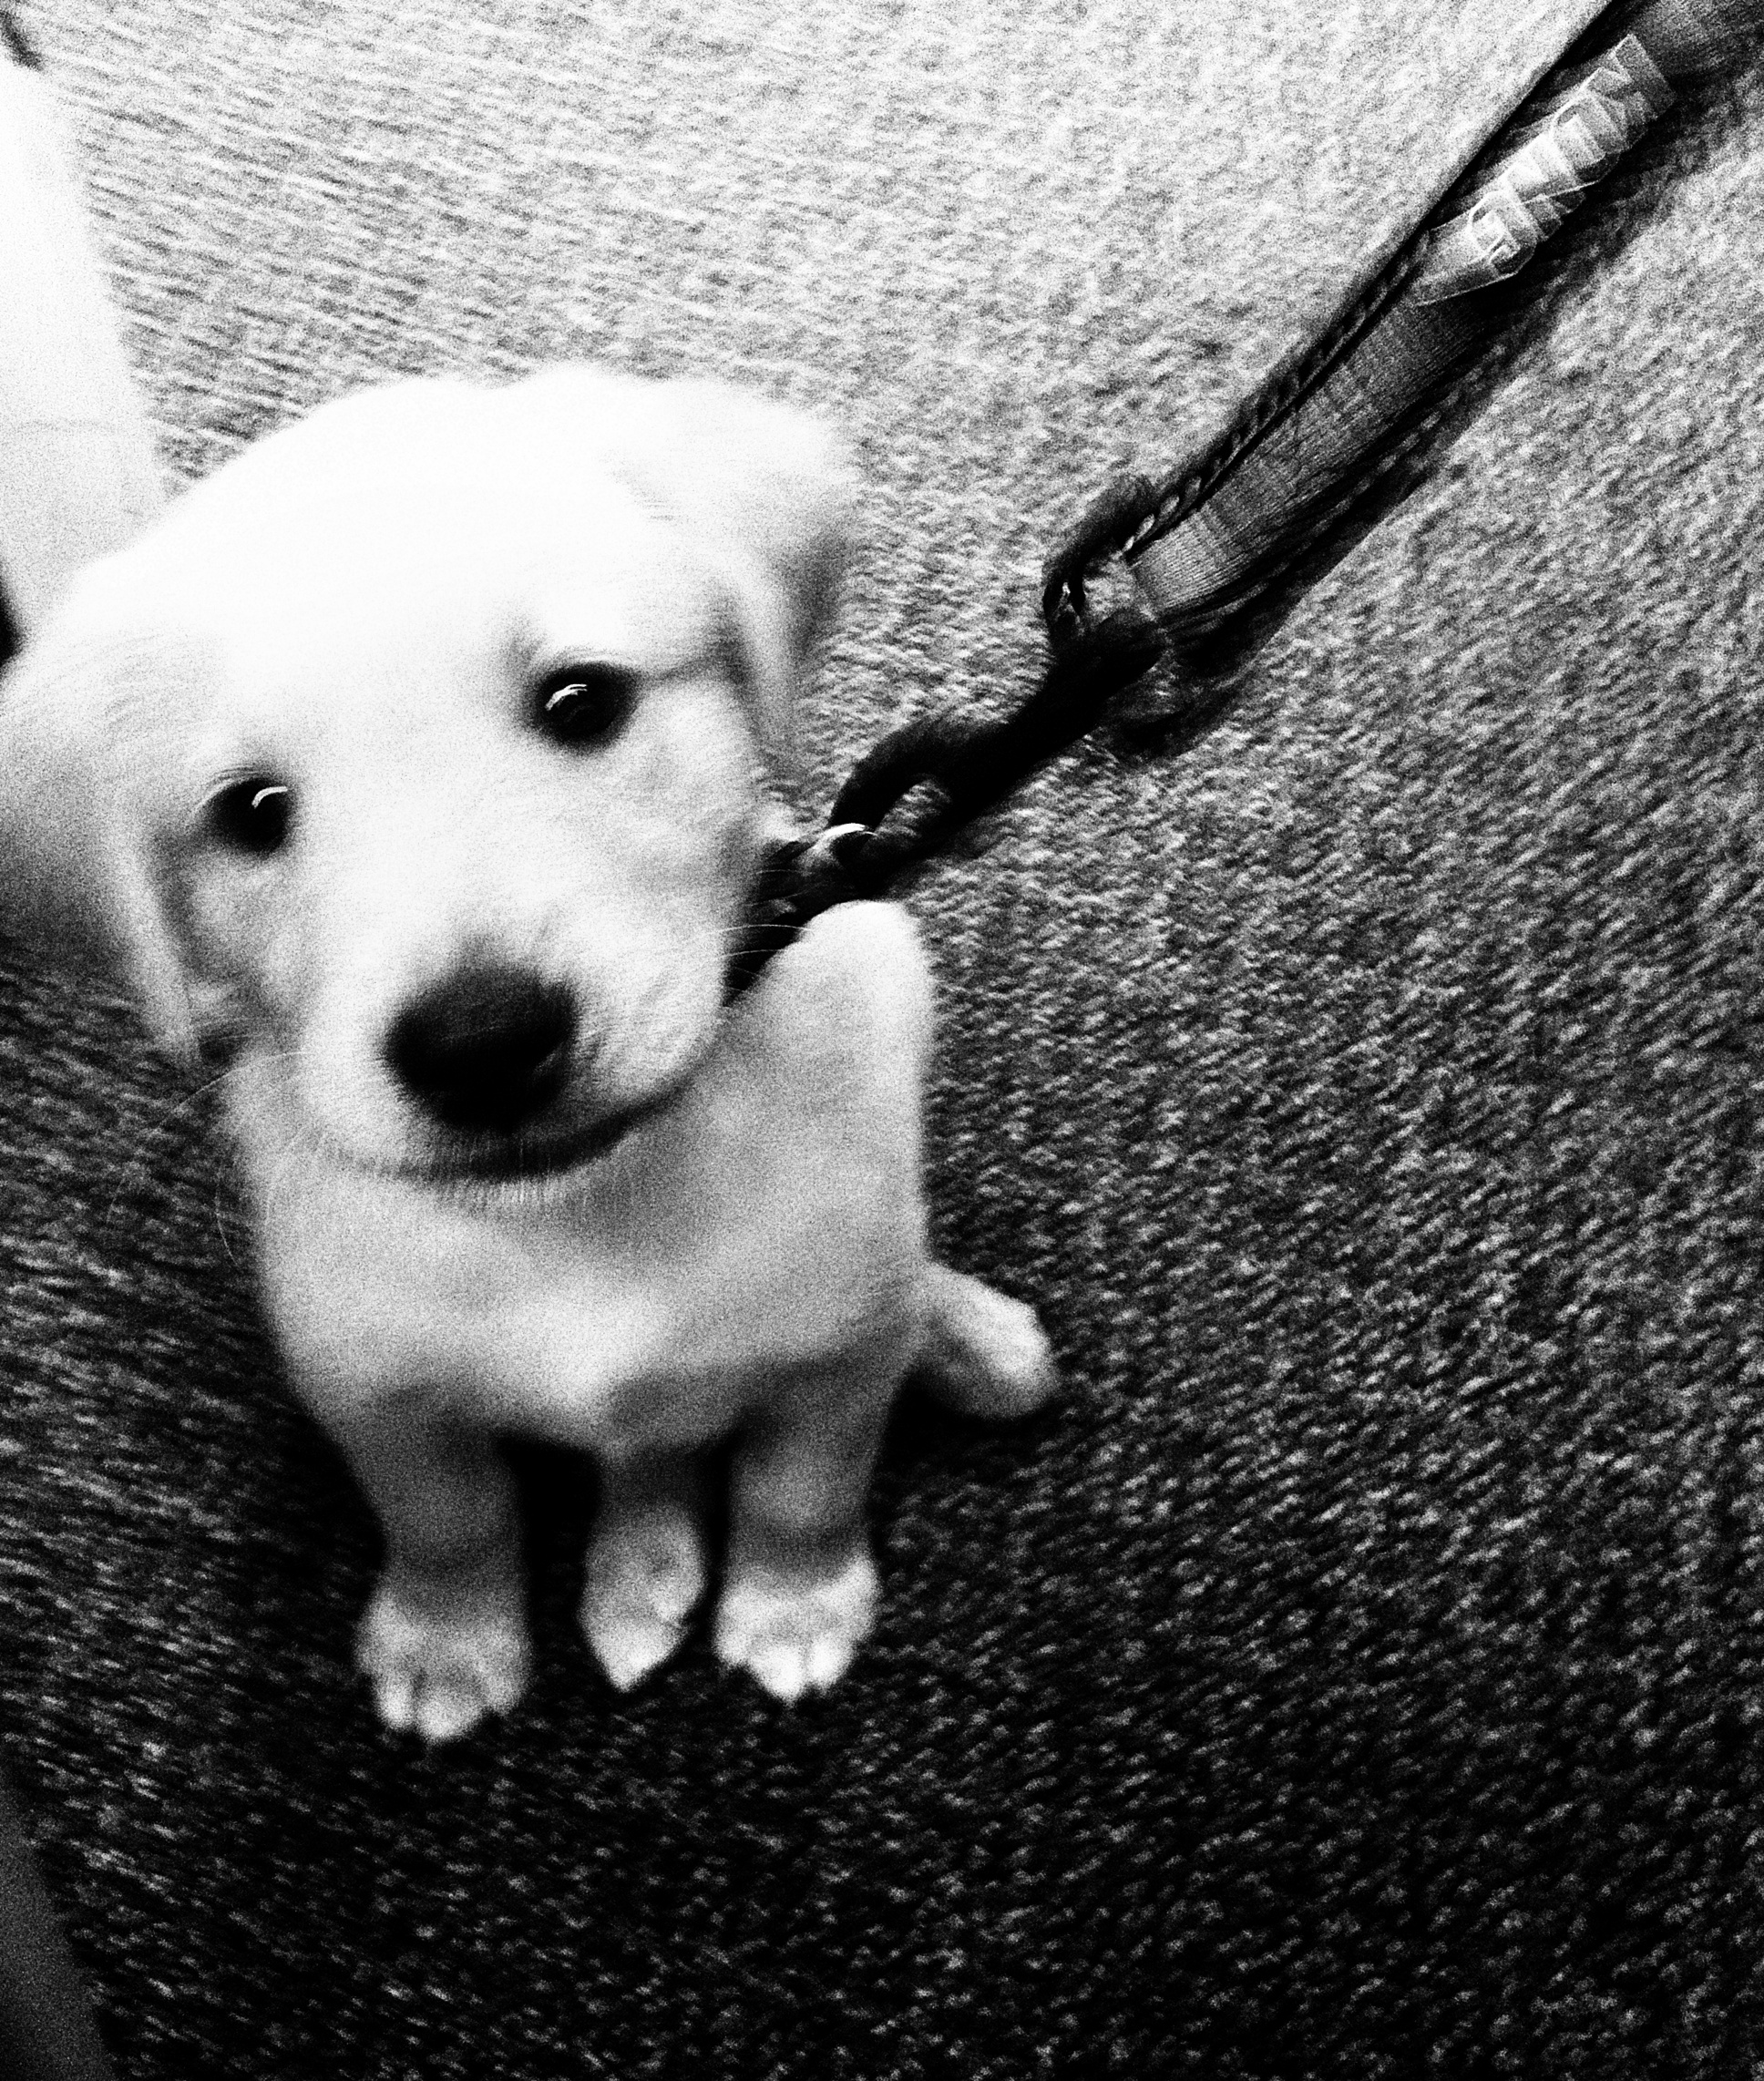
He wouldn’t keep still for a photo so this is the best I could do.

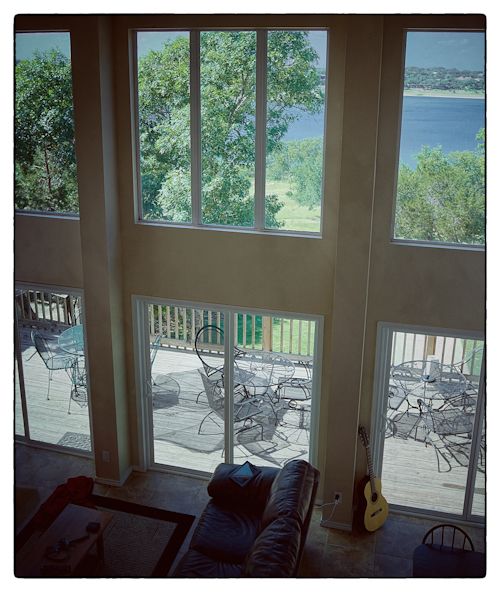
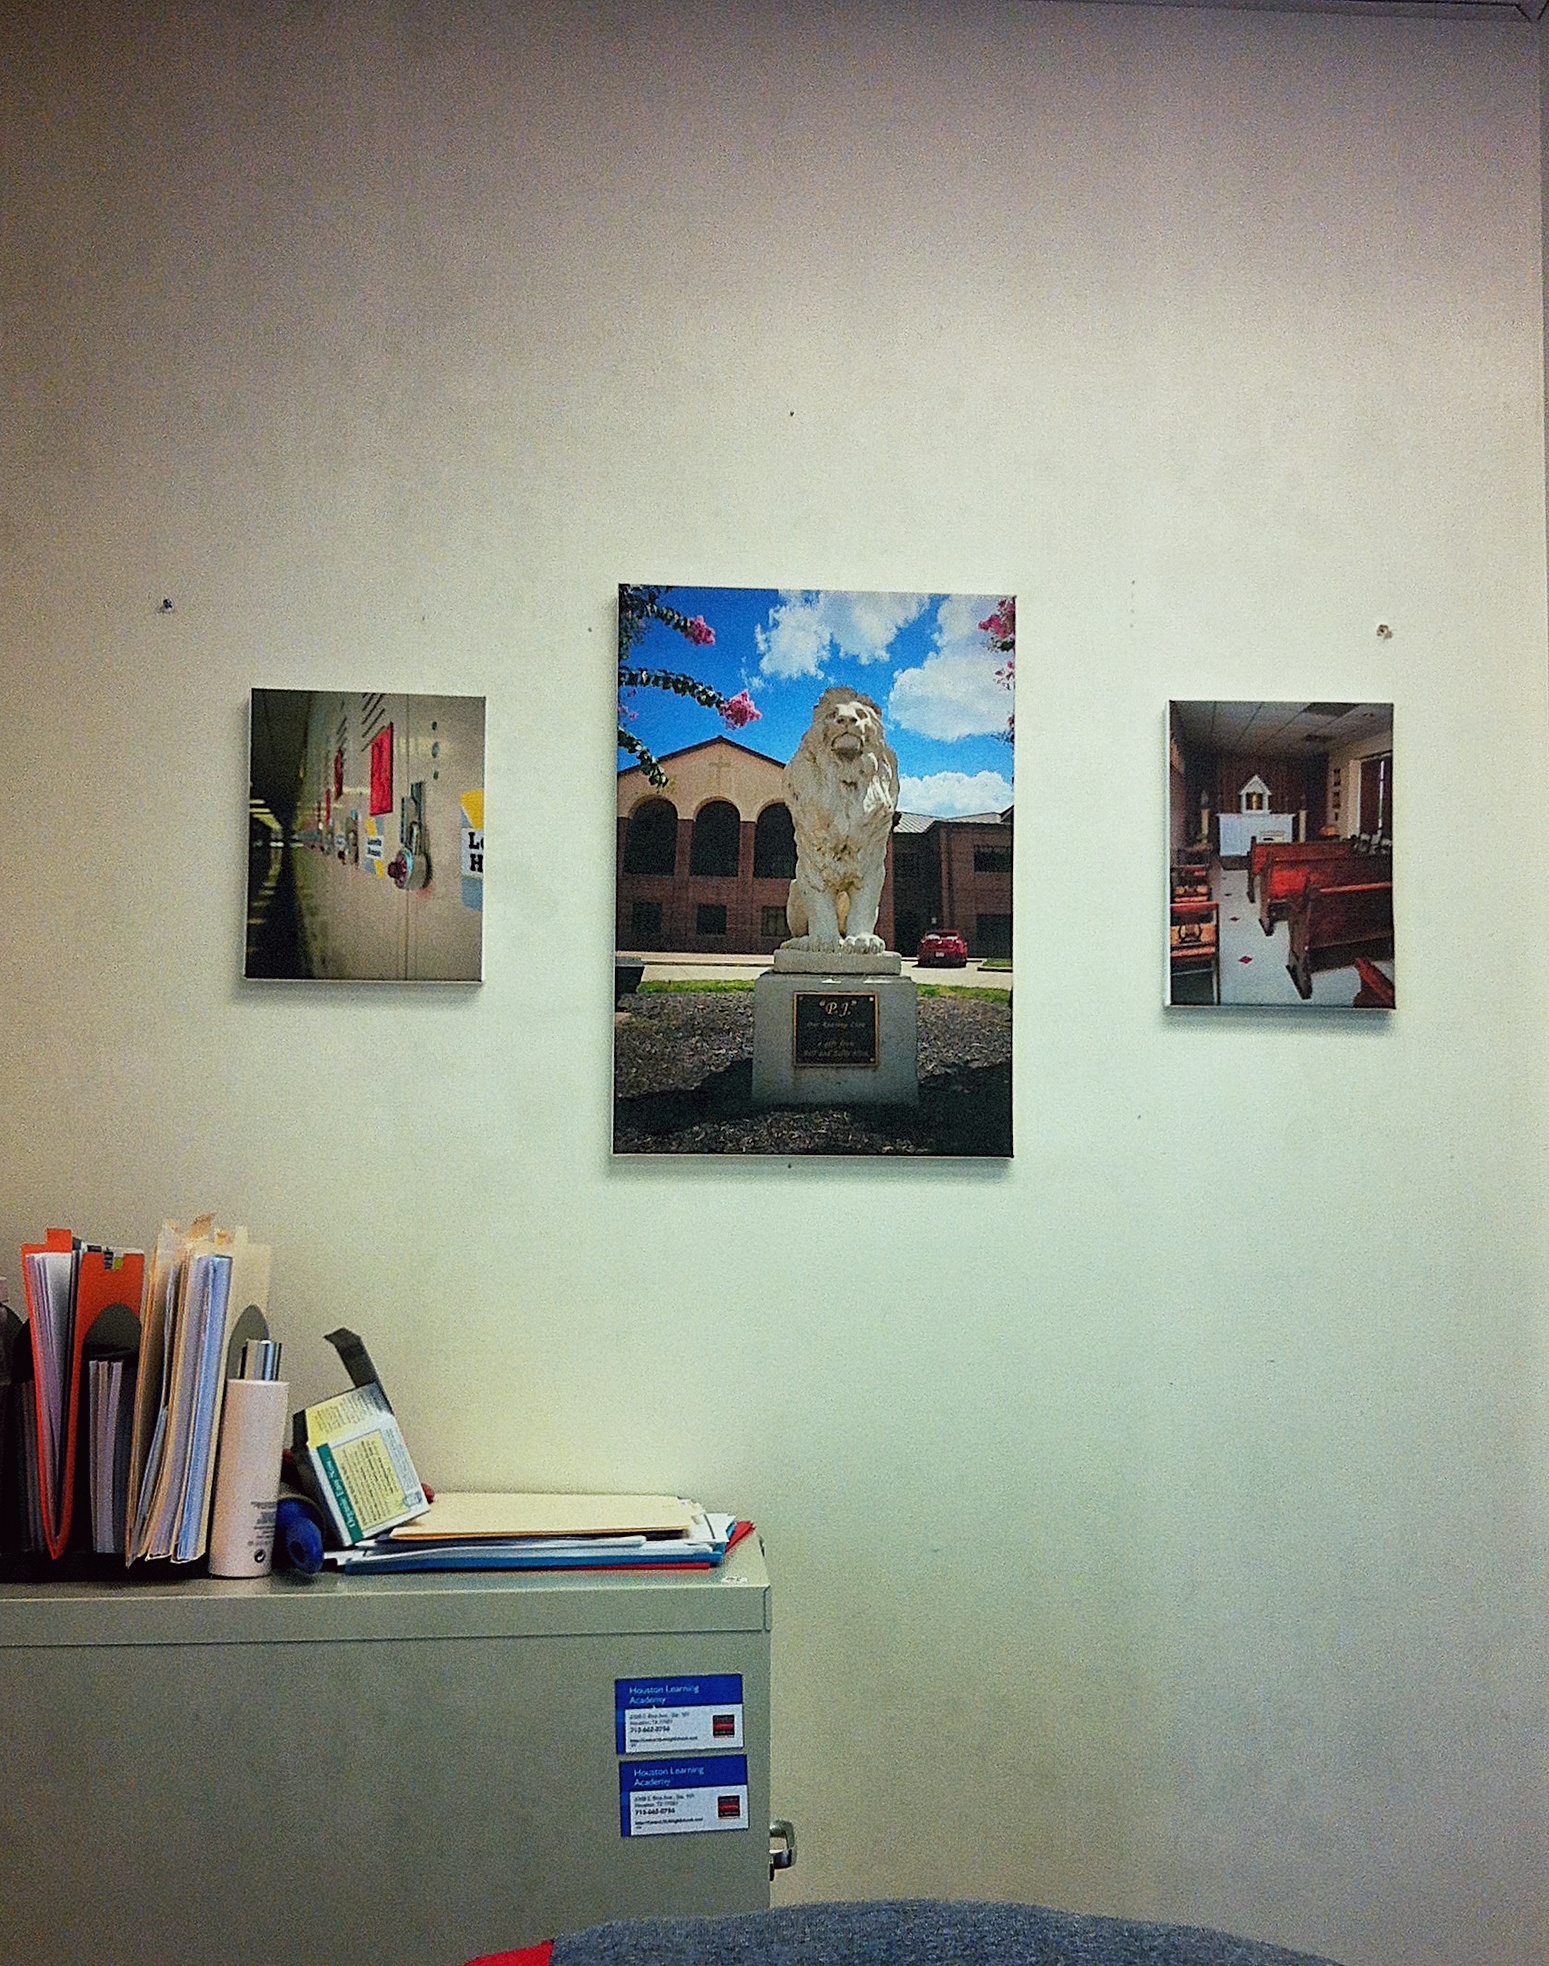
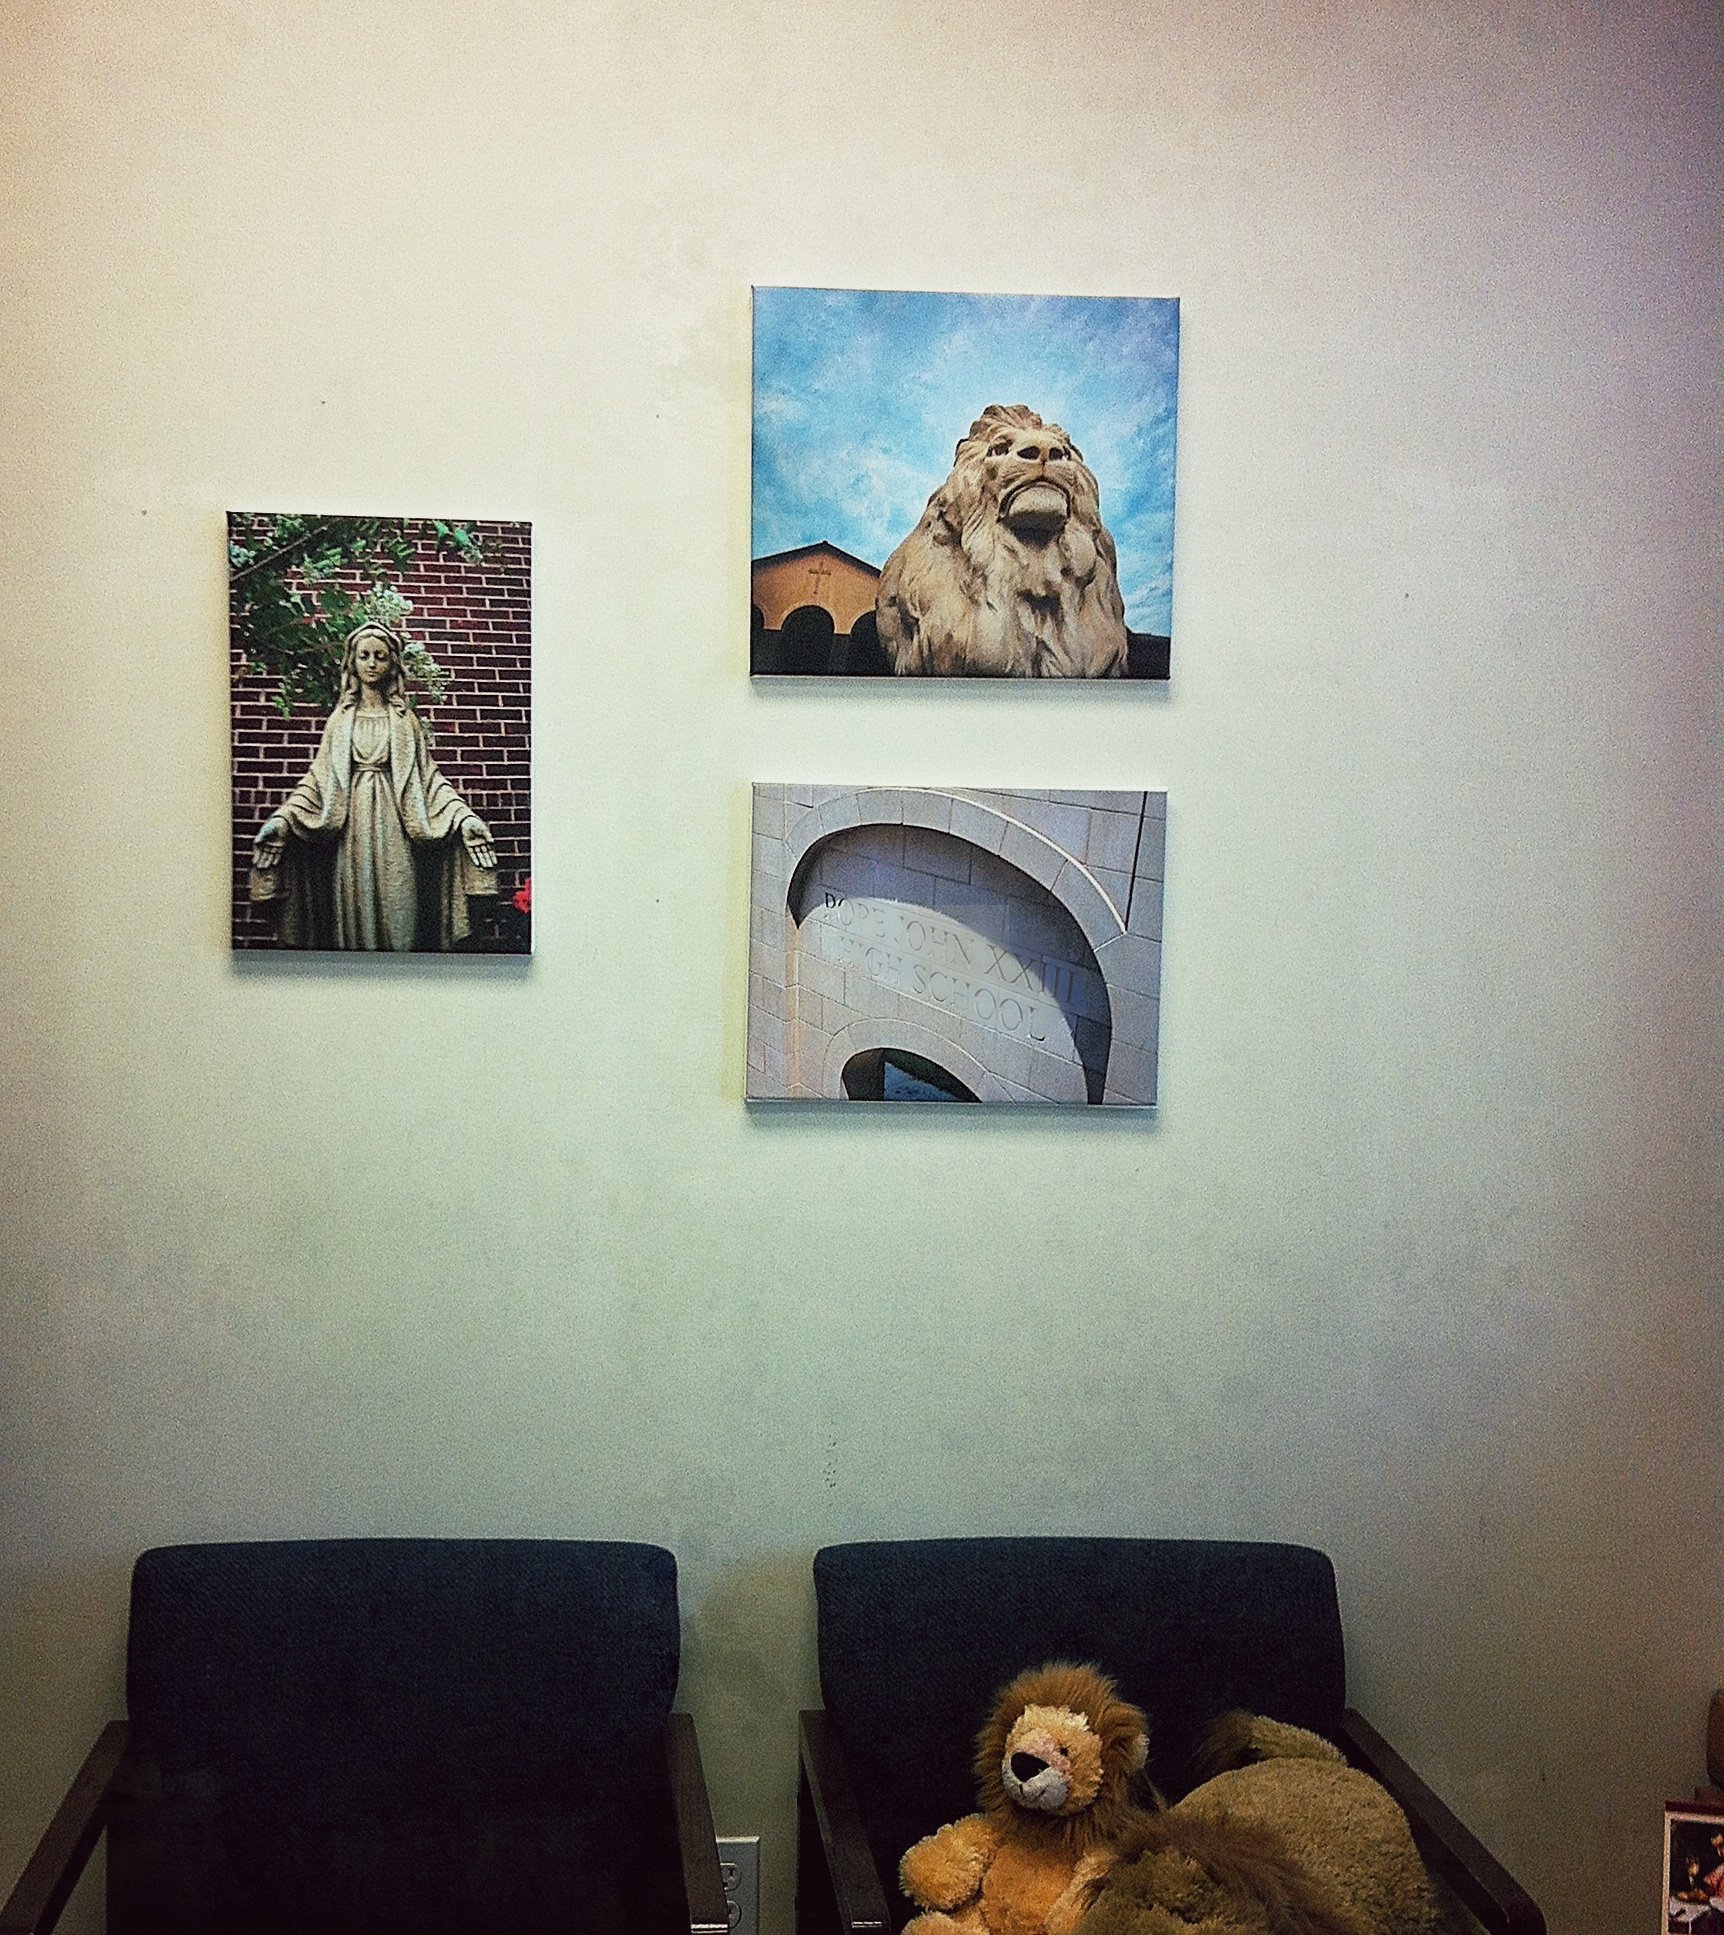
In other random shots, I wrote recently about how I took photos around my campus to print and hang in an attempt to spruce up my office – well, they finally came in today. Someone else who works at the school had contacts with a printing company that agreed to print up some of my shots; I had them printed on canvas and stretched so they’d be both free (no framing necessary) and easy to hang. They didn’t come out the highest quality, and they were all these weird different dimensions because I forgot to specify what size I wanted them to be, but whatever. I was able to hang them on the walls so they aren’t blank anymore – and did I mention it was free? – so I’m happy.

kitty7
I don’t think they’re crooked, I think the photo is. But who knows.

kitty6
Yes, those are stuffed animals in my chair. Even high school students need to snuggle a Pillow Pet sometimes.

kitty5
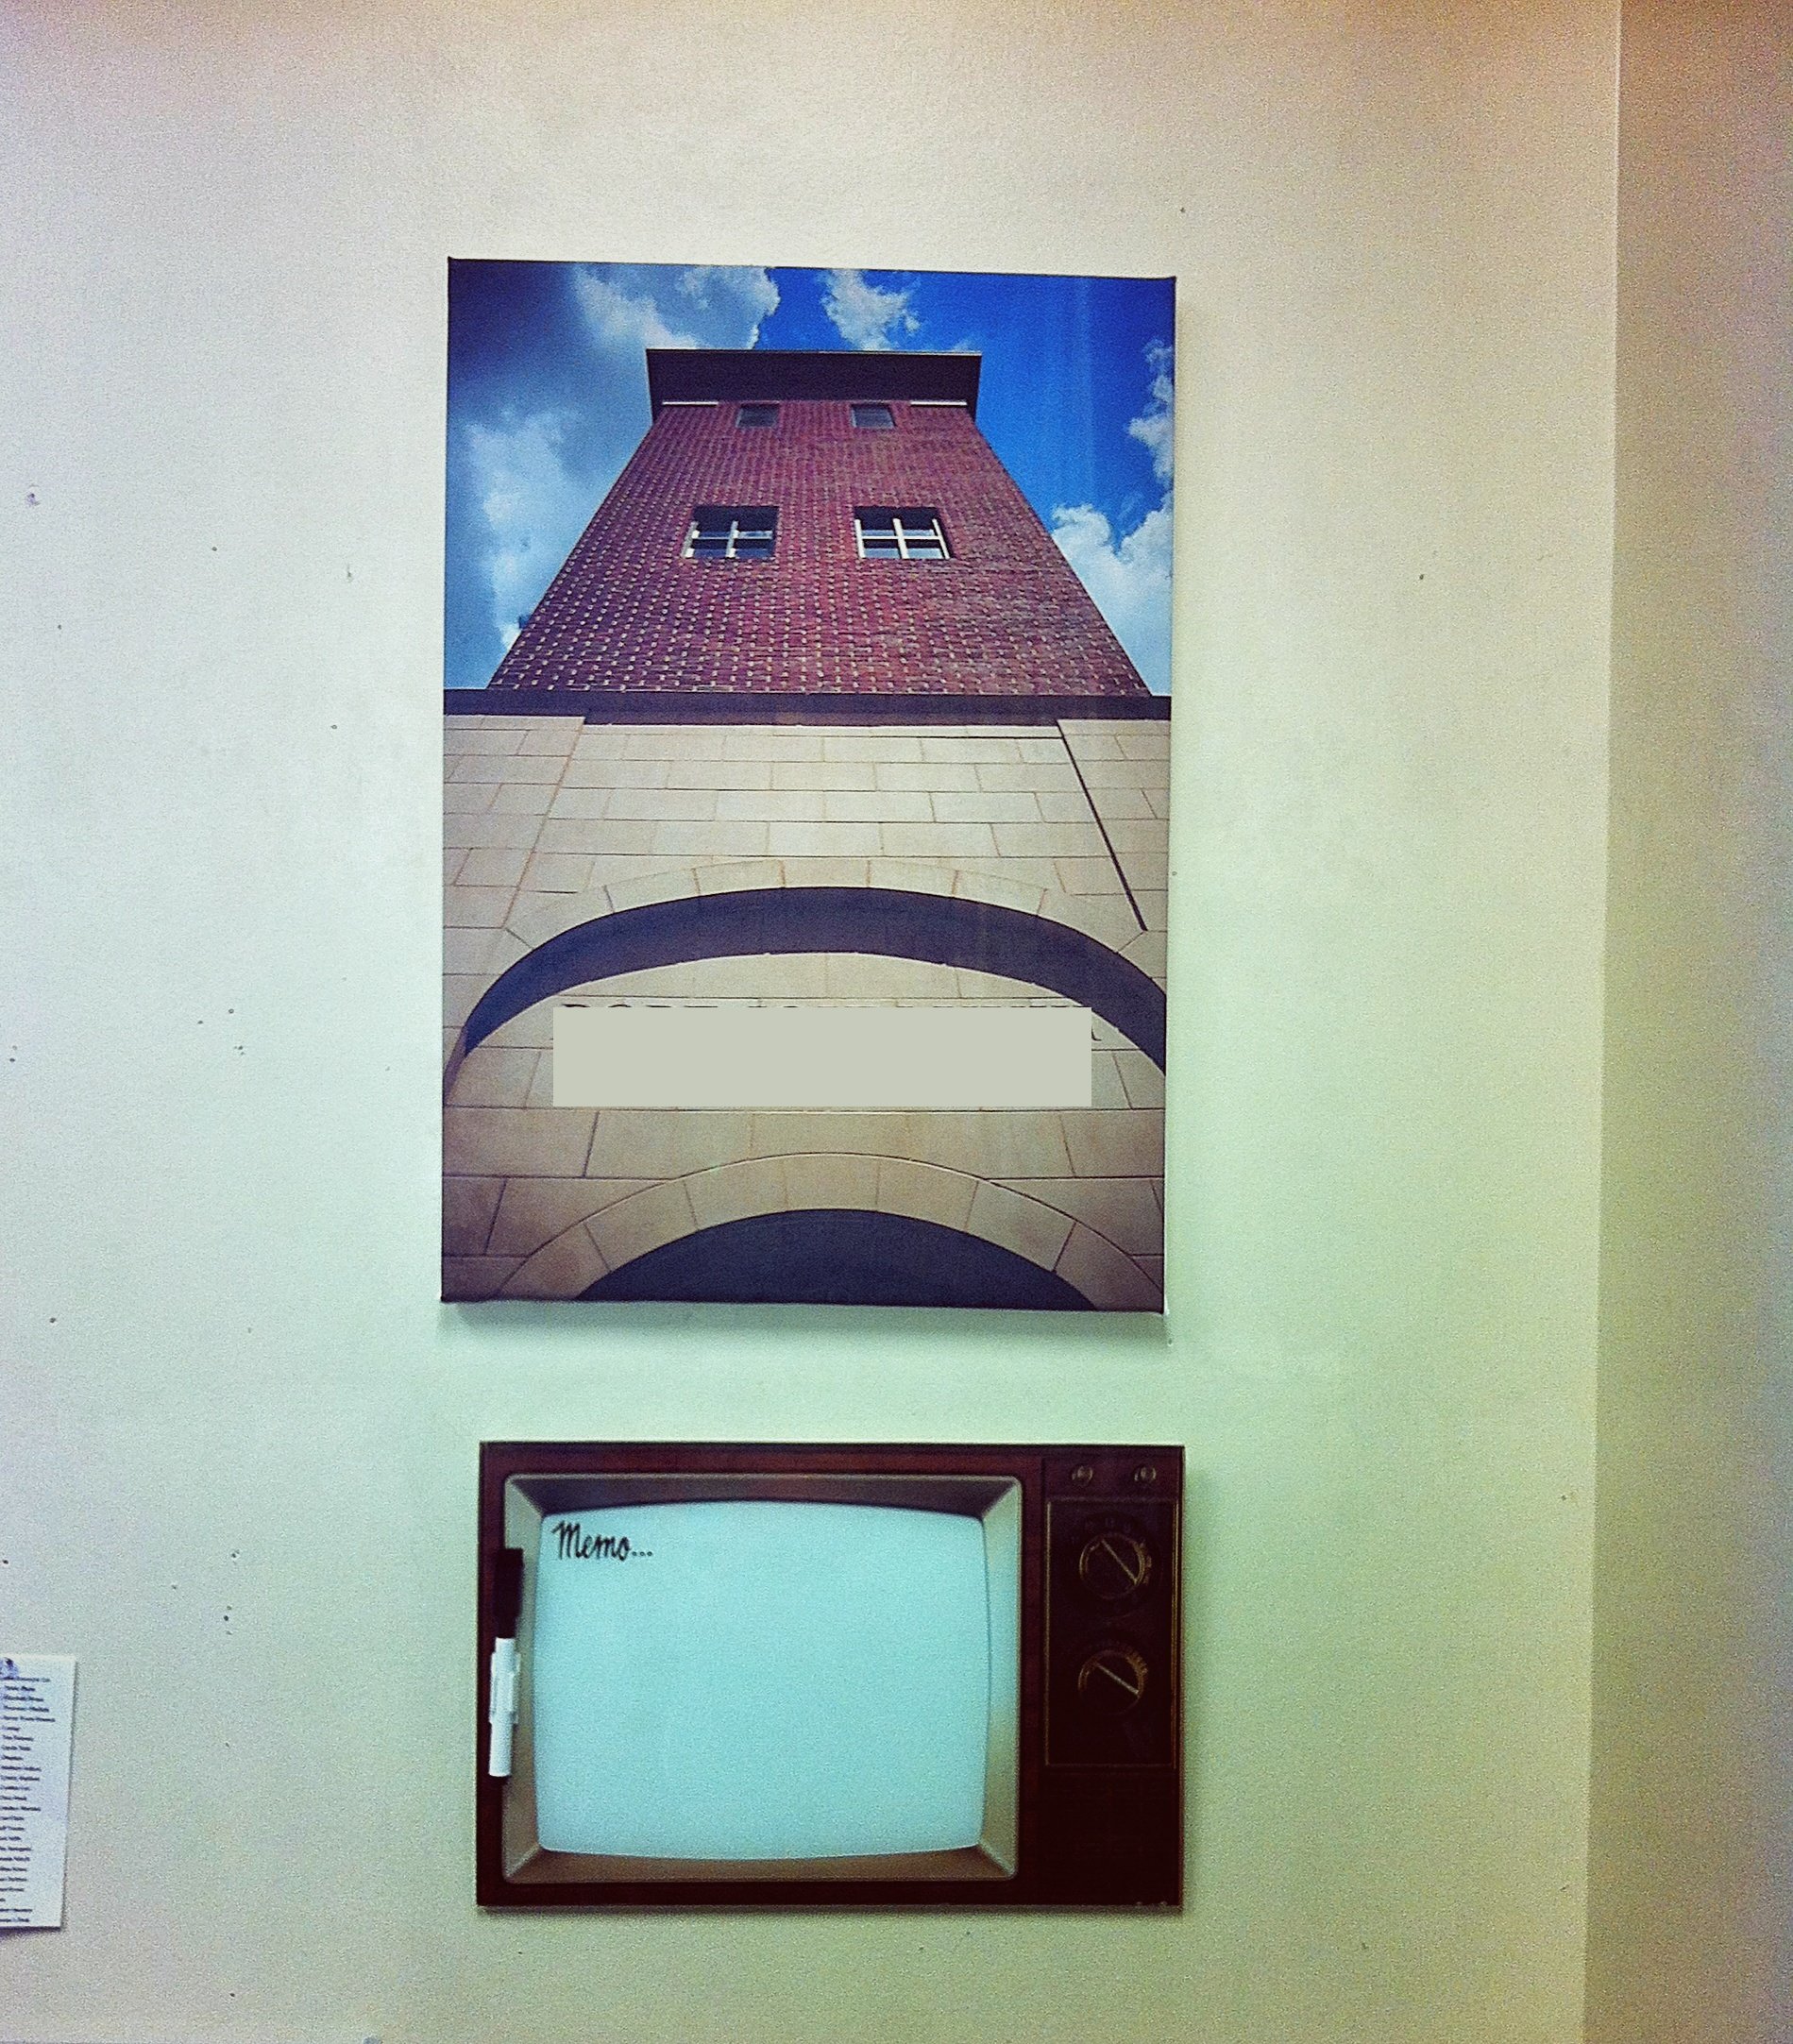
Yep, I edited the name of the school out of this photo again. And below it is a memo board I bought from ModCloth.com – I thought it looked so cool and very much like an old television set, but unfortunately it was only half the size I thought it would be. Still bummed about that.

Interestingly (or maybe not), this is the first time I ever saw any of my photos in  print. As I said before, they were rather sloppily done, and if I ever decided to print up some shots for my own use I’d be sure they were higher quality, but I’ve always preferred prints without frames so I do like the canvas aspect. Plus, I’m cheap, and it’s cheaper this way and easier to hang. But these didn’t exactly inspire me to rush home and pick more shots to get printed. Maybe it’s because I’m not a decorator at all, and in general blank walls don’t bother me,  but I’m not all that anxious to see a bunch of my stuff in print. Having it on hard drives is good enough for me, quite honestly. At least for now.

More light shots

After playing around with the Medusa wig Saturday, I decided to try out these Halloween gloves I got on sale from my grocery store last November. They are battery powered, and have light bulbs underneath each fingernail that blink and change colors, and I thought they might make for some more interesting long exposure portraits. So, I shut off the lights, put the gloves on, and set to work.

This was one of the first shots I took, and it was mostly me just screwing around, but I liked how it made my eyes look red and evil:

fingers7

I ended up with a ton of cool shots, and as usual I’ve only had a bit of time to process them. This next shot was done with the shutter open for about six seconds, and I started the shot by holding the gloves down low and slowly moving my hands up while wiggling my fingers. I realize that is such a technical description you probably can’t follow it, but that’s what you get when dealing with an expert like me. (/sarcasm).

fingers1

I really liked how doing this made it look like I was playing with fire, so I did several using this movement.

fingers6

I did also have my external flash (Canon Speedlite 600-EX-RT) attached to the camera and was using it as a master to my old 430-EX II which was set up off to my right side so the shot wouldn’t be completely in darkness. I had to be careful to keep my body as still as possible aside from moving my hands around so I wouldn’t be too blurry.

fingers2

Behind me is the same backdrop, a plastic shower curtain, that I had hung up for the Medusa shots, and at some point I got the idea to stand behind it and wave my fingers around in front of my face with the camera still set to a long exposure, and the results of that were pretty cool too – although it’s hard to tell exactly what the hell is going on:

fingers3

fingers4

Overall I’m having fun editing these; the Medusa shots were, as I predicted, pretty literal, and while the ones I processed are fun, there’s only so many shots of me dressed as Medusa a person needs to see (although I do have a few more I can share later), so I’m glad I played around with this stuff as well as it’s given me tons of unique shots to work with. More from this shoot to come!

Oh, and it seems that right now posting every other day is working better for me than posting daily, so that’s probably the way it’s going to go for now.

Medusa shoot

I had some time to work with one of the wigs I got from Target today. I also did some more light experimentation, but those shots are so different from these that I am going to create a separate post for them later.

I don’t have a whole lot of preliminary stuff to say about these, because it’s quite late and I’m tired, so I’ll just show you what I’ve had time to process so far. Between this shoot and the tutu pics from last weekend, I have a ton of stuff still to work with, so I may lay off doing any more shoots for awhile until I can catch up.

For this first one, I decided to change the color of the snake wig to match the backdrop and the dress. That’s not something that always works out, but it was easy to pull off this time. I also have a plastic shower curtain hanging up behind me; the creases in it can’t be steamed out, unfortunately, but it still creates an interesting backdrop, and I managed to pull off some cool stuff with it in my light experimentation shots I’ll share later:

medusa3

Not bad, but I do like the bright green of the wig so I didn’t do this again.

For the second one, I cut up this cheap old Cleopatra hat so I could use the silly-looking snake that adorned it as a tongue. This really didn’t work all that well so I don’t plan on processing any more of these. But the Cleopatra tongue-snake did match the silliness of the wig, so it was worth a shot.

medusa2

I’m torn on this next one. I love the color but at the same time, I think it might work better and as black and white shot. I can’t make up my mind which one is the real winner. The goggles, by the way, were purchased off Amazon a few years ago, and have been used in several shoots. This dress was an eBay vintage find; it was pricey but it’s great for photos:

medusacollage

I pulled out all sorts of old props and doodads to throw on with the wig; one of them was this bellydancing scarf I picked up somewhere. In this shot I’d flung it around a bit and I liked the way it was moving across my face here:

medusa4

The sequined gown I am wearing in most of these shots, by the way, belonged to my mother-in-law. It is full-length, all sequins, weighs a ton, and cannot be pulled over my hips to save my life. As a result, I had the whole thing yanked up like some sort of weird miniskirt during the shoot. Also, it is backless with one of those little hooks at the neck to keep the entire top from falling down due to its weight; there was no way I was going to be able to fasten that hook on my own, so the dress is being held together at the neck by a chip clip. Nothing but the classiest for me – YEP.

More pics to come!

Here’s goodly gear

OK, I know that quote from Romeo and Juliet doesn’t quite mean what I intend it to mean, but once I got the idea of sharing some recently discovered “gear” for photos here, I couldn’t get it out of my head. I used to teach the play to ninth graders, so quotes from it pop into my mind and try to apply to situations in my life that aren’t really appropriate all the time, so I just go with it. And now all sorts of internet searchers are going to come across this post about foam wigs from Target because they’re searching for that phrase and wonder what the hell is going on. Anyway.

Yes that’s right, I did say foam wigs from Target. The other day, an internet friend posted a link to these Halloween wigs by Chris March for Target and as soon as I saw them, I knew I had to have one, specifically this one:

target3
Shut up if you don’t think this has my name on it.

Most of these fabulous foam wigs are not for sale online,and none of the ones I was interested in were, so after work yesterday I rushed over to the nearby SuperTarget to see if I could snag one. Alas, here is what greeted me when I reached the Halloween area of the store:

target
Too early seen unknown, and known too late!

So many bald mannequin heads, so few colorful foam wigs left! And notice – not one in pink. The salesperson scanned the sticker for that one, and it showed that there were none left anywhere in my area. Bummer. So, to compensate for not getting the one I really wanted, I bought two runners-up (yes, this is how my mind works when it comes to shopping):

target5
Yes it’s fabulous, but too literal. I can’t do anything other than Medusa with it, really.

target4
More my style, but flat; I like the roundness and dimensionality of the pink afro best. 

Anyway, I have everyone I know on a nation-wide search for that pink one, so if you see it in your area, pick it up! It’s only twenty bucks and I will gladly pay for shipping, although shipping this thing is gonna be a beast because it’s huge, it’s foam, and it doesn’t fold. My two were shoved into a HUGE bag that I was able to carry out of the store (someone in the checkout line thought they were pool toys, LOL).

Hoping to get some shots done with Medusa today, but we’ll see. Lots of errands to run first.

Muddy photos!

I mentioned in yesterday’s post that I’d had trouble editing the background of some of my flipped photos. I worked on correcting the problem this evening, so I figured I’d go ahead and show you what I was talking about that had been bugging me as well as share the final results – so here goes.

Since I was rotating these shots, I had to crop them in an odd way to get the composition right, and as a result there was a lot of space added to them that wasn’t in the original. I know I am not articulating that very well, but basically, I took photos that were horizontal rectangles and cropped them into squares, which added a lot of tacked-on gray space that wasn’t in the original shot:

tutubefore1

I then had to use a clone tool to cover all this gray with the white background. While this sounds easy enough, a solid white background actually has an astounding amount of variation in shade, and it’s hard to clone all that gray space so it blends properly. I am sure it’s possible, but I don’t have the skill to pull it off every time. And as it turns out, white is way more difficult than the purple I used last time I flipped photos. Anyway, after cloning white space onto the gray and pulling the shot into Photoshop to try and blend the cloned areas using the patch tool, the end result was, well, patchy and smudged, as if the backdrop itself were dirty. It’s not terribly noticeable in the first shot, so I circled the bits that were bothering me:

tutusmudge1

I also had a harder time using textures than usual with these shots because tulle is very transparent, and it wasn’t easy to select the subject and erase the texture from it (I wanted to be lazy with these two shots and leave a white background with no texture, but it was not to be). In the end, I did add texture to conceal the smudges:

tutu10The final shot. Still smudged, but now it looks more like part of the texture.

I think the whole process is more clear in this next shot, where you can definitely see the muddiness of the background that was bothering me. But the first thing you can see is that I tilted the hell out of this shot. I wanted my upper body to be parallel to the imaginary horizon line, so I did quite a bit of horizontal rotation after flipping:

tutubefore2

Cloning and patching out all that gray, plus the differences in shading between the blanket on the floor, the sheet on the wall, and the plaster, made for a seriously dirty looking background. If you REALLY want to see how bad it was, tilt your laptop screen back a bit for this one, and – YUK! – you can see more detail of the poor blending job (and yes, this is after editing and fixing it to the best of my ability):

tutusmudge2

No WAY that was tolerable, so I added the same texture as the first picture to disguise it. Took more time, but it did solve the problem:

tutu11

As I mentioned before, this flipping photos stuff involves processes I don’t have to use for straight-on jumps, and I started to get tired of all the cloning and patching and blending and texturing; in the future when I do this, perhaps I can at least avoid a white background as it’s trickier to edit. Either that or forgo the tulle so I can add texture behind the subject without so much hassle.

Tutu shoot

After my disappointing grocery store trip that yielded little in the way of decent photos, I decided to throw up a backdrop and try out some more jumping shots Saturday night, with the intention this time of flipping them to look like I was falling. It’s a different sort of jumping this requires – I am used to facing the camera as I leap, and trying to get my legs as high off the floor as possibly to add to the effect of height, but for these flipped shots I just need to look like I am falling backwards or forwards, so I can make smaller leaps with my feet staying closer to the floor. It’s also a fairly different process to edit the shots, but in spite of the differences I think this was a successful experiment.

tutu1

I also noticed how different it is to jump without all the fabric and hair to worry about as I usually do. I’m normally concerned with getting the hair and the clothing to move in a certain way, but here, it was just my body I had to concern myself with. The tutu wasn’t going to flow in any other direction but outward no matter what I did, and since I had no wig on I didn’t have to concern myself with flinging it about. The end result was a lot of really nice jumps that didn’t have some of the usual bloopers such as wonky hands or weird faces, although that did happen on occasion. But all I had to think about was keeping the toes pointed and the fingers from going crazy and I think that’s why I got so many good shots in such a short time. Not that this means I’m ready to reject my usual layers of flowy clothing and long hair, because I will always love that stuff. But sometimes it’s nice to change things up.

tutu4
Of course, the occasional weird face did make it into the set. I still liked this one enough to process it in spite of the strange expression.

Because I didn’t get started until later in the evening (I usually set up and shoot in the morning and early afternoon) I did not bother with stage makeup or an elaborate outfit; I also didn’t much feel like putting on a wig – I just wanted to jump around.

tutu7

I used one of the fabulous headscarves I bought from BeauBeau headcovers – these things are great if you are like me and can never successfully tie a real scarf around your head. They’re pre-tied and just slip over your head like a cap. I love the look of a good scarf over my hair, and even though they are marketed towards women with hair loss I have a ton of them and wear them quite often – but I digress.

tutu6

I also incorporated another plastic mask I got from Party City, a white one this time, but I’ve found that after trying masks out twice, I really don’t care for what they do to a photo. I guess I like faces and facial expressions too much, or maybe I need to buy better masks instead of the $3 cheapies at the party store. Not sure, but neither time I used them was I pleased with the effect. So I most likely won’t be doing that again.

tutu8
Um, no.

For the tutu pics, such as those I’ve shared above, the lack of stage makeup didn’t bug me too much, but I also wanted to test out this idea I’ve had for quite awhile and keep forgetting to try, which is layering myself in petticoats and letting them all fly about in jumping shots. I did put a wig on for these, and I really felt the lack of proper makeup later when processing them. I am not criticizing my appearance without loads of war paint or anything – it’s just that in photos, with the amount of bright light I use, facial features disappear if they’re not exaggerated. My eyebrows in particular won’t show up at all, and my eyes appear to sink back into my skull. I’ll have to try this again when I have time to apply a full face. Also, I need to fluff up the petticoats some more, that bottom green one wasn’t moving about as much as the blue one and it kept leaving a “gap” in the material.

tutu3
Love that wig! It’s a Gothic Lolita, of course.

I have tons more of the tutu ones to process, and a few more with the petticoats I’d like to work with also; this isn’t even everything I worked on the past two days. In fact, I sat at my computer processing shots from 10 AM to 3 PM Sunday, which would be pathetic if it didn’t produce something I consider to be art at the end of it all. But it did, so I am happy. Also, while I usually work with different filters and textures for each shot I edit from the same shoot, this time I kept the process the same for all the tutu shots (except for the mask ones) which feels a little odd to me, but I thought it created a better sense of consistency. I am always changing up what I do and how I do it, so that’s what I went with this time. Here’s a quick collage of everything I’ve edited so far:

collagetutu
By the way, I use good old Pixlr for my collages. Is there anything that program can’t do?

And that one in the middle occurred right before I tore down the set; Sprocket had made himself comfortable on the fleece blanket I’d laid down on the floor, so I decided to do a few leaps over him for fun. Here’s the one I ended up processing:

sprocketjump

Gah!-roceries

Well Saturday was both the most awesome and the most disappointing grocery store trip ever.

First of all, I noticed as I pulled into the parking lot that it was exceptionally crowded. It was 1 PM on a Saturday, true, but I’ve been at this Kroger plenty of times during that part of the day and never seen quite as much traffic as I saw this time. Then I noticed this:

cheerleader1

And I knew something was up.

The entrance to the store was all decked out in football regalia, which is not unusual for any day in Texas this time of year.

cheerleader2
There’s a hint in that placard, if you can read it. My photos were particular crappy this time out.

Now, generally, this is how I approach all things football:

football

In fact, I know so little about my city’s own team that I actually thought this guy was one of our players, based on the simple fact that there was a lot of football stuff around, he was a rather big dude, and a few people in fan jerseys were talking to him – but I guess I was wrong.

Cheerleader3
Can you see what the little guy is holding? YEP.

Whatever was going on involved a pretty long line, which snaked around and inconveniently blocked the aisles of toiletries:

Cheerleader4
Notice that woman in the red shirt & khaki pants guarding the line? She’s one of many who ruined what could have been the most awesome grocery day ever.

In case you haven’t guessed yet, the team’s cheerleaders were at my grocery store today to sign copies of their calendar for fans. Cheerleaders! In tight sparkly silver shorts! And silver go-go boots! With super-long stick-straight hair extensions and awesome spray tans! SCORE! How could my attempts to take entertaining, super-cheesy grocery store photos get any better than this? I swear all these photos are so blurry because I was trembling with joy at the opportunities I briefly envisioned. That is until the FIRST Kroger employee eyed me suspiciously while I whipped out my cell phone. Hm, I thought, that’s unusual. Usually no one thinks twice about a woman on her phone in the grocery store.

Then of course I noticed all the guards and cops and the over-abundance of store employees gathered about, trying to prevent anyone from taking photos of the cheerleaders for free. Damn! Try as I might, and as stealthily as I tried to wander the aisles, looking for some crack or crevice in their makeshift staging area that wasn’t guarded by an eagle-eyed individual, this is the ONLY shot I could get of them without buying a calendar and standing in line, and yeah, it’s pretty disappointing:

cheerleader5
Don’t think I didn’t seriously consider buying one.

I tried to circle around a bit and get something better, but they were totally onto me. I eventually started to feel like a pervert so I went about my business, completely uninterested in taking any other photos for the rest of the day. When you miss the opportunity to get pics of grown women dressed in cheerleader gear in front of the baby wipes aisle, well, nothing is really gonna get you over that level of disappointment but time. I’m not over it yet, but I’m getting there.

iRetroscope

So much I could say about work today, but I put off writing a blog post too long and am not up for all the typing. So – I thought I’d share a fun little photography/video app I have on my iPhone called iRetroscope.

My artist friend Deb Morbeto shared this little iPhone photo gem with me, and I often forget I even have it, but last Friday I went over to a friend’s house after work and her two little boys pounced on me as soon as I walked in the door, asking me if I would take photos of them jumping as I’ve done before. See collage below for reference:

collagecand
No toddlers were harmed in the making of these photos.

But of course, I did not have my Canon 7D with me as I’d not been planning on taking any pics, so I knew I wasn’t going to be able to get any decent jump shots that night. However, far be  it from me to deny some kids the opportunity to jump on the bed, so I got out my trusty iPhone and went to work. I did shoot video of them jumping around on the bed for awhile and threw together a video of the experience that I can also share, but it’s not the most thrilling thing ever, and actually does not use the iRetroscope app. I’ll throw it in here anyway – why not (and yes, I’m getting to the iRetroscope part, I promise):

Unfortunately, it wasn’t until after that bit of fun was over that I remembered the IRetroscope app and realized it would have been a perfect opportunity to use it. The app has several different era settings – from the 1920’s all the way up to the 1980’s – and does a pretty cool job of making either a video or a photo look dated. It’s a great thing to use when snapping iPhone pics that you think might not turn out all that great; as you may know if you’ve read my blog for any length of time, I am a huge fan of doing whatever possible to make quick, crappy pics look intentionally crappy so you can still use them. Aging a photo is a sure-fire way to turn blur and bad framing into something ‘retro,’ so I decided to give it a go while the kids basically ran around and screamed a lot to provide me with more camera fodder, as seen here (using the app this time):


I literally started filming and said, “OK, just run around or something.” And man did they comply.

I used the 1930’s setting for the first section and the 1970’s setting for the second. And no, there is no repeating of footage there; they actually did run back and forth that much. The music is from a compilation I found on amazon.com of silent film soundtracks, and man have I gotten use out of those tunes. It’s great for silly little videos like this one.

I actually don’t have any photos using iRetroscope that I can get my hands on at the moment, but you get the idea from the video, I think. And unfortunately, I thought that in order to fill the screen I needed to hold my camera in landscape/horizontal position like you do with the plain old iPhone video camera; sadly I was wrong so everything is squished. As I said, I haven’t used this app in forever so I forgot how to use it. Also, I know nothing about video editing and the only software I know how to use is MovieMaker, and that probably shows. Never was able to get into video editing like I did with photos.

Anyway, I can’t recall if the app is free, but if it costs money I’m sure it’s not much or I wouldn’t have purchased it. It’s a lot of fun and an easy way to fancy up your iPhone shots. You’re welcome!

Go exploring!

The whole subject of the Explore feature on Flickr is a bit of a loaded one. Ask a question about how to get on the Explore page in the Discussion area and you’re likely to get a thousand of those “why do you care about getting on Explore you should just love taking photos” responses. Not to mention the fact that there is no set criteria for hitting Flickr’s Explore page and the whole process is supposedly a well-kept secret. Except that it isn’t, kind of.

Explore5
A link to the photos I’ve had on Explore since 2011. Some of them really suck, by the way – but I’ll explain that later.

I read up on Explore after being on Flickr for awhile and having one of my photos suddenly get a lot of comments from people who were not followers of mine. I found it odd that so many strangers were suddenly showing up, and then someone left a comment that said “Congrats on Explore!” and I had to go look the whole thing up on Google.

Explore2
My first Explored photo – this one landed at #39 out of 500, so not too shabby.

So what is Explore, first of all? To my very basic understanding of it, Explore is Flickr’s determination of the ‘most interesting’ photos uploaded each day – I believe the number of photos that hit Explore each day is 500, but don’t quote me on that. What determines a photo as ‘interesting’ is not some group of people checking out what’s being uploaded; it’s a constantly changing computer algorithm that assesses a photos’ activity – basically, if an uploaded photo gets a lot of chatter in the form of favorites and comments in a certain period of time, it’s chances of being considered ‘interesting’ by Flickr are upped. Once a photo hits Explore, it moves up in rank as it collects more views, likes, and comments. A photo can hit Explore and then drop off quickly if it doesn’t continue to get any love – I’ve had this happen a lot, too. 

Explore1
I guess you could call this my ‘most Explored’ shot – it reached #6.

There are some other standard bits of advice I’ve seen about getting photos on Explore: tag your photos well so they will be found by lots of people (I used to be good with this but have gotten progressively more lazy as time goes by), do NOT put your photo into too many groups (no more than 5 is the general rule, but honestly I can’t remember the last time I put a photo in any group; again, I’ve been lazy lately), avoid the groups that have rules about commenting on other people’s photos (I hate those groups anyway), and be an active Flickr member who comments and favorites other people’s photos regularly so they return the favor (got this one down).

Now, with random rules like this, and remember, with no actual PEOPLE checking out your photos, it’s inevitable that some of your crap photos are going to hit Explore also, and I have been no exception to this:

Explore3
There’s no way this should be called “interesting” – I was literally just showing off a new wig to friends here.

Here are a few more observations I’ve found about hitting Explore, that may or may not be truthful, accurate, and/or useful. For some reason, most of my photos that have made it to Explore have been ones I’ve uploaded right after midnight, Central Standard time.Even though I haven’t read anything else out there that states this is a factor, if I have a photo I’d like to see on Explore then I am sure to upload around then. For this one, which is one of my favorite photos, uploading at 12:01 AM Central time worked:

Explore4
Really wanted this one to get higher than #179, but again, out of 500 that isn’t bad.

Also, after the Explore bots find you once, they’ll hit you two or three more times in close succession. This has always been the case for me, and it’s another way I managed to get the above photo on the page – Explore had hit me twice recently so I knew the chances were good I could get that one to hit too.

047_Snapseed_sm
Another fairly uninteresting photo Explore deemed ‘interesting’ – it made the page a few days before I managed to get the previous shot to hit.

You also need your photos to be visible to everyone, and they need to have a ‘safe’ rating. Anything marked ‘restricted’ will not hit Explore, and I’m not sure about the ‘moderate’ setting. All my photos are very safe so I’ve never had to worry about this one.

After Explore has had its way with you a few times and you’re starting to feel like the two of you have a good thing going, it will abandon you without so much as a phone call. It sucks but it always happens. Explore is a fickle little bitch, and apparently the algorithm is always changing slightly to keep things, well, interesting. I might have 4 or 5 photos go Exploring in one month, then not have another one make the page for 6 months or more. And as I already mentioned, it’s not like it’s always my best shot, or even a good one, that makes the bot-cut. It’s pretty random stuff.

So essentially, there’s very little rhyme or reason to the whole thing. Follow some basic rules and eventually you will get lucky though. And by the way, if you want to know which of your photos have hit Explore, you can go here, type in your Flickr username, and the Scout will pull them all up, along with their current numeric status. Photos that hit Explore but fall off the top 500 at some point, however, will not show up. Give it a whirl – you never know, you might have already been featured on Explore and not even known about it. The first time I put my name in there, I was surprised at how many I found. But then I went back to the pics and looked at how many views they had and it made sense – they had loads more views than my average photos. 

Explore6
All of my photos that made it to Explore since I came online in 2011. Kinda fun. To check out yours, go here.

So there you go, my tips for hitting the Explore page on Flickr. Not that it really matters whether you hit Explore or not, because all you should be caring about anyway is taking good photos. Or something like that.

Flipping out

I’ve been having fun flipping more photos this weekend. I’ve got some ideas for how to make this more effective when I shoot again, too. I need to get the hair and the fabric both moving in the right direction to get the effect of falling, or flying, or whatever. And now that I really see how this is going to work, I think I can pose better to make the shots more convincing; I was trying with the last shoot to pose in ways that they could be flipped, but until I worked with them and saw what needed to happen I didn’t really know what to do.

And I apologize if I am sounding a little incoherent right now. Three weeks out from my bronchitis, I still have a wicked cough that won’t go away. It’s worst at night, so I’ve resorted to swilling Robitussin every night to keep it under control and, hopefully, finally make it go away. As a result I’m a little loopy right now since I am writing Monday morning’s post on Sunday night like I always do, and I’ve already taken my nightly dose.

Anyway, here are my latest flipped pics:

133_Snapseed_sm

flip_Snapseed

rotate
OK, so flipping completely upside-down doesn’t work – yet. Still, I had to try.